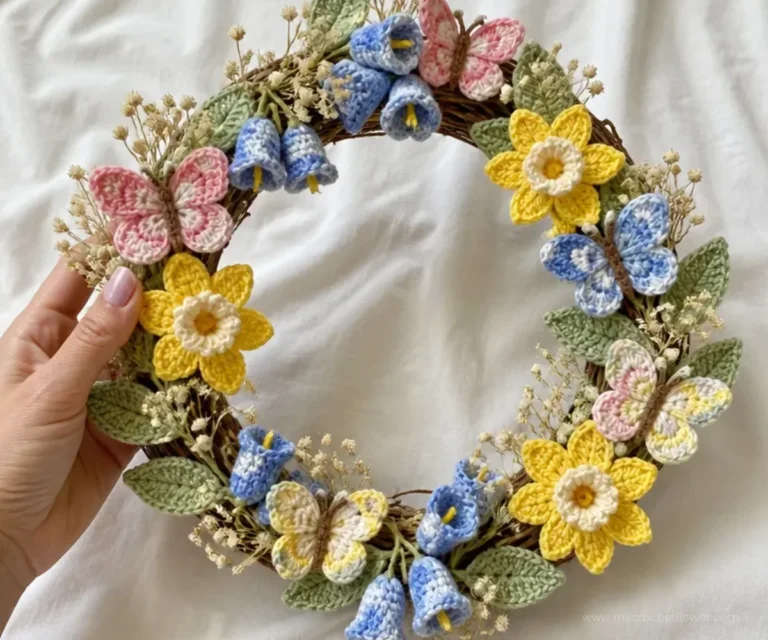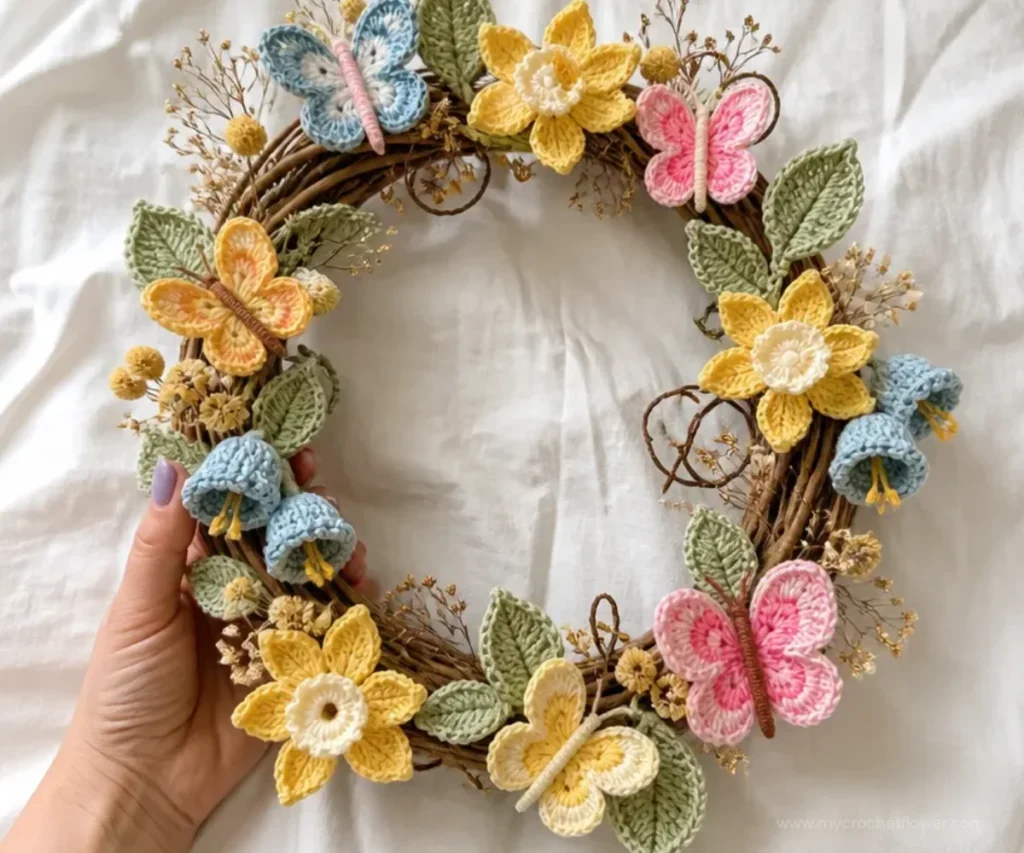
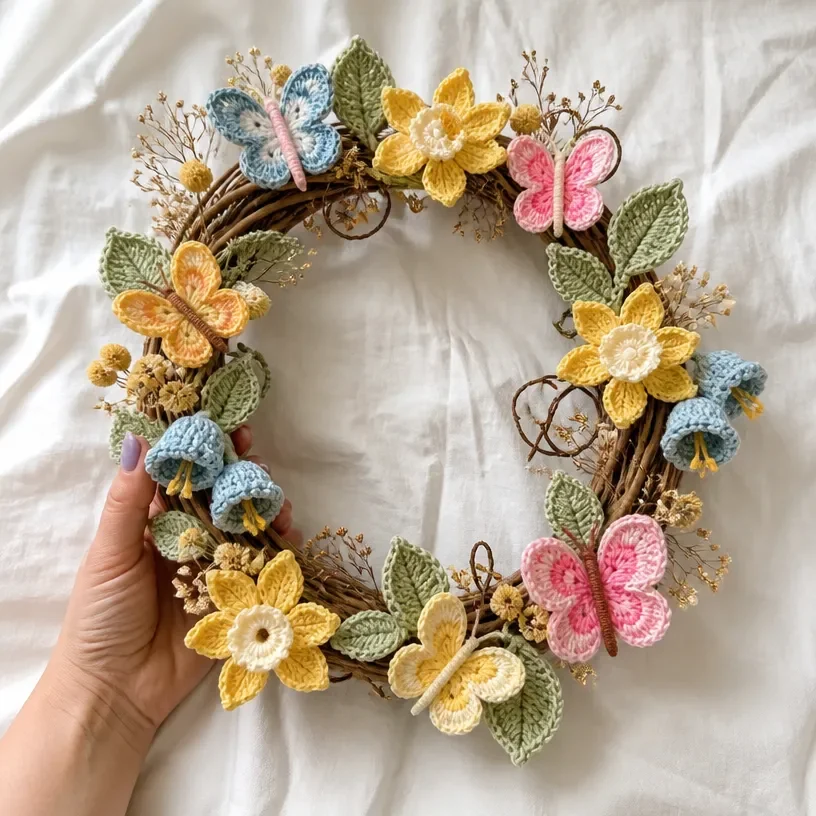
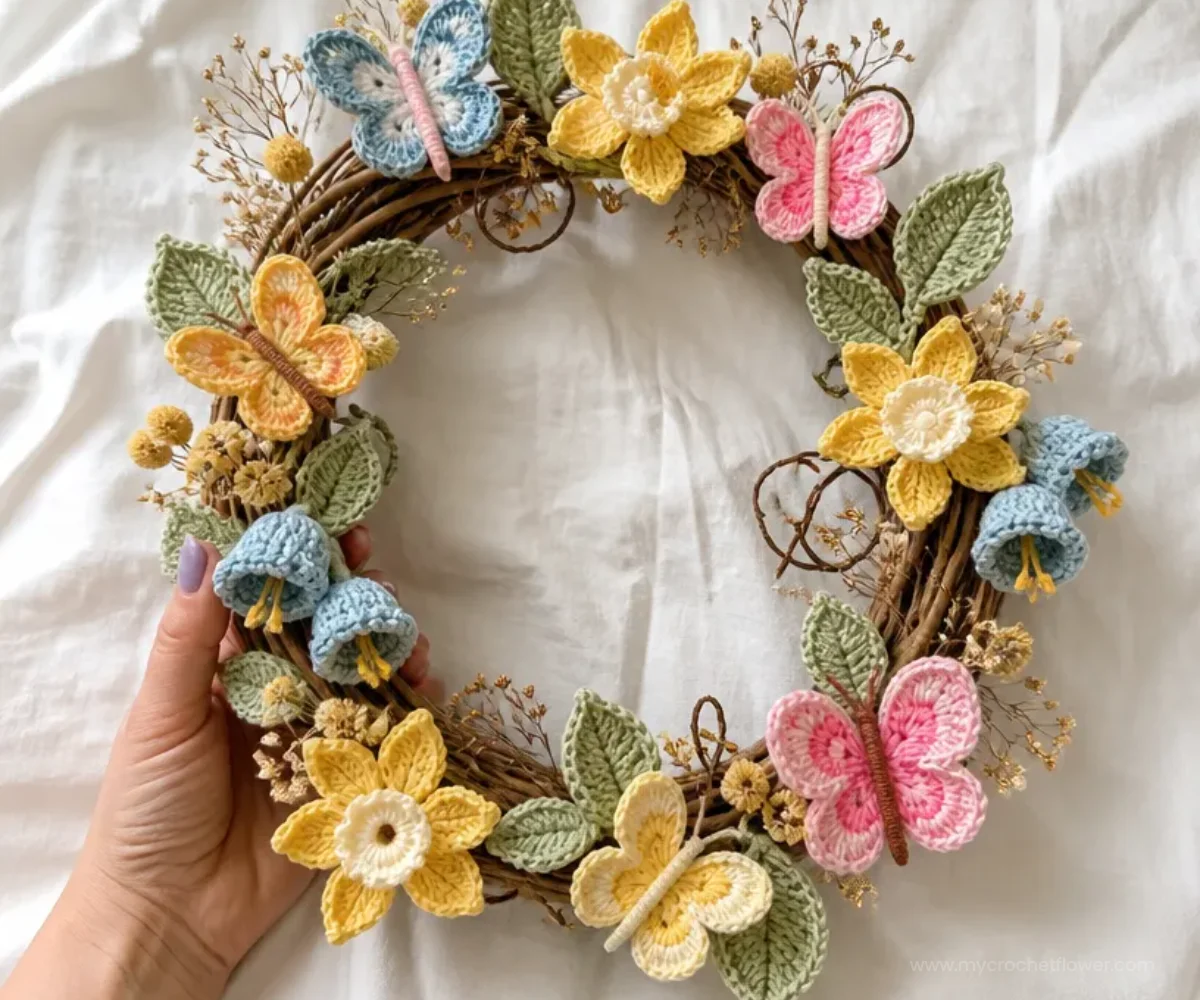
This Celebrate Spring Pattern creates a cheerful floral wreath featuring crocheted bells, daffodils, butterflies, and leaves. Bright yellow, sage green, blue, denim, strawberry, and soft ecru shades give the arrangement a fresh seasonal look, while the willow wreath provides a natural base. The project is suitable for crocheters who enjoy making small decorative motifs and assembling them into a larger display. Hang it on a door, display it indoors, or give it as a handmade spring gift.
Why You’ll Love This Crochet Project
- It combines several decorative motifs. You will practice crocheting bells, butterflies, daffodils, and leaves before arranging them into one coordinated wreath.
- It creates a reusable seasonal decoration. The finished wreath can brighten a doorway, wall, entryway, or spring display.
- It offers useful shaping practice. The pattern includes increases, petals, picots, front-loop and back-loop stitches, and joined rounds.
- It makes a thoughtful handmade gift. A floral wreath is easy to personalize with colors that suit the recipient’s home.
- It encourages creative arrangement. The pieces can be positioned around the wreath to create a balanced botanical composition.
My Crochet Flower Tip: Lay all crocheted pieces around the wreath before gluing anything in place. This makes it easier to adjust the color balance and spacing.
Before You Start Crocheting
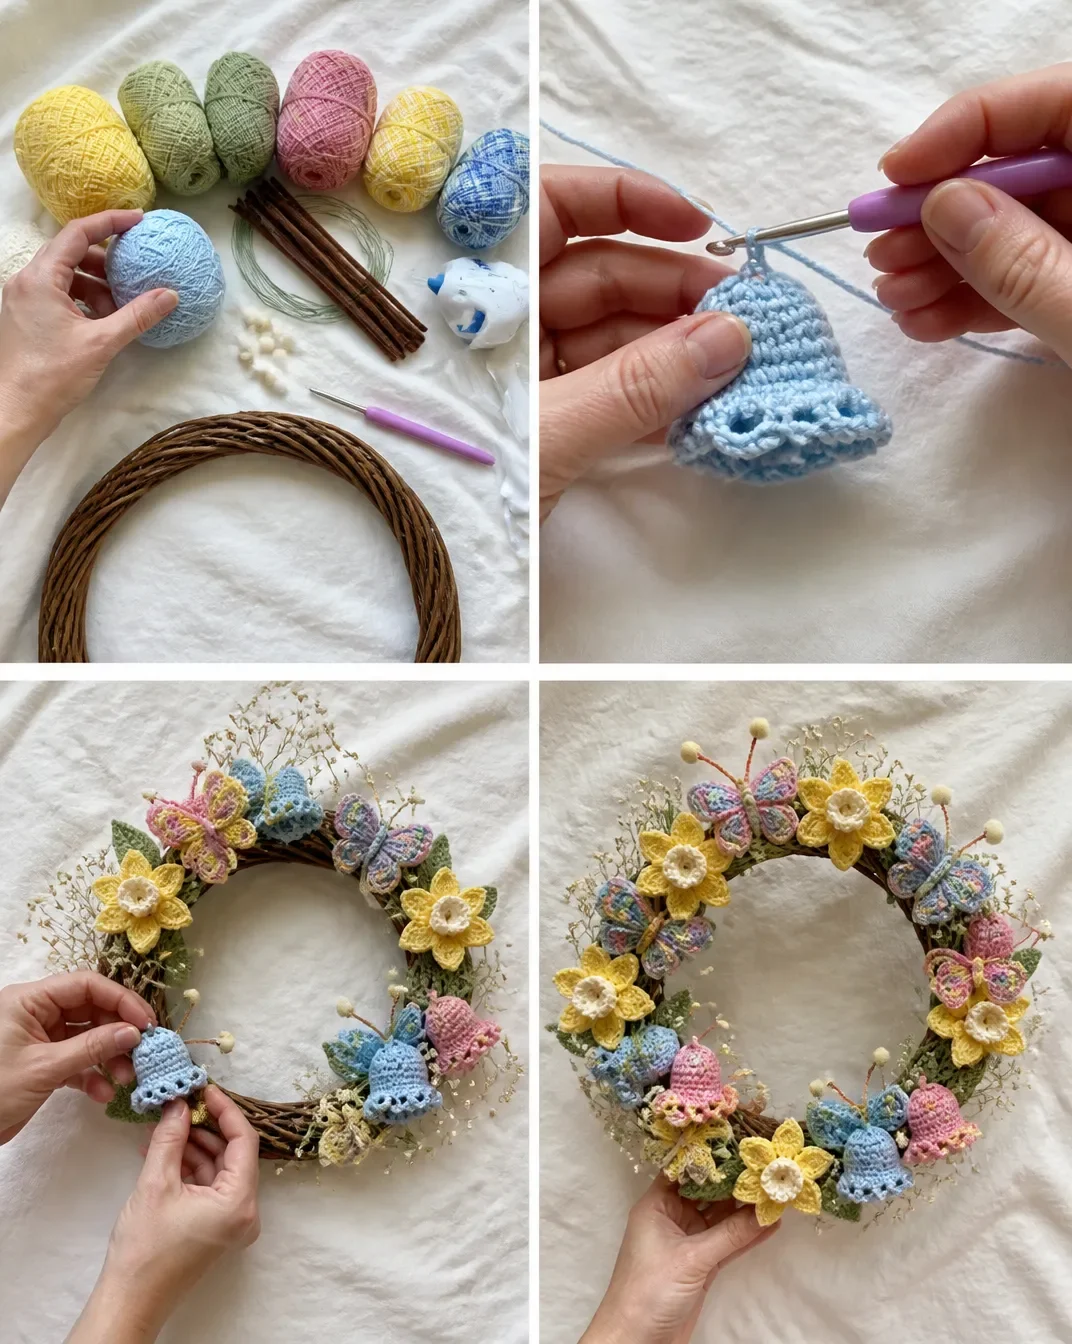
The project includes three bells, three pistils, eleven butterflies, three daffodils, and ten leaves. The butterflies are made in three ombré colorways, while the bells, daffodils, and leaves use solid colors. After crocheting, the pieces are assembled and glued to a 14-inch [35.5 cm] willow wreath.
The construction sequence is:
- Crochet the bells and pistils.
- Crochet the butterflies and add their chenille-stem bodies, wire antennas, and pompoms.
- Crochet the daffodils and their trumpet centers.
- Crochet the leaves.
- Arrange and glue all components to the wreath.
- Add small lengths of dried flowers if desired.
The supplied yield notes indicate that one ball of ombré yarn makes 9 butterflies, one ball of solid yarn makes 18 bells, one ball of solid yarn makes 7 daffodils, and one ball of solid yarn makes 35 leaves.
Useful Abbreviations
- ch: chain
- sc: single crochet
- hdc: half double crochet
- dc: double crochet
- tr: treble crochet
- sl st/ss: slip stitch
- RS: right side
- sp: space
- yoh: yarn over
- sc2tog: single crochet two together
Materials You’ll Need
Yarn
- Solids, 70.9 g / 2.5 oz
- Contrast A, 00010 Yellow: 1 ball
- Contrast B, 00084 Sage Green: 1 ball
- Ombres, 56.7 g / 2 oz
- Contrast C, 133 Shaded Denim Ombre: 1 ball
- Contrast D, 00165 Daisy Ombre: 1 ball
- Contrast E, 00144 Strawberry Ombre: 1 ball
- Contrast F, 01004 Soft Ecru: 1 ball
- Contrast G, 00026 Light Blue: 1 ball
Tools and Supplies
- Size 4 mm (U.S. G or 6) crochet hook, or size needed to obtain gauge
- 5 brown chenille stems
- 22 pompoms, ¼ in [5 mm] wide
- Thread-coated wire for the butterflies
- Glue gun and glue sticks
- Willow wreath, 14 ins [35.5 cm] in diameter
- Dried flowers for decoration, if desired
The chenille stems form the butterfly bodies, and the thread-coated wire is used for the antennas. Use the glue gun carefully, especially when attaching small pieces.
Step-by-Step Crochet Instructions
The following instructions retain the supplied construction order and stitch details.
Bells
Bell (make 3) with G, ch 2
1st rnd: (RS). 6 sc in 2nd ch from hook. Join with sl st in first sc.
2nd rnd: Ch 1. 1 sc in each sc around. Join with sl st to first sc.
3rd rnd: Ch 1. 1 sc in each of first 2 sc. 2 sc in next sc. 1 sc in each of next 2 sc. 2 sc in next sc. Join with sl st in first sc. 8 sc.
4th rnd: Ch 1. 1 sc in same st as last ss. (2 sc in next sc. 1 sc in next sc) 3 times. 2 sc in next sc. Join with ss in first sc. 12 sc.
5th and 6th rnds: Ch 1. 1 sc in same st as last ss. 1 sc in each sc around. Join with sl st in first sc.
7th rnd: Ch 1. Miss first and 2nd sc. (5 dc in next sc. Miss next sc. Sl st in next sc. Miss next sc) 3 times. Join with ss in first ch 1. Fasten off.
Pistils
Pistil (make 3) with A, ch 2
1st rnd: 6 sc in 2nd ch from hook. Join with sl st in first sc. Ch 10. Fasten off.
Bell Finishing
Join Pistil to Bell.
Glue Bells in cluster as shown in picture.
Butterflies
Butterfly: Make 4 each with C and E. Make 3 with D.
Ch 6. Join in round with ss in first ch.
1st rnd: Ch 1. [(1 sc. Ch 6. 1 sc) all in ring] twice. [(1 sc. Ch 4. 1 sc) all in ring] twice. Join with sl st in first sc.
2nd row: *Sl st in next ch 6 sp. (Ch 3. 4 dc. 1 tr. Ch 3. Sl st in first ch Picot made. 1 tr. 5 dc) all in next ch 6 sp. Sl st in each of next 2 sc. Rep from * once more. (9 dc in next ch 4 sp. Sl st in each of next 2 sc) twice. Fasten off.
Glue foundation ring closed vertically.
Glue opening of each wing closed vertically.
Cut desired length of chenille stems for Body as illustrated.
Make antennas with wire as illustrated.
Glue pompoms to top of antennas.
Daffodils
Daffodil (make 3) with A, ch 2
1st rnd: (RS). 6 sc in 2nd ch from hook. Join with sl st in back loop of first sc.
First Petal
1st row: Ch 1. 2 sc in back loop of same sc as last sl st. Ch 1. Turn.
2nd row: 2 sc in each sc. 4 sc. Ch 1. Turn.
3rd to 5th rows: 1 sc in each sc to end of row. Ch 1. Turn.
6th row: (Draw up a loop in each of next 2 sc. Yoh and draw through 3 loops on hook Sc2tog made) twice. Ch 3. Turn.
7th row: Miss first sc. Sl st in next sc. Sl st in side of each of next 5 rows of petal. Sl st in last sc worked on 1st row and in back loop of next sc. Do not turn.
Second to Sixth Petals
1st row: Ch 1. 2 sc in back loop of same sc as last sl st. Ch 1. Turn.
2nd to 7th rows: Work as given for 2nd to 7th rows of First Petal.
At end of Sixth Petal, fasten off.
Trumpet
Join F with sl st to any front loop of 1st rnd.
1st rnd: Ch 1. 2 sc in same sp as last sl st. *2 sc in front loop of next sc. Rep from * around. Join with sl st in first sc.
2nd rnd: Ch 1. 1 sc in same st as last sl st. *Ch 1. 1 sc in next sc. Rep from * around. Join with sl st in first sc. Fasten off.
Leaves
Leaf (make 10) with B, ch 12
1st rnd: (RS). 1 sc in 2nd ch from hook. 1 sc in next ch. 1 hdc in next ch. 1 dc in each of next 4 ch. 1 hdc in next ch. 1 sc in each of next 2 ch. 3 sc in last ch.
Working in other side of ch, proceed as follows:
1 sc in each of next 2 ch.
1 hdc in next ch.
1 dc in each of next 4 ch.
1 hdc in next ch.
1 sc in next ch.
2 sc in next ch.
Join with sl st to first sc. Fasten off.
Assembly
Using photo as a guide, assemble all pieces on Wreath and glue in position.
If desired, break small lengths of dried flowers and attach to Wreath randomly as shown in picture.
Ways to Display Your Finished Crochet
- Hang the wreath on an entry door for a bright spring welcome.
- Display it on an interior wall where the crocheted colors can be protected from weather.
- Use it as part of a seasonal mantel or entryway arrangement.
- Give it as a handmade housewarming or springtime gift.
- Coordinate the wreath with a table display that uses matching yellow, green, blue, or pink accents.
- Add dried flowers in a restrained way to emphasize the botanical theme without covering the crocheted motifs.
Caring for Your Crochet Project
Because this wreath includes hot glue, chenille stems, thread-coated wire, pompoms, and dried flowers, do not machine wash, soak, or launder it.
Dust the surface gently with a soft brush or use a vacuum cleaner on a low setting with a fabric-covered nozzle held slightly away from the crochet. For small marks, use careful spot cleaning with a barely damp cloth, avoiding the glued areas and dried flowers.
Keep the wreath away from excessive heat, open flames, and prolonged direct sunlight. Store it flat or hang it in a dry, covered space where the butterflies, pompoms, and petals will not be crushed. If a component shifts, reshape it gently by hand and reinforce the attachment with glue only when the area is clean and dry.
Tips for Better Results
- Count the beginning rounds carefully. The bell increases establish the shape, so confirm the stitch counts of 8 sc after the 3rd round and 12 sc after the 4th round.
- Mark the first stitch when needed. A removable marker can help identify the joining point in small circular pieces.
- Watch the loop placement on the daffodils. The first petal begins in a back loop, while the trumpet is joined to a front loop of the first round.
- Keep petal tension even. Consistent tension helps the six daffodil petals sit evenly around the center.
- Shape each butterfly before gluing. Close the foundation ring and wing openings vertically as instructed, then arrange the wings before the adhesive sets.
- Handle wire ends carefully. Bend or cover sharp ends of the antenna wire so they do not catch on fabric or scratch hands.
- Arrange before attaching. Place the bells, butterflies, daffodils, and leaves on the wreath first, checking that the heavier visual areas are balanced.
- Use glue sparingly but securely. Small, controlled amounts help prevent visible lumps on the wreath and crocheted pieces.
Color and Styling Variations
These options are optional and do not change the approved pattern instructions.
- Use the supplied yellow and soft ecru combination for a classic daffodil-inspired palette.
- Arrange the blue and denim butterflies together on one side of the wreath for a cool-toned section, then balance them with strawberry and yellow accents.
- Add dried flowers in natural tan and cream shades for a rustic look.
- Create a softer spring arrangement by emphasizing sage green, soft ecru, and daisy ombré pieces.
- For a more vivid display, position strawberry ombré butterflies near the yellow daffodils.
- If substituting yarn, choose a similar yarn type and be aware that a different fiber, thickness, or hook size can change the size, drape, texture, and amount of yarn required. The chenille stems and wire must still fit the finished butterfly construction.
Frequently Asked Questions
How many butterflies does the pattern make?
The pattern makes 11 butterflies: 4 with Contrast C, 4 with Contrast E, and 3 with Contrast D.
How many flowers are included?
The project includes three bells and three daffodils. Each daffodil is formed from six petals and a trumpet.
What hook size should I use?
Use a size 4 mm (U.S. G or 6) crochet hook, or the size needed to obtain gauge.
Can I change the yarn colors?
Yes. Color changes are an optional styling choice. Keep the color assignments in the approved instructions when following the original version, or substitute colors while maintaining the same component quantities.
How are the butterflies attached to the wreath?
The butterfly foundation ring and wing openings are closed vertically with glue. Chenille stems form the bodies, thread-coated wire forms the antennas, and pompoms are glued to the antenna tops. The completed pieces are then assembled on the wreath and glued in position.
Can I wash the completed wreath?
No. The finished wreath contains glue, wire, chenille stems, pompoms, and optional dried flowers. Clean it by gentle dusting and careful spot cleaning instead of washing or soaking.
How should I keep the wreath from losing its shape?
Store it in a dry place away from heat and pressure. Avoid stacking objects on top of it, and reshape crocheted pieces gently by hand if they become slightly displaced.
Conclusion
This Celebrate Spring Pattern brings together colorful crochet motifs and natural wreath elements in one cheerful seasonal decoration. The bells, daffodils, butterflies, and leaves can be arranged in many attractive ways, making the finished piece suitable for display or gifting. For the original approved instructions and project details, see the free Celebrate Spring crochet pattern.