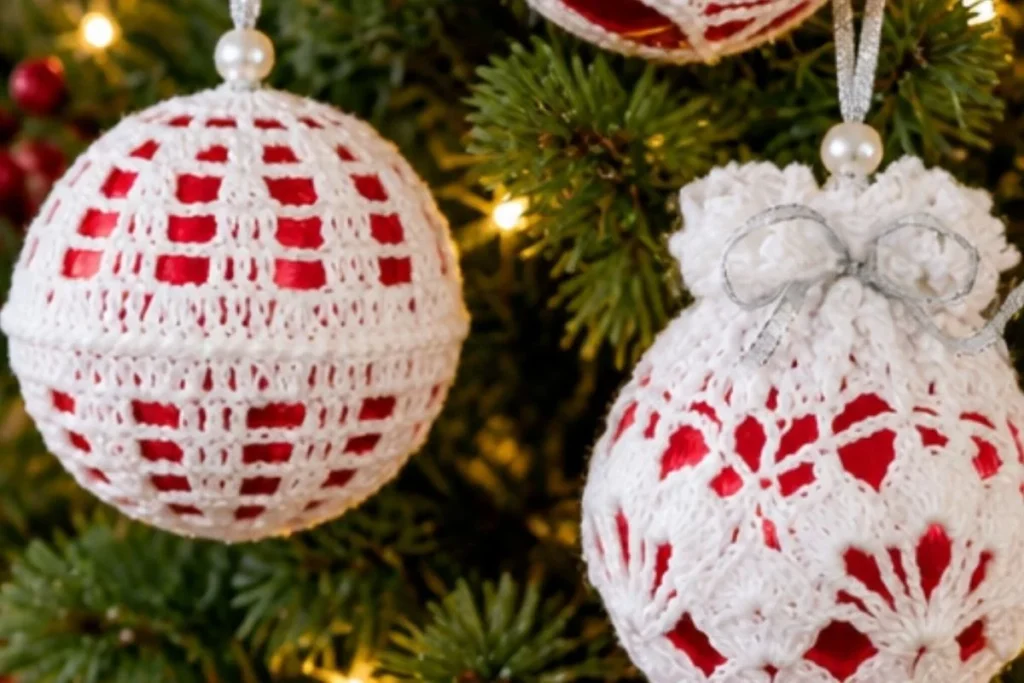
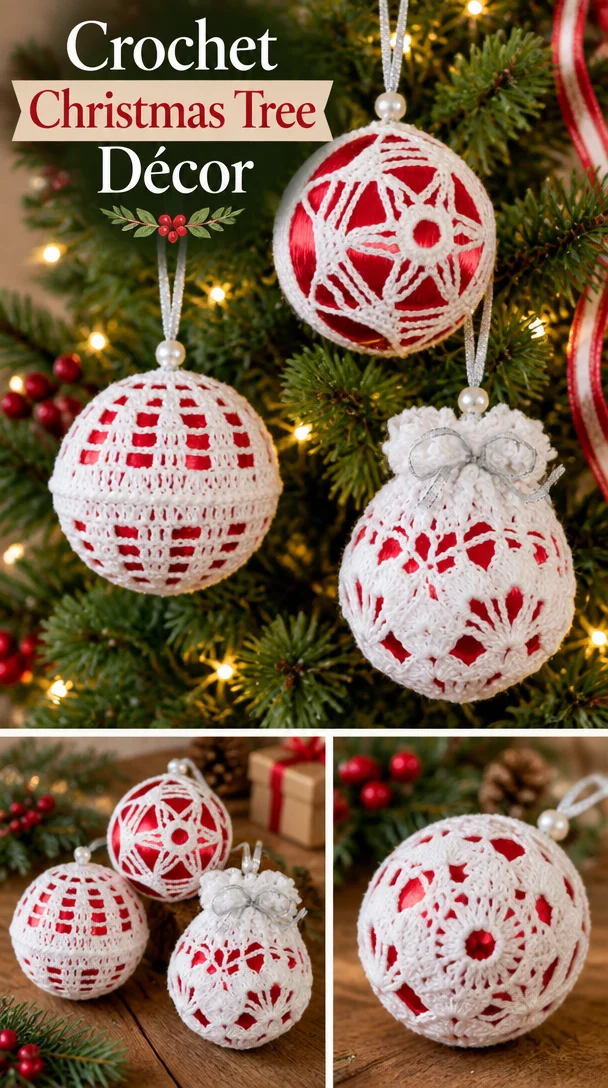
This Crochet Christmas Tree Décor Pattern creates three elegant red satin ornaments covered with delicate white crochet lace. Each ball uses a different openwork design, giving the finished set beautiful variety while keeping the color palette classic and festive. They are lovely for a Christmas tree, mantel, centerpiece, or handmade gift. Crocheters who enjoy thread work and decorative shaping may also appreciate this three-dimensional floral crochet design for another intricate project.
Why You’ll Love This Crochet Project
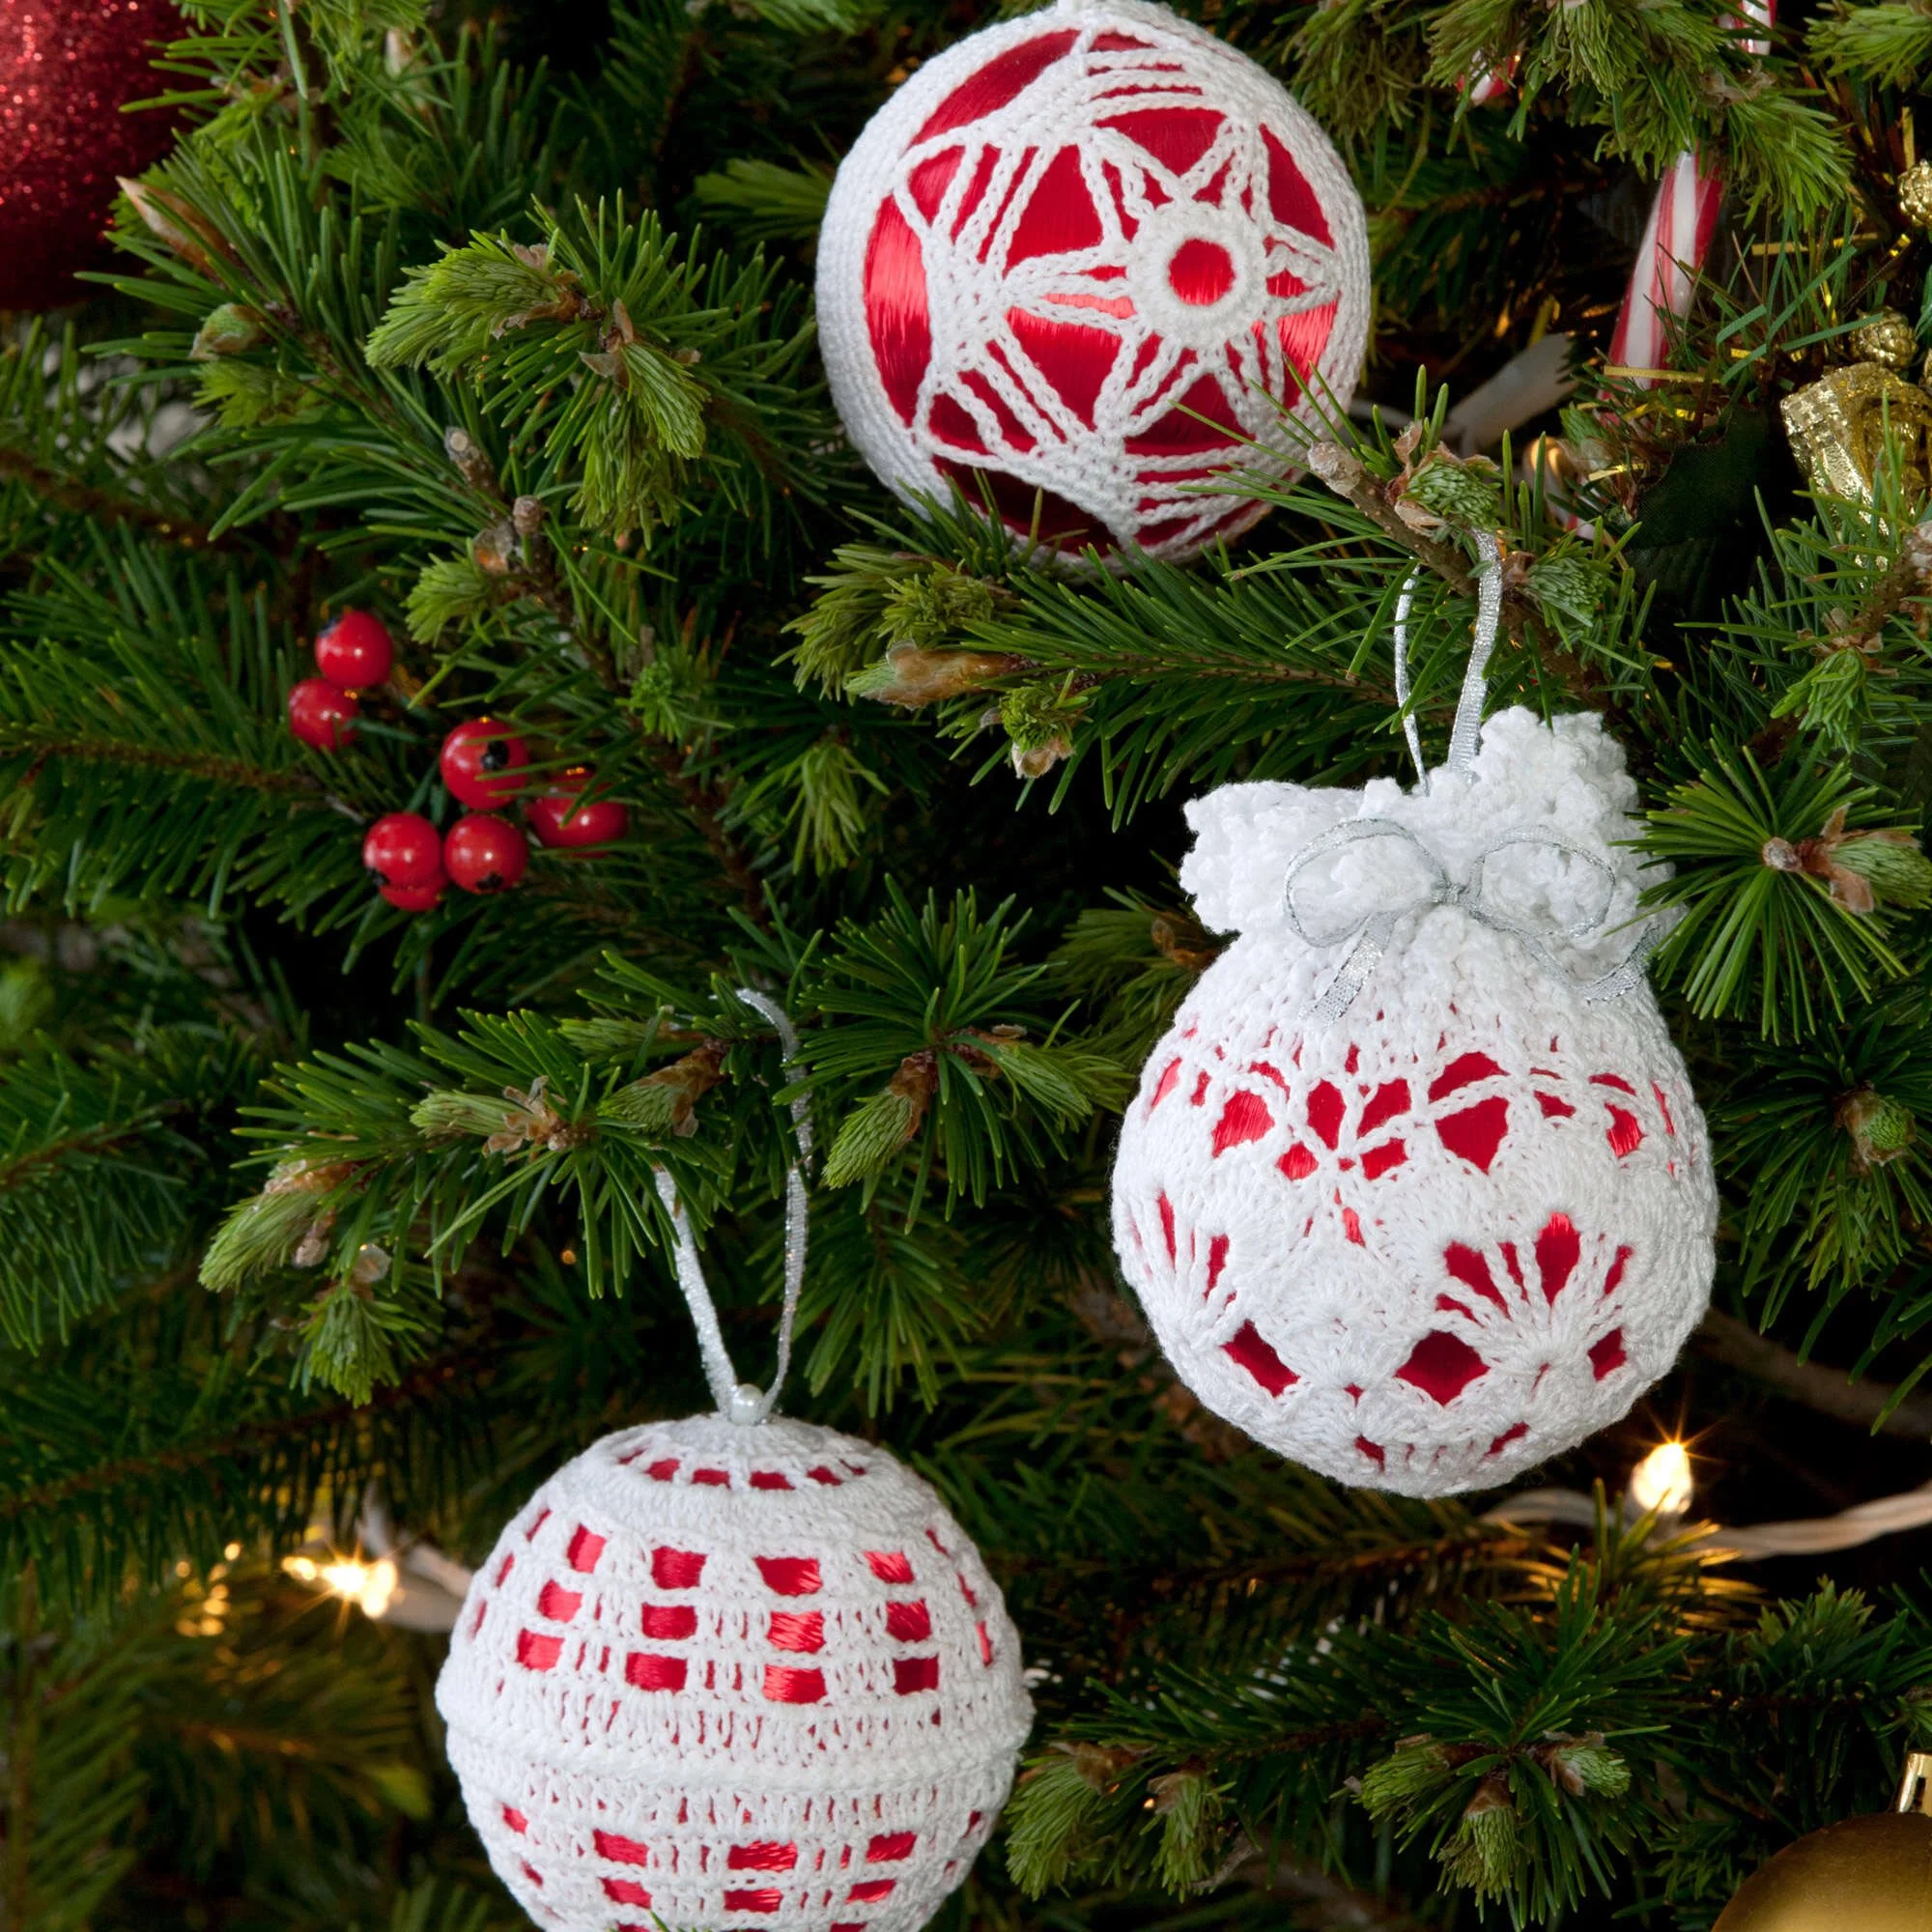
- Make three coordinated ornaments: The pattern includes three distinct crochet covers sized for 3-inch red satin balls.
- Practice thread crochet: Size 10 thread and a 1.5 mm steel hook create fine, delicate fabric with a lacy appearance.
- Learn decorative shaping: The covers use chain spaces, tall stitches, picots, and gradual shaping to fit round forms.
- Create a polished holiday display: Satin, pearl, and white crochet provide a traditional Christmas look.
- Give a handmade gift: The ornaments are lightweight, attractive, and easy to coordinate with a recipient’s holiday décor.
My Crochet Flower Tip: Keep each ornament’s finishing supplies together in a labeled bag so the correct ribbon length and corsage pin stay with the matching crochet cover. You may also find Crochet Bloomin Shoe Appliques Pattern useful.
Before You Start Crocheting
The project includes three ornament covers:
- Ball Number 1, the center design, is crocheted as one continuous cover through Round 19.
- Ball Number 2, the top design, is made from two matching halves worked through Round 9.
- Ball Number 3, the bottom design, is also made from two matching halves, worked through Round 7.
Ball Number 1 is gathered around the satin ball with ribbon. Balls Number 2 and 3 are assembled by matching and joining two crocheted halves. The pattern uses US crochet terminology and includes single crochet, half double crochet, double crochet, double treble crochet, slip stitches, chain spaces, and picots.
A picot is made by chaining 3 and slip stitching into the top of the last stitch made. In the instructions, * and ** identify repeated sections, while brackets indicate directions worked the specified number of times.
Materials You’ll Need
Ball Number 1 Center of Photo
- AUNT LYDIA’S® Classic Crochet Thread, Size 10: 1 ball, White
- Steel crochet hook: 1.5 mm [US 7]
- Tapestry needle
- 1/8” x 25” double-faced satin ribbon
- 2” long pearl teardrop corsage pin
- 3” red satin ball
Ball Number 2 Top of Photo
- Steel crochet hook: 1.5 mm [US 7]
- Tapestry needle
- 1/8” x 7” double-faced satin ribbon
- 2” long pearl teardrop corsage pin
- 3” red satin ball
Ball Number 3 Bottom of Photo
- Steel crochet hook: 1.5 mm [US 7]
- Tapestry needle
- 1/8” x 7” double-faced satin ribbon
- 2” long pearl teardrop corsage pin
- 3” red satin ball
The crochet thread creates the lace covers, while the satin balls provide the round form. The ribbon gathers or creates the hanger, and the pearl teardrop corsage pin helps secure the hanger at the top of the ornament.
Complete Crochet Tutorial
Special Stitch and Pattern Notes
Picot: Ch 3, slip st in top of last st made.
The symbols * or ** mean to repeat whatever follows as indicated. Directions in brackets are worked the number of times specified.
Ball Number 1 Center of Photo
Ball Cover
Ch 6; join with a slip st to form a ring.
Round 1
Ch 5 (counts as dc, ch-2), [dc in ring, ch 2] 7 times; join with a slip st in 3rd ch of ch-5.
Round 2
Slip st in next space, ch 5 (counts as dtr), 3 dtr in same space, ch 3,
[4 dtr in next space, ch 3] 7 times;
join with a slip st in top of ch-5.
Round 3
Slip st in next dtr,
[sc between 2nd and 3rd dtr, (4 dc, ch 2, 4 dc) in next ch-3 space] 8 times;
join in first sc.
Round 4
Slip st in next 4 dc and into ch-2 space,
ch 5 (counts as dtr),
(dtr, [ch 3, 2 dtr] 3 times) all in same space,
- (4 dc, ch 2, 4 dc) in next ch-2 space **,
([2 dtr, ch 3] 3 times, 2 dtr) all in next ch-2 space;
repeat from * around,
end at **;
join in top of ch-5.
Round 5
Ch 1,
- sc between next 2 dtr,
(3 dc, [picot, 3 dc] twice) all in next ch-3 space;
repeat from * twice more;
sc between next 2 dtr,
sc between dtr and dc,
(4 dc, picot, 4 dc) in next ch-2 space,
sc between dc and dtr;
repeat from * around;
join in first sc.
Fasten off.
Round 6
Join thread in 3rd picot of Round 5;
ch 1, sc in picot,
- ch 3, sc in next picot, ch 5, sc in next picot, ch 3,
pull up a loop in each of the next 3 picots, yo and draw through all 4 loops on hook,
ch 3, sc in next picot, ch 5 **,
sc in next picot;
repeat from * around,
end at **;
join.
Round 7
Ch 1, sc in first sc,
- ch 3, sc in next sc, ch 5, hdc in next sc, ch 3, dc in next joined sts, ch 3, hdc in next sc, ch 5 **,
sc in next sc;
repeat from * around,
end at **;
join.
Round 8
Ch 1, sc in first sc,
- ch 3, sc in next space, ch 3, sc in next sc,
[ch 3, sc] twice in ch-5 space,
ch 3, sc in next hdc,
ch 3, sc in next space,
ch 3, sc in next dc,
ch 3, sc in next space,
ch 3, sc in next hdc,
[ch 3, sc] twice in ch-5 space **,
ch 3, sc in next sc;
repeat from * around,
end at **;
(ch 1, hdc) in first sc to join and form last loop.
Rounds 9–17
Ch 1, sc in loop just formed,
- ch 3, sc in next ch-3 loop;
repeat from * around,
ending with (ch 1, hdc) in first sc to join and form last loop.
Round 18
Repeat Round 17 ending with ch 3;
join in first sc.
Round 19
- (Sc, picot, sc) in next ch-3 loop;
repeat from * around;
join in first sc.
Fasten off.
Weave in ends.
To Finish Ball Number 1
- Insert the satin ball into the crocheted piece, placing the center hole at the bottom of the crocheted piece on the center bottom of the ball.
- Weave the 18” length of ribbon through Round 15, draw up the ribbon very tightly and knot, then tie in a bow on top of the knot. Trim the ribbon ends.
- Insert the teardrop pearl corsage pin through the ends of the 7” length of ribbon and into the center top of the ball to form the hanger loop.
Ball Number 2 Top of Photo
First Half
Ch 12; join with a slip st to form a ring.
Round 1
Ch 1, 24 sc in ring; join with a slip st in first sc.
Round 2
Ch 10 (counts as dtr, ch-5), skip next sc,
[sc in next sc, ch 5, skip next sc, dtr in next sc, ch 5, skip next sc] 5 times,
sc in next sc, ch 5, skip next sc;
join with a slip st in 5th ch of ch-10.
Round 3
Ch 1, sc in same st as joining, ch 8,
[sc in next dtr, ch 8] 5 times;
join in first sc.
Round 4
Ch 1, sc in first sc,
- sc in first ch of ch-8, ch 8, skip next 6 ch, sc in next ch **, sc in next sc;
repeat from * around,
end at **;
join in first sc – 18 sc.
Round 5
Ch 1, sc in first 2 sc,
- sc in first ch of ch-8, ch 8, skip next 6 ch, sc in next ch **, sc in next 3 sc;
repeat from * to last sc,
end at **;
sc in last sc;
join – 30 sc.
Round 6
Ch 1, sc in first 3 sc,
- sc in first ch of ch-8, ch 8, skip next 6 ch, sc in next ch **, sc in next 5 sc;
repeat from * to last 2 sc,
end at **;
sc in last 2 sc;
join – 42 sc.
Round 7
Slip st in next 3 sc, slip st in next 4 ch,
ch 1, sc in same loop, ch 12,
- sc in next loop, ch 12;
repeat from * around;
join in first sc.
Round 8
Ch 1, sc in first sc, sc in each ch and sc around;
join – 78 sc.
Round 9
Ch 1, sc in each sc around; join.
Fasten off.
Weave in ends.
Second Half
Work the same as the First Half, leaving a 48” thread tail at the end of Round 9 to sew the halves together and to make the hanger loop.
Finishing Ball Number 2
- Place the crocheted halves over the satin ball, matching the crochet design pattern and matching stitches. Sew or slip stitch them together with the length of thread left on the Second Half.
- With the remaining thread left after sewing, use the crochet hook to anchor the thread with a slip st at the center top of the ball; ch 40; join to the first chain to form a loop, being careful not to twist the chain. Fasten off.
- Open the hanger loop at the base. Insert the teardrop pearl corsage pin into the satin ball at the center top to give firm hold to the hanger loop. Weave in ends.
Ball Number 3 Bottom of Photo
First Half
Ch 12; join with a slip st to form a ring.
Round 1
Ch 3 (counts as dc), 23 dc in ring; join with a slip st to top of ch-3.
Round 2
Ch 6 (counts as dc, ch 3), skip next dc,
[dc in next dc, ch 3, skip next dc] 11 times;
join in 3rd ch of ch-6.
Round 3
Ch 3, 5 dc in next ch-3 space,
[dc in next dc, 5 dc in next ch-3 space] 11 times;
join.
Round 4
Ch 3, 2 dc in same st as joining, ch 3, skip next 5 dc,
[3 dc in next dc, ch 3, skip next 5 dc] 11 times;
join.
Rounds 5 and 6
Ch 3, dc in next 2 dc, ch 3,
[dc in next 3 dc, ch 3] 11 times;
join.
Round 7
Ch 3, dc in next 2 dc,
3 dc in next ch-3 space,
[dc in next 3 dc, 3 dc in next ch-3 space] 11 times;
join.
Fasten off.
Weave in ends.
Second Half
Work the same as the First Half, leaving a 48” thread tail at the end of Round 7.
Finishing Ball Number 3
- Place the crocheted halves over the satin ball, matching the crochet design pattern and matching stitches. Sew or slip stitch them together with the length of thread left on the Second Half.
- Insert the teardrop pearl corsage pin through the ends of the 7” length of ribbon and into the center top of the ball to form the hanger loop.
Handmade Gift and Decoration Ideas
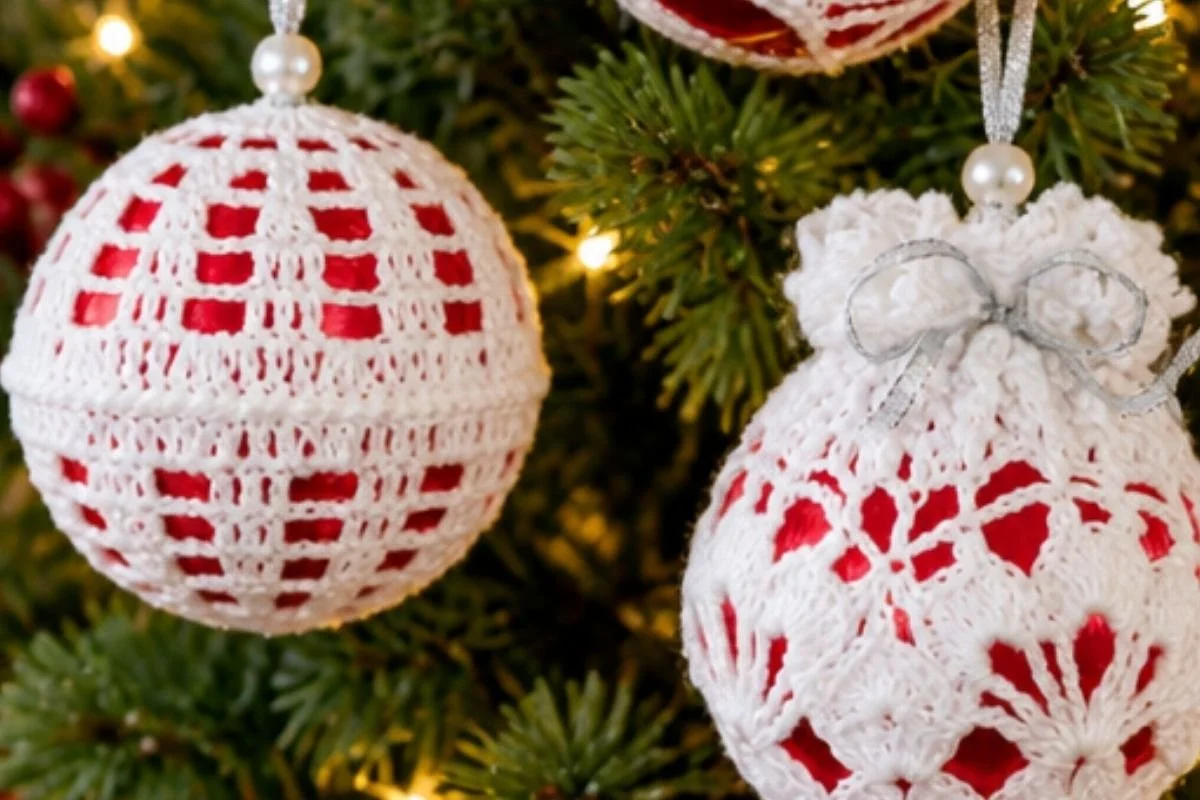
- Hang all three ornaments together on a small tabletop tree for a coordinated lace-and-satin display.
- Arrange them at different heights in a decorative bowl or shallow holiday centerpiece.
- Tie one ornament to a wrapped gift as a reusable handmade decoration.
- Display the balls on a mantel with greenery, pinecones, or red satin accents.
- Use the white crochet details as part of a traditional red, white, and gold Christmas color scheme.
- Pair the ornaments with other handmade seasonal pieces, such as an ornamental crochet wreath, for a unified handmade holiday display.
Caring for Your Crochet Project
These ornaments combine fine crochet thread, satin, ribbon, pearl pins, and satin-covered forms, so they should be handled gently.
- Dust them with a soft, dry makeup brush, craft brush, or microfiber cloth.
- Avoid soaking, machine washing, or wringing the ornaments.
- For a small mark, use a barely damp cloth and dab carefully without saturating the crochet or satin.
- Keep the ornaments away from direct heat, radiators, and hot storage areas.
- Store each ornament in tissue paper or a soft fabric pouch so the lace does not snag.
- Avoid placing heavy items on top of the ornaments.
- Before hanging, check that the ribbon and corsage pin remain secure.
Tips for Better Results
- Use the specified small hook and thread. The openwork structure depends on the fine thread and 1.5 mm steel hook.
- Count chain spaces carefully. The lace patterns rely on repeated spaces, and one missed chain can affect alignment in later rounds.
- Mark the beginning of rounds if needed. This is especially helpful in Ball Number 1, which continues through 19 rounds.
- Work picots consistently. Keep each picot at three chains and insert the slip stitch into the top of the last stitch made.
- Leave the required long tails. Ball Number 2 needs a 48” thread tail after Round 9, and Ball Number 3 needs a 48” thread tail after Round 7.
- Match the halves before joining. Align the crochet design and stitches around the satin ball before sewing or slip stitching.
- Gather Ball Number 1 firmly. The ribbon woven through Round 15 must be drawn up very tightly so the cover holds its shape.
- Keep the hanger loop untwisted. When making Ball Number 2’s ch-40 loop, check the chain before joining it.
Creative Ways to Customize Your Project
The approved pattern uses White thread with red satin balls, but the following are optional styling ideas and do not change the written instructions:
- Use another satin-ball color, such as gold, emerald, ivory, or deep green, while keeping the white crochet for contrast.
- Coordinate the ribbon with the satin ball or choose a metallic ribbon for a brighter holiday effect.
- Make a mixed-color set using one color family for all three ornaments.
- Display the ornaments with white, gold, or silver greenery.
- Use different decorative bowls or tree branches to create a formal, rustic, or vintage presentation.
- If substituting yarn or changing the hook size, expect the cover’s texture, stretch, dimensions, and fit to change. Test the altered materials before making all three components.
Frequently Asked Questions
How many ornaments does this pattern make?
The pattern makes three crochet-covered ornaments: Ball Number 1, Ball Number 2, and Ball Number 3. Each uses a 3” red satin ball.
What thread and hook size are recommended?
Ball Number 1 specifies AUNT LYDIA’S® Classic Crochet Thread, Size 10, in White, with a 1.5 mm [US 7] steel crochet hook. The listed hook is also used for Balls Number 2 and 3.
Which ornament is made in one piece?
Ball Number 1 is worked as one continuous ball cover through Round 19. Balls Number 2 and 3 are each made from two halves that are joined around the satin ball.
Why are long thread tails required for Balls Number 2 and 3?
The 48” tails are used to sew or slip stitch the matching halves together. For Ball Number 2, the remaining thread also forms the ch-40 hanger loop.
Can I change the crochet or satin-ball colors?
Yes, color changes are optional. The written pattern uses White crochet thread and red satin balls, but other color combinations can create different seasonal looks. Keep the thread type and hook size consistent if you want a similar fabric and fit.
How is Ball Number 1 gathered?
After inserting the satin ball, weave the 18” ribbon through Round 15, draw it up very tightly, knot it, and tie a bow over the knot. The 7” ribbon and pearl teardrop corsage pin form the hanger loop.
How should the finished ornaments be stored?
Store them in a dry place, protected with tissue paper or soft fabric. Avoid moisture, heat, crushing, and contact with rough or sharp objects that could catch the lace.
Conclusion
This Crochet Christmas Tree Décor Pattern combines fine white thread crochet with classic red satin ornaments for a graceful handmade holiday set. The three cover designs offer variety while sharing the same elegant materials and display possibilities. Hang them on a tree, give them as gifts, or style them with other seasonal crochet pieces. For more festive inspiration, explore these free crochet Christmas tree patterns.