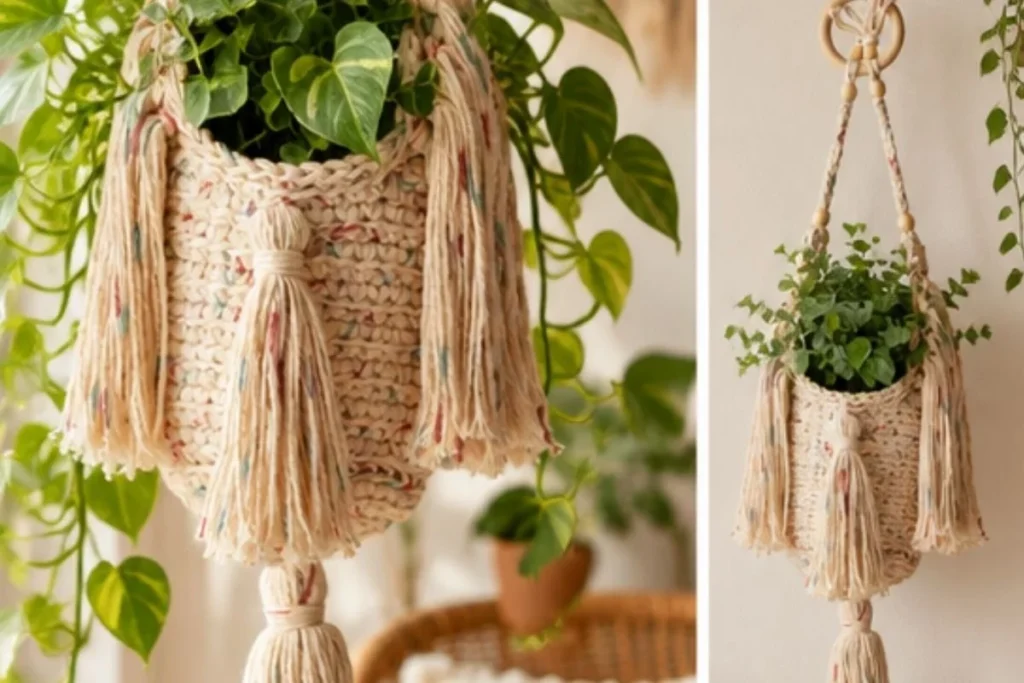
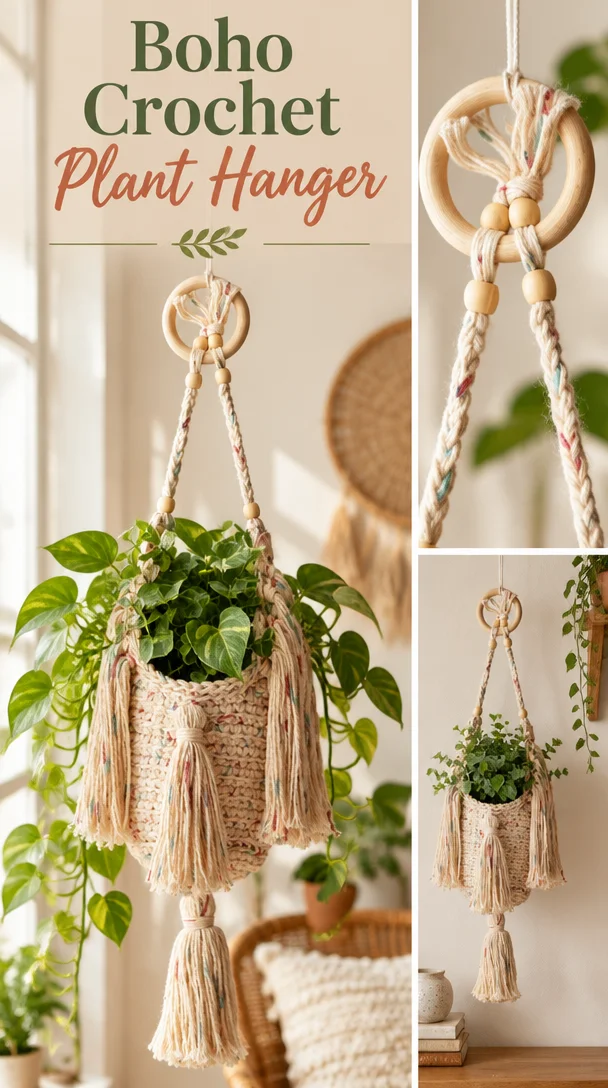
A Boho Fringed Crochet Plant Hanger brings texture and handmade charm to a sunny corner, shelf, or covered porch. This crochet plant hanger pattern combines a sturdy crocheted basket, braided sides, wooden beads, a wooden ring, fringe, and two tassels for a relaxed bohemian look. It is an enjoyable project for crocheters who want to practice linked double crochet, shaping, back-loop stitches, braiding, and decorative finishing. For another colorful handmade home accent, you may also enjoy this 3D flower granny square crochet pattern.
Why You’ll Love This Crochet Project
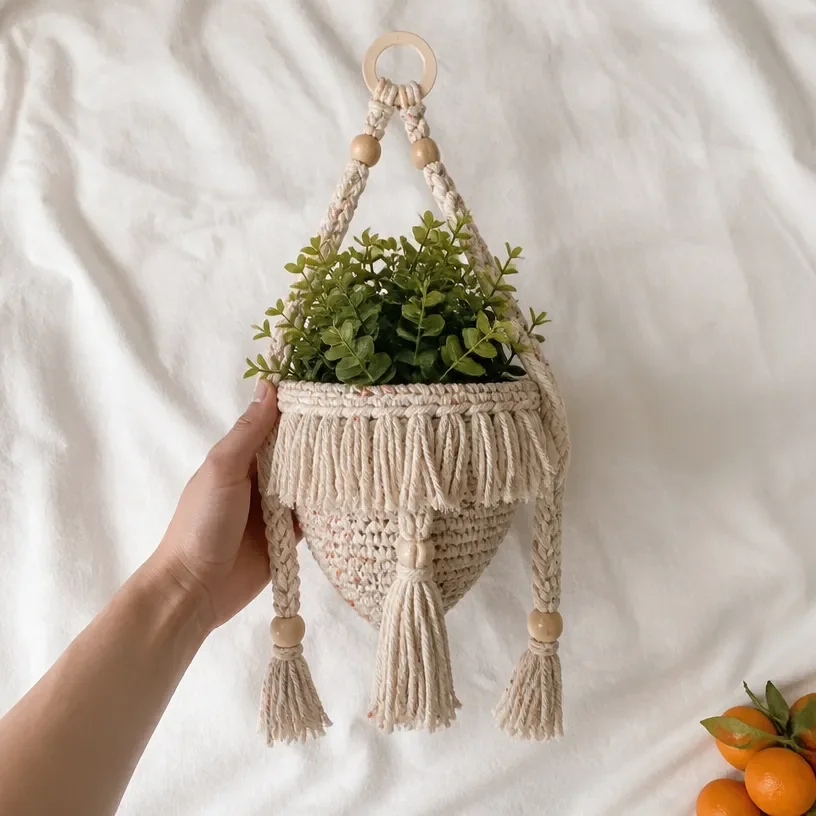
- It adds useful handmade storage. The finished hanger is designed to hold a plant pot, creating a decorative way to display greenery without using floor or table space.
- It combines several techniques. You will practice linked double crochet, controlled increases, decreases, back-loop-only rounds, crocheted edging, braiding, and tassel construction.
- The details create a true boho finish. Wooden beads, fringe, braided cords, and tassels give the project visual interest without requiring complicated colorwork.
- It makes a thoughtful handmade gift. A plant hanger paired with a small houseplant or decorative pot can become a practical present for a new home, birthday, or plant lover.
- It can be styled in many spaces. Hang it near a bright window, from a ceiling hook, or in a covered outdoor area suitable for the plant you choose.
My Crochet Flower Tip: Keep the crocheted body flat while working the early rounds, and count each increase carefully. Even shaping helps the hanger support a pot evenly later.
Before You Start Crocheting
The project begins with a small ring foundation and expands through linked double crochet increases to 40 stitches. After a back-loop-only round creates a turning ridge, the body continues in linked double crochet until it measures 4½” [11.5 cm] from the 4th round.
The upper section is then shaped with single crochet rows and decreases. Once the side shaping is complete, the upper edge is reinforced with two rounds of single crochet. Fringe is added through the unworked front loops, while braided yarn hangers connect the body to a wooden ring with wooden beads.
The pattern includes one crocheted plant-hanger body, two braided side hangers, fringe, and two tassels. The instructions use a U.S. E/4 (3.5 mm) crochet hook, or the size needed to obtain gauge.
Useful Abbreviations
- beg beginning
- ch chain
- dc double crochet
- hdc half double crochet
- lnkdc linked double crochet
- rem remaining
- rep repeat
- rnd round
- RS right side
- sc single crochet
- sc2tog single crochet two together
- sl st slip stitch
- st/sts stitch/stitches
- tog together
Materials You’ll Need
- Peaches & Crème® Cone 14 oz / 400 g; 674 yds / 616 m
- Panorama (01100) 1 cone or 425 yds / 388.5 m
- Crochet hook Size U.S. E/4 (3.5 mm) crochet hook or size needed to obtain gauge
- Stitch marker
- Wooden ring approx 2″ (5 cm) in diameter
- Wooden beads 6 beads, approx 1/2″ (1.5 cm) diameter
The yarn forms the plant-hanger body, fringe, braided sides, and tassels. The stitch marker identifies the first linked double crochet section during the setup round. The wooden ring supports the finished hanger, while the six wooden beads decorate and secure the braided cords.
Complete Crochet Instructions
Ring Foundation
Ch 4. Join with sl st to first ch to form ring.
Set-Up Round
(1 sc. 1 hdc. 1 dc. Place marker in dc. 8 beglnkdc) in ring.
1 lnkdc in each st to marker.
10 sts.
First Increase Round
1st rnd: (RS). Beg in first dc from previous rnd, work 2 lnkdc in each st around.
20 lnkdc.
Second Increase Round
2nd rnd: *1 lnkdc in next lnkdc. 2 lnkdc in next lnkdc. Rep from * around.
30 lnkdc.
Third Increase Round
3rd rnd: *1 lnkdc in each of next 2 lnkdc. 2 lnkdc in next lnkdc. Rep from * around.
40 lnkdc.
Building the Plant-Hanger Body
4th rnd: Working in back loops only, 1 lnkdc in each st around.
5th rnd: 1 lnkdc in each st around.
Rep 5th rnd until work from 4th rnd measures 4½” [11.5 cm].
Finishing the Top Section Before the Sides
Next rnd: 1 lnkdc in each lnkdc to last 3 sts.
1 hdc in next lnkdc.
1 sc in each of next 2 lnkdc.
Join with sl st to first st in rnd.
Shape the Sides
Begin working in rows as follows:
1st row: (RS). Ch 1. 1 sc in each of next 12 sts. Turn.
2nd row: Ch 1. Sc2tog. 1 sc in each of next 8 sts. Sc2tog. Turn.
10 sts.
3rd row: Ch 1. 1 sc in each st across. Turn.
4th row: Ch 1. Sc2tog. 1 sc in each st to last 2 sts. Sc2tog. Turn.
8 sts.
5th to 8th rows: Rep 3rd and 4th rows twice more.
4 sts.
9th row: Ch 1. 1 sc in each st across. Turn.
10th row: Ch 1. (Sc2tog) twice. Turn.
2 sts.
11th row: Ch 4. Join with sl st to next st. Fasten off.
Join the Sides to Form the Hanger Body
Join yarn with sl st to last rnd of lnkdc, leaving 8 sts between sl st and last st worked in first row of side shaping.
Work from the first row mark to the last row mark as given above.
As provided in the pattern layout: “Work from to as given above.”
Reinforce the Upper Edge
With RS facing, join yarn with sl st on upper edge of Plant Hanger.
Work 1 rnd of sc evenly around edge, working 5 sc in each ch-4 sp.
Join with sl st to first sc.
Next rnd: Ch 1. Working in back loops only, work 1 sc in each st around.
Join with sl st to first sc. Fasten off.
Add the Fringe
Cut strands of yarn 16″ [40.5 cm] long.
Taking 3 strands held tog, fold in half and knot into fringe along top of Plant Hanger as follows: use unworked front loops from last rnd of sc, work fringe into each of 6 sts on either side of ch-4 sps. Trim fringe evenly.
The pattern also includes this alternate finishing text:
Fringe: Cut yarn 10 to 14 ins [25.5 to 35.5 cm] long. Taking 2 or 3 strands together for each fringe knot into fringe across cast on and cast o edges. Trim fringe evenly.
Make the Braided Side Hangers
Cut 12 lengths of yarn 18” [45.5 cm].
Holding 6 strands tog, thread through ch-4 sp at side of Plant Hanger, and fold in half so that ends meet.
Thread all strands through a wooden bead; push bead to base of strands.
Braid strands tog, with 4 strands held tog in each section of braid, until braid measures approx 5” [12.5 cm].
Thread all strands through another wooden bead to finish braid, ensuring bead is seated at top of braid.
With 6 strands held on each side, wrap hanger strands around wooden ring.
Thread all strands through another bead, and secure with a knot.
Trim evenly.
Rep for opposite side of Plant Hanger.
Make Two Tassels
- Cut a piece of cardboard 5″ [12.5 cm] wide.
- Wind yarn around cardboard 60 times.
- Break yarn leaving a long end and thread end through needle.
- Slip needle through all loops and tie tightly.
- Remove cardboard and wind yarn tightly around loops 1″ [2.5 cm] below fold. Fasten securely.
- Cut through rem loops and trim ends evenly.
- Sew 1 Tassel to base of Plant Hanger and sew 1 Tassel to center front of Plant Hanger as shown in photo.
Ways to Display Your Finished Crochet
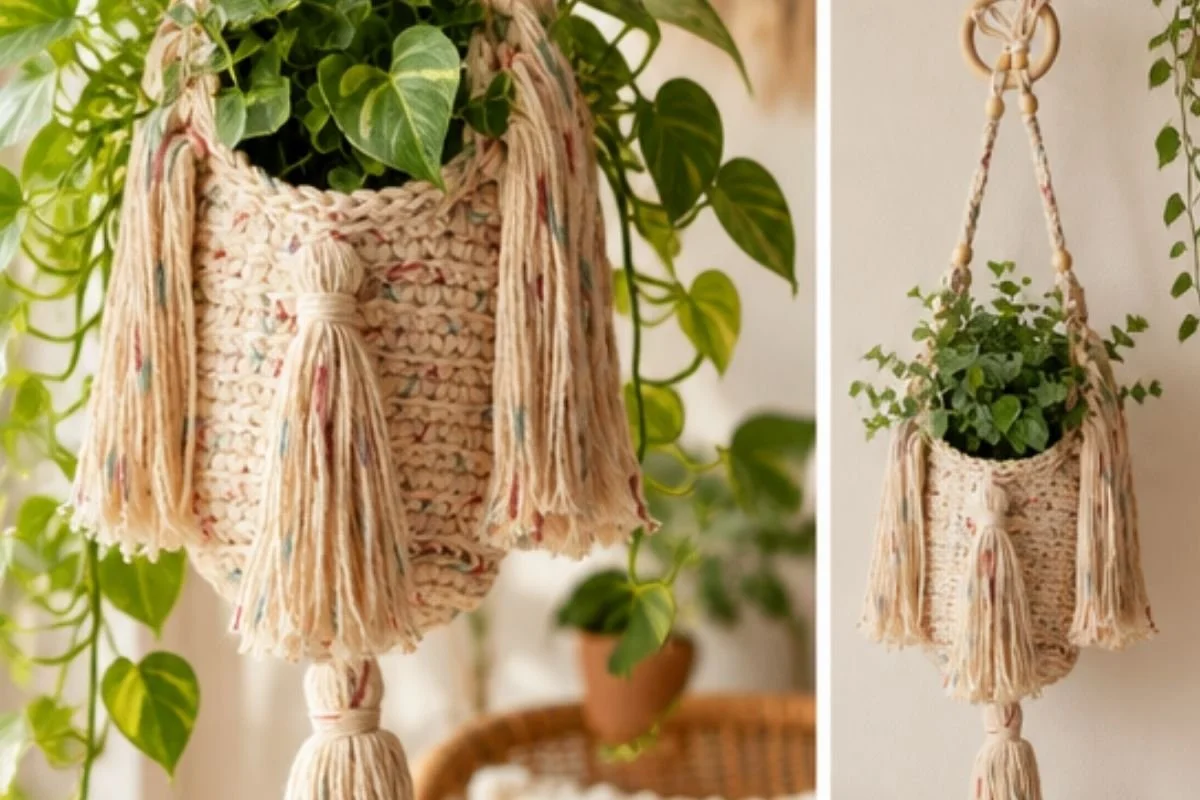
- Showcase a trailing plant: Use the hanger for a suitable trailing plant so the leaves spill naturally over the sides and fringe.
- Create a window display: Hang it near a bright window, while choosing a plant location according to that plant’s light and moisture needs.
- Give it as a housewarming gift: Pair the handmade hanger with a lightweight plant pot or a plant selected by the recipient.
- Coordinate several hangers: Make additional pieces in complementary yarn colors and arrange them at different heights.
- Style a covered porch: The boho details suit a sheltered outdoor space, provided the yarn and wooden components are protected from prolonged moisture.
- Use it as a decorative container: When not holding a plant, it can display a lightweight decorative item that fits securely inside the crocheted body.
For another seasonal handmade decoration, an April flowers crochet wreath pattern can complement the plant hanger in a coordinated display.
Caring for Your Crochet Project
- Dust gently: Use a soft brush, microfiber cloth, or gentle handheld dusting method around the fringe, beads, and tassels.
- Spot-clean carefully: If a small area needs attention, use a barely damp cloth and avoid saturating the crocheted body, wooden beads, ring, fringe, or tassels.
- Protect the wood: Keep the wooden ring and beads away from prolonged moisture, soaking, and high humidity.
- Avoid excessive heat: Do not place the hanger near heaters, radiators, or other hot surfaces, as heat may affect the yarn and dry the wooden components.
- Check the knots: Before hanging a plant, inspect the braided cords, bead positions, knots, and ring connections.
- Store it dry: If storing the hanger, remove the plant and pot, allow the piece to remain completely dry, and keep it in a clean, dry location.
- Prevent overloading: Use a lightweight pot and plant appropriate for the structure, especially because the pattern does not specify a maximum load.
Tips for Better Results
- Mark the setup stitch accurately. The marker is placed in the dc during the setup round, and the following linked double crochet stitches are worked to that marker.
- Count every increase round. The stitch counts progress from 10 to 20, 30, and 40 linked double crochet stitches. Checking these counts helps prevent a misshapen body.
- Work the 4th round in back loops only. This placement creates the transition needed before the straight linked double crochet rounds.
- Measure from the correct point. Repeat the 5th round until the work from the 4th round measures 4½” [11.5 cm], rather than measuring from the foundation ring.
- Track the side-shaping rows. The decreases gradually reduce the sections from 12 stitches to 10, 8, 4, and finally 2 stitches. A row-by-row checklist can help.
- Keep the fringe strands consistent. Cut the 16″ [40.5 cm] strands evenly so the trim can be shaped neatly after knotting.
- Seat each bead firmly. Push the first bead to the base of the folded strands and ensure the second bead is seated at the top of the braid before wrapping the cords around the wooden ring.
- Trim tassels after assembly. Leaving the ends slightly long until the tassel is secured makes it easier to create an even final edge.
Creative Ways to Customize Your Project
The approved instructions create the original plant hanger. The following are optional styling ideas and do not change the pattern instructions:
- Choose a different color palette: Use a contrasting fringe and tassel color for a bold accent, or keep all elements in one shade for a minimalist look.
- Coordinate with a room: Match the yarn to nearby planters, curtains, baskets, or wall art.
- Vary the plant pairing: A trailing plant emphasizes the vertical shape, while a compact plant creates a fuller rounded display.
- Style several pieces together: Use related colors at different heights to create a layered botanical arrangement.
- Coordinate with handmade accessories: A small floral accent or crochet accessory can echo the plant hanger’s color without changing its construction. For example, crochet bloomin shoe appliques can inspire small-scale floral color combinations.
- Consider yarn changes carefully: A different yarn or hook size may affect gauge, dimensions, texture, drape, stitch definition, yarn requirements, and the strength of the finished hanger. If substituting, make a gauge swatch and evaluate whether the yarn creates a secure fabric.
Frequently Asked Questions
Is this plant hanger beginner-friendly?
It is suitable for crocheters who are comfortable with basic stitches and are ready to learn linked double crochet, shaping, back-loop-only work, braiding, and tassel construction. The pattern includes several distinct finishing techniques.
What yarn and hook should I use?
The supplied materials specify Peaches & Crème® Cone in Panorama (01100), using 1 cone or 425 yds / 388.5 m, with a U.S. E/4 (3.5 mm) crochet hook or the size needed to obtain gauge.
How many wooden beads are needed?
The materials list calls for 6 wooden beads, each approximately 1/2″ [1.5 cm] in diameter. The braided hanger instructions use beads on both sides of the project.
How many tassels are made?
Make 2 tassels. Sew 1 tassel to the base of the Plant Hanger and 1 tassel to the center front of the Plant Hanger as shown in the photo.
Can I change the yarn color?
Yes, color changes are an optional styling choice. Keep the approved stitch counts, measurements, and construction sequence unchanged, and remember that a different yarn can affect gauge, fabric strength, texture, and yarn requirements.
How is the body shaped?
The body begins in rounds with linked double crochet increases. The side sections are then worked in rows using single crochet and decreases before the upper edge is reinforced with two rounds of single crochet.
How are the braided hangers attached?
Each side uses 12 lengths of yarn measuring 18” [45.5 cm]. The strands pass through a side ch-4 space, are folded, threaded through beads, braided to approximately 5” [12.5 cm], and wrapped around the wooden ring before being secured.
How should I clean the finished hanger?
Use gentle dusting and careful spot cleaning rather than soaking the project. Protect the yarn, fringe, tassels, wooden ring, and wooden beads from excess moisture, then store the hanger dry.
Conclusion
This Boho Fringed Crochet Plant Hanger Pattern creates a practical home accent with plenty of handmade texture. The linked crochet body, braided sides, wooden beads, fringe, and tassels work together for a relaxed decorative finish. Display it with a suitable lightweight plant, gift it to someone special, or customize the colors to coordinate with your space. For the original project reference, see the Boho Fringed Crochet Plant Hanger Pattern.