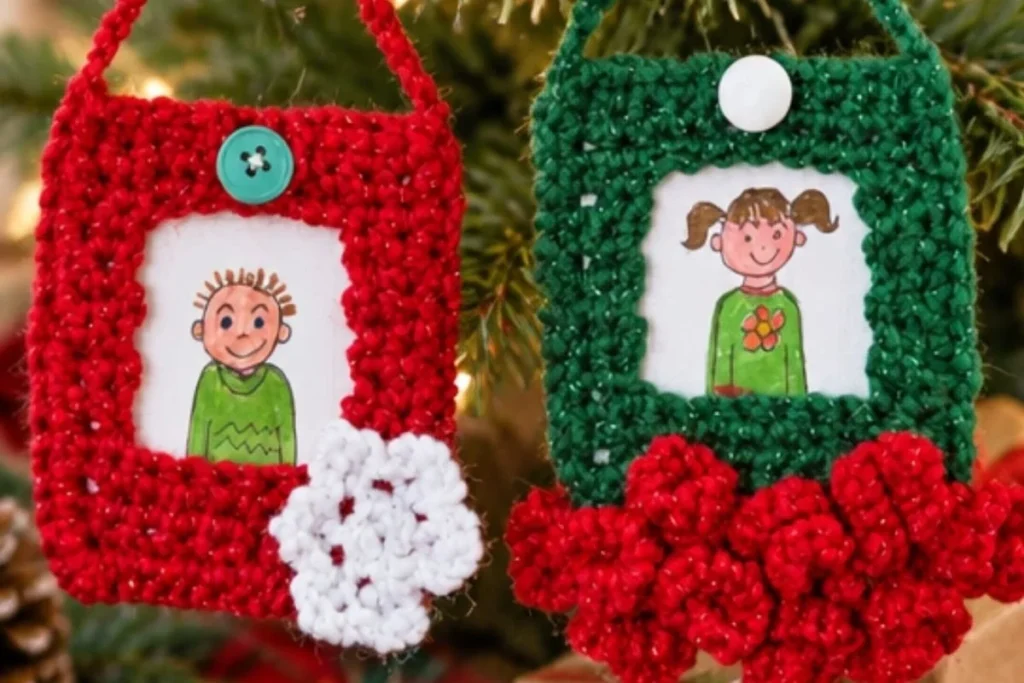
These Crochet Festive Ornament Frames turn small photographs into cheerful handmade decorations. Each frame combines a crocheted front and back, a simple hanging loop, and a button closure so the picture can be inserted and changed. Make one red frame with a white flower and one green frame with crocheted trim for a coordinated seasonal display or thoughtful handmade gift. For another ornament idea with a floral focus, compare this project with a crochet flower ball ornament pattern.
Why You’ll Love This Crochet Project
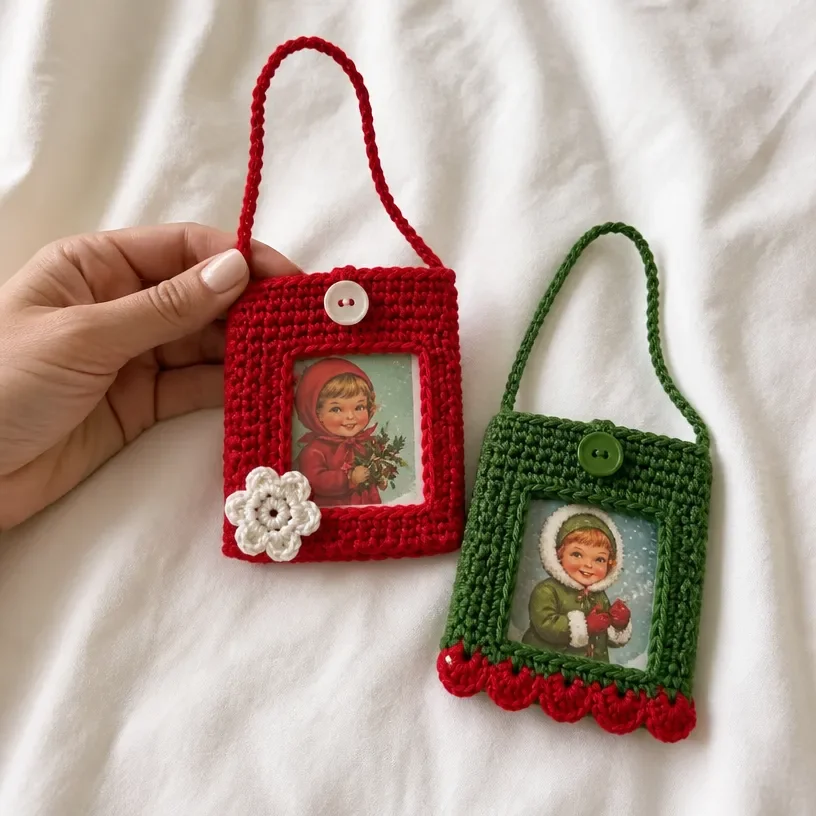
- It creates a meaningful keepsake. The finished frames hold small photographs, making them suitable for family memories, gift tags, or seasonal decorations.
- The construction is approachable. The main frame panels use single crochet, while the shaping is made by dividing the side edges and joining them at the top.
- You practice useful techniques. The pattern includes working through two layers, crocheting in back loops only, making a button loop, and attaching decorative details.
- The two colorways coordinate naturally. The red frame receives a small white flower, while the green frame is finished with a playful crocheted bottom trim.
- The hanger is built in. A chain-20 hanger is added during assembly, so no separate hanging hardware is required.
My Crochet Flower Tip: Before assembling the frame, lay the front and back pieces over the cardboard and photo to confirm that the picture sits neatly behind the opening.
Pattern Overview
This project makes two ornament frames: one front and one back with Color A, plus one front and one back with Color B. The red frame receives a small Color C flower, and the green frame receives a crocheted Color A trim.
The work proceeds in four stages:
- Prepare two cardboard pieces by taping a photo to the center of each one.
- Crochet the red and green front panels, including the shaped opening at the top.
- Crochet the matching back panels, adding a six-chain button loop to each.
- Hold each front and back together with wrong sides facing, single crochet around the sides and bottom, add the hanger, and attach the button.
The supplied measurements include cardboard pieces measuring 3” x 2½” (8 x 6 cm) and photos measuring 13⅛” (3.3 cm) wide x 1¾” (4.4 cm) high. The pattern uses a 3.75mm [US F-5] crochet hook.
Useful abbreviations include:
- ch: chain
- sc: single crochet
- dc: double crochet
- slip st: slip stitch
Materials You’ll Need
- RED HEART® Holiday: 1 ball each
- 9090 Red/Red (Color A)
- 6060 Green/Green (Color B)
- 140 White/Silver (Color C)
- Susan Bates® Crochet Hook: 3.75mm [US F-5]
- Cardboard pieces: two pieces 3” x 2½” (8 x 6 cm)
- Photos: two photos 13⅛” (3.3 cm) wide x 1¾” (4.4 cm) high
- Wide clear mailing tape: small amount
- Buttons: two ½” (3 cm) buttons one green and one white
The cardboard and photographs form the insert portion of the ornaments. The tape holds each photograph securely in place, while the buttons close the front of the frames over the pictures.
Step-by-Step Crochet Instructions
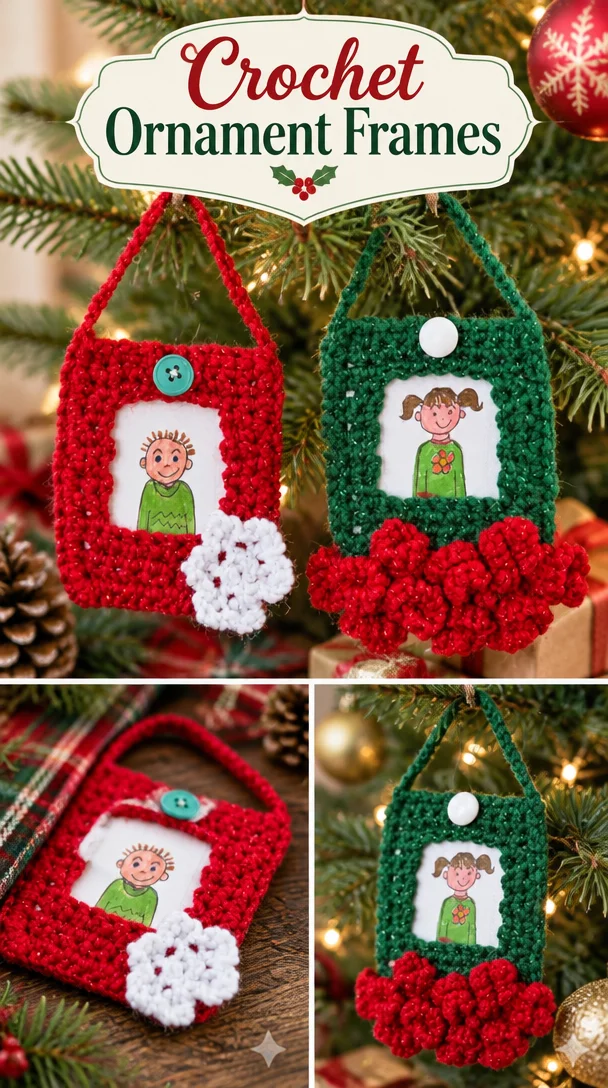
Work the following components in the order given. The front panels are shaped around the top opening, while the back panels remain solid except for the button loop.
Preparation: Photos and Cardboard
Tape a photo to the center of each cardboard piece with wide clear mailing tape. Set aside.
Front Panels
Make one front with Color A and one front with Color B.
Row 1 Wrong Side
Chain 11; single crochet in the 2nd chain from hook and in each chain across; turn 10 sc.
Rows 2 and 3
Chain 1, single crochet in each single crochet across, turn.
Divide for Right Side Edge Row 4
Chain 1, single crochet in the first 2 single crochets; turn, leaving 8 single crochets unworked.
Rows 5–10
Chain 1, single crochet in 2 single crochets; turn. Fasten off at the end of Row 10.
Left Side Edge
With right side facing, skip the next 6 single crochets of Row 3; join yarn with a single crochet in the next single crochet, single crochet in the last single crochet; turn.
Repeat Rows 5–10 the same as for the right side, except do not fasten off; turn.
Join for Top Edge Row 11
Chain 1, single crochet in the next 2 single crochets, chain 6, single crochet across 2 single crochets of the right side edge; turn.
Row 12
Chain 1, single crochet in 2 single crochets, single crochet in the 6-chain space, single crochet in the next 2 single crochets; turn 10 sc.
Rows 13 and 14
Chain 1, single crochet in each single crochet across. Fasten off.
Back Panels
Make one back with Color A and one back with Color B.
Row 1 Right Side
Chain 11; single crochet in the 2nd chain from hook and in each chain across; turn 10 sc.
Rows 2–13
Chain 1, single crochet in each single crochet across; turn.
Row 14
Chain 1, single crochet in the first 5 single crochets, chain 6 for the button loop, single crochet in the last 5 single crochets; turn.
Flower for Red Frame
Attach this flower to the red frame.
Round 1 Color C
With Color C, chain 2; work 6 single crochets in the 2nd chain from hook.
Round 2
Working in back loops only, *(slip stitch, chain 1, double crochet, chain 1) in the next single crochet; repeat from * around; join.
Fasten off. Sew to the frame. Weave in ends.
Trim for Green Frame
Attach this trim to the green frame.
Holding the frame upside down, join Color A with a slip stitch in the left bottom corner single crochet.
*Chain 6, 3 single crochets in the 2nd chain from hook and each chain across, slip stitch in the next single crochet on the frame; repeat from * across the bottom.
Fasten off. Weave in ends.
Join Front and Back
Prepare one ornament at a time.
Hold the front and back with wrong sides together.
Chain 1, working through both layers, single crochet evenly down the side edge, 3 single crochets in the corner, single crochet across the bottom edge, 3 single crochets in the corner, single crochet up the other side edge. Do not single crochet across the top edge.
Chain 20 for the hanger, slip stitch in the opposite top corner.
Fasten off. Weave in ends.
Sew a button to the top center front. Insert the picture and button closed.
Repeat the assembly instructions for the second frame.
Ways to Display Your Finished Crochet
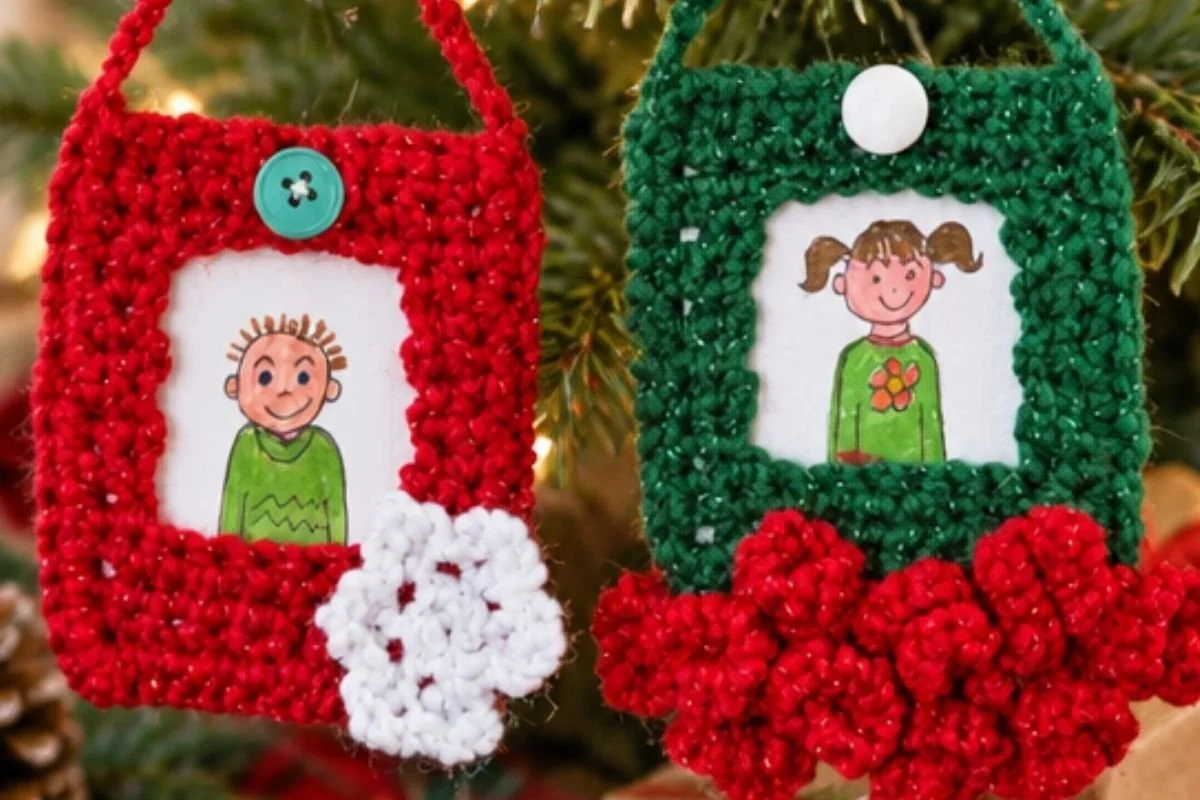
- Hang the red and green frames together on a Christmas tree, mantel, cabinet knob, or seasonal wall display.
- Use the frames as handmade photo ornaments for family members or close friends.
- Place them on a gift package instead of using a disposable bow or tag.
- Arrange both colorways in a small holiday centerpiece alongside evergreen branches or other non-crocheted decorations.
- Change the inserted photographs from year to year while keeping the crocheted frames as reusable keepsakes.
- If you enjoy botanical crochet décor, a crochet flower wreath pattern can complement the ornaments in a larger seasonal display.
Caring for Your Crochet Project
Keep the finished ornaments dry whenever possible because each frame contains cardboard, a photograph, mailing tape, and sewn-on buttons. Dust them gently with a soft, dry cloth or a clean, soft brush.
For a small mark, use minimal moisture on a cloth and dab carefully rather than soaking the ornament. Keep moisture away from the cardboard insert and photograph. Allow any spot-cleaned area to dry completely before storing.
Store the frames flat or hanging in a cool, dry place. Avoid excessive heat, direct moisture, and heavy objects that could bend the cardboard or flatten the crocheted details. Before storing, check that the buttons remain secure and that the hanger and decorative flower or trim are firmly attached.
Tips for Better Results
- Count the foundation stitches carefully. Chain 11 and work into the 2nd chain from the hook to establish the required 10 single crochets.
- Mark the right and wrong sides. The front begins on the wrong side, while the left side edge is joined with the right side facing.
- Watch the unworked stitches. On Right Side Edge Row 4, work only the first 2 single crochets and leave 8 unworked. The opening depends on this division.
- Keep the two sides aligned. When repeating Rows 5–10 for the left side edge, follow the same shaping as the right side and do not fasten off before joining the top.
- Work Round 2 in back loops only. This placement creates the texture and shape of the small flower for the red frame.
- Do not close the top edge during assembly. The instructions specifically say not to single crochet across the top edge; the chain-20 hanger and button closure complete the frame.
- Secure the picture before final display. Insert the cardboard-backed photo and fasten the button so the insert stays in position.
- Weave in ends neatly. Loose ends can catch on the photograph, button, or hanger, so secure them on the inside of each panel where possible.
For a related floral color-planning project, the 3D flower granny square color chart offers inspiration for coordinating red, green, and white crochet palettes.
Creative Ways to Customize Your Project
The following ideas are optional styling variations and do not change the approved instructions.
- Change the seasonal palette. Use a different combination of three coordinating colors while keeping Color A, Color B, and Color C roles organized. The original red, green, and white arrangement gives the strongest festive contrast.
- Coordinate the buttons. The approved materials call for one green and one white button. You may choose buttons with a similar size and shape, but changing the size could affect the closure and appearance.
- Match the photograph to the display. Use family portraits, pet photographs, holiday scenes, or small botanical images that fit the specified photo dimensions.
- Create a unified set. Make additional pairs in carefully chosen palettes for a tree covered with coordinated handmade ornaments.
- Experiment with arrangement. Display the two frames side by side, hang them at different heights, or combine them with other crochet decorations.
- Use another yarn only with care. A different yarn may change the fabric thickness, dimensions, stitch definition, and amount of yarn required. A different hook size can also alter the fit around the cardboard and photograph, so retain the stated hook when you want the original proportions.
Frequently Asked Questions
Is this project suitable for a beginner?
The pattern uses primarily single crochet, chain stitches, slip stitches, and one double crochet in the flower. Beginners should be comfortable counting stitches, turning rows, joining yarn, and sewing pieces together.
How many frames does the pattern make?
The instructions make two frames: one front and back in Color A and one front and back in Color B. The red frame receives the white flower, and the green frame receives the crocheted trim.
What hook size should I use?
Use a Susan Bates® Crochet Hook measuring 3.75mm [US F-5], as specified in the materials.
Which yarn colors are required?
Use one ball each of RED HEART® Holiday in 9090 Red/Red for Color A, 6060 Green/Green for Color B, and 140 White/Silver for Color C.
How do I attach the photograph?
Tape each photo to the center of its cardboard piece during preparation. After joining the crocheted front and back, insert the cardboard-backed picture and close the button.
Why is the top edge left open during assembly?
The top remains open so the picture can be inserted and removed. The button at the top center front and the back-panel button loop provide the closure.
Can I change the colors?
Yes, color changes are an optional styling choice. Keep track of which color is used for each frame and decoration, and remember that different yarns or colors may have different surface textures and stitch definition.
How should I clean the finished ornament?
Dust it gently and spot-clean cautiously if needed. Avoid soaking because the project contains cardboard, a photograph, tape, and buttons.
Can I use a different yarn?
You can experiment with another yarn, but it may change the frame’s size, firmness, texture, and fit around the cardboard and photograph. A hook-size change may also affect the finished proportions.
Conclusion
These festive crochet ornament frames combine simple crochet construction with personal photographs and decorative colorwork. Make the red frame with its small white flower, finish the green frame with the playful bottom trim, and display both as keepsakes or gifts. For the original pattern source and another reference point, see the Free Easy Red Heart Festive Ornament Frames Crochet Pattern.