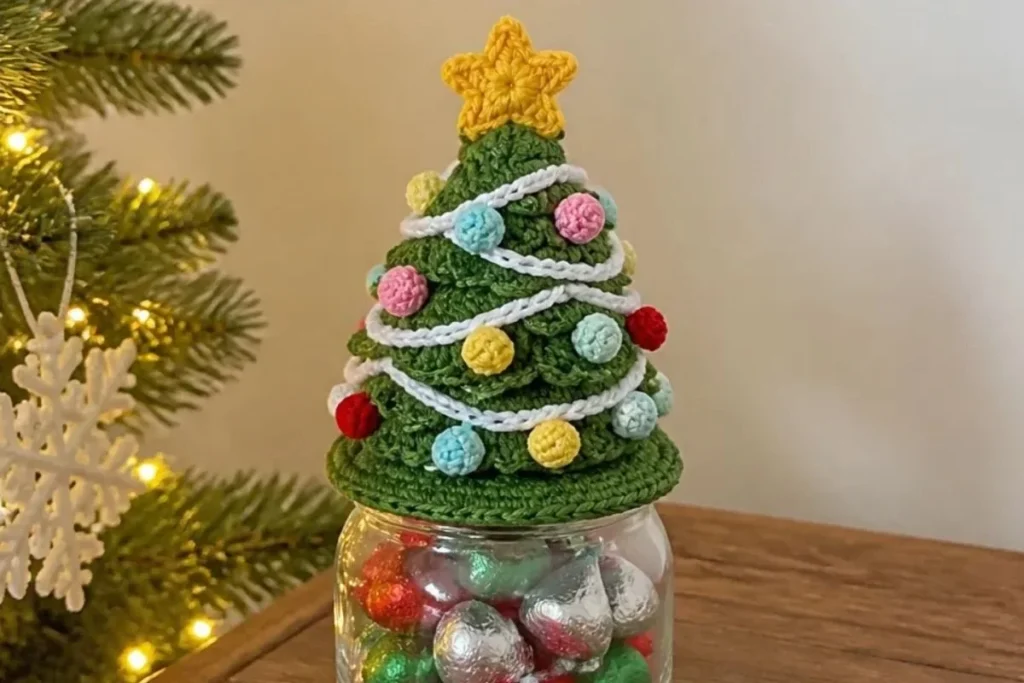
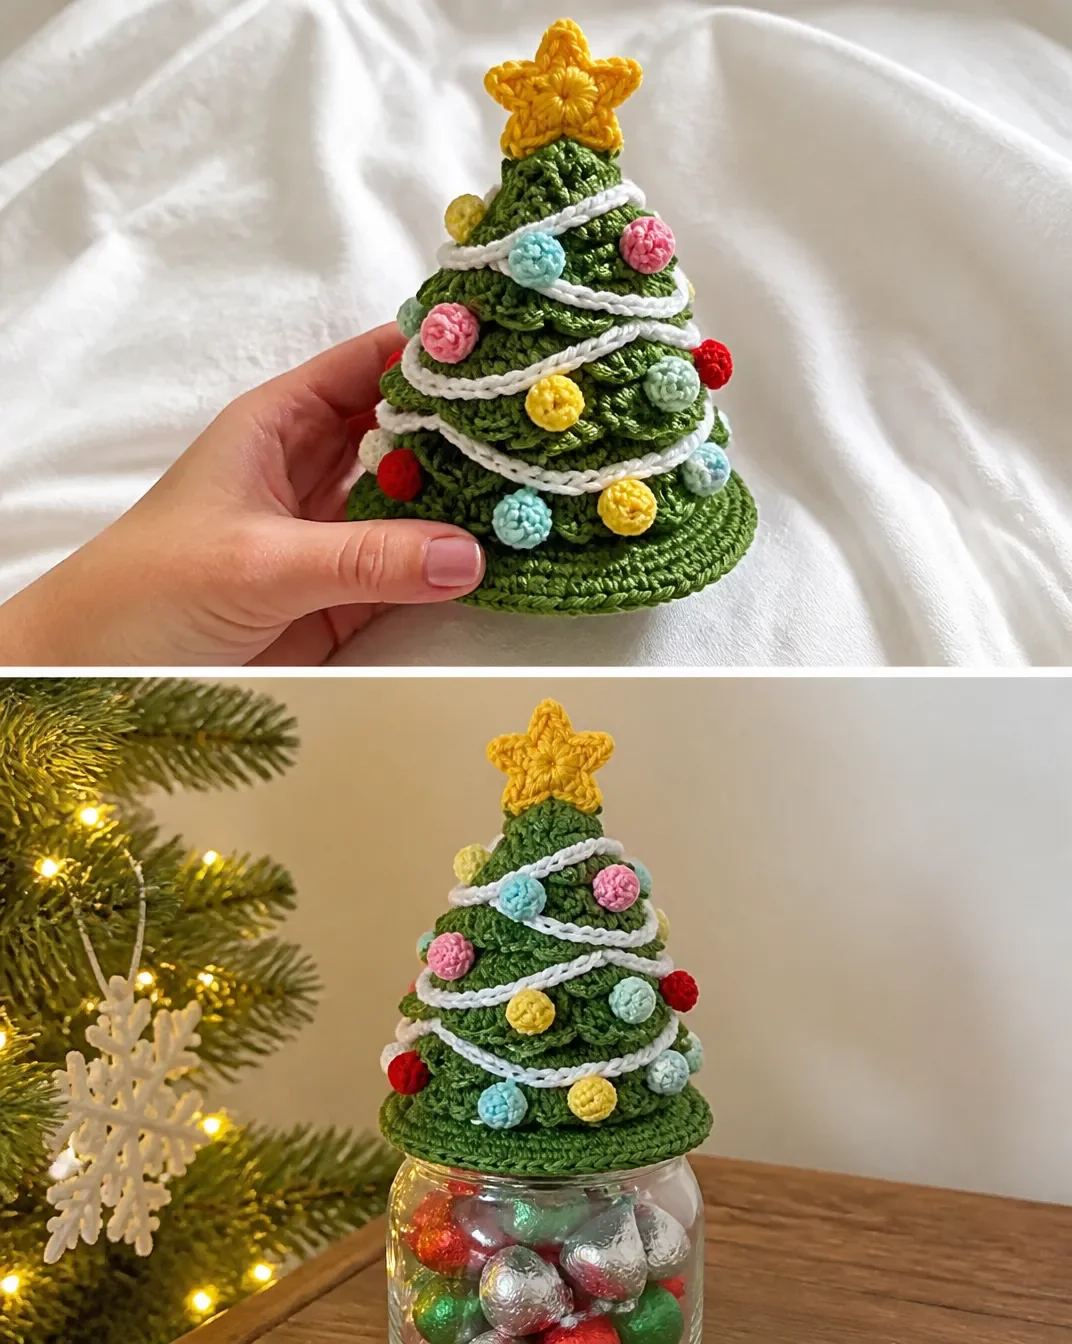
A handmade Christmas tree jar topper turns an ordinary jar lid into a cheerful holiday decoration. This Crochet Christmas Tree Jar Topper Pattern Tutorial includes a ruffled green tree, a star, white garland, and colorful ornaments made with RED HEART® Super Saver®. It is an enjoyable project for practicing front-loop and back-loop crochet, increases, picot stitches, and simple sewn assembly. Display the finished topper on a seasonal jar, give it as a handmade gift, or coordinate it with other festive crochet decorations such as a colorful floral crochet design.
Why You’ll Love This Crochet Project
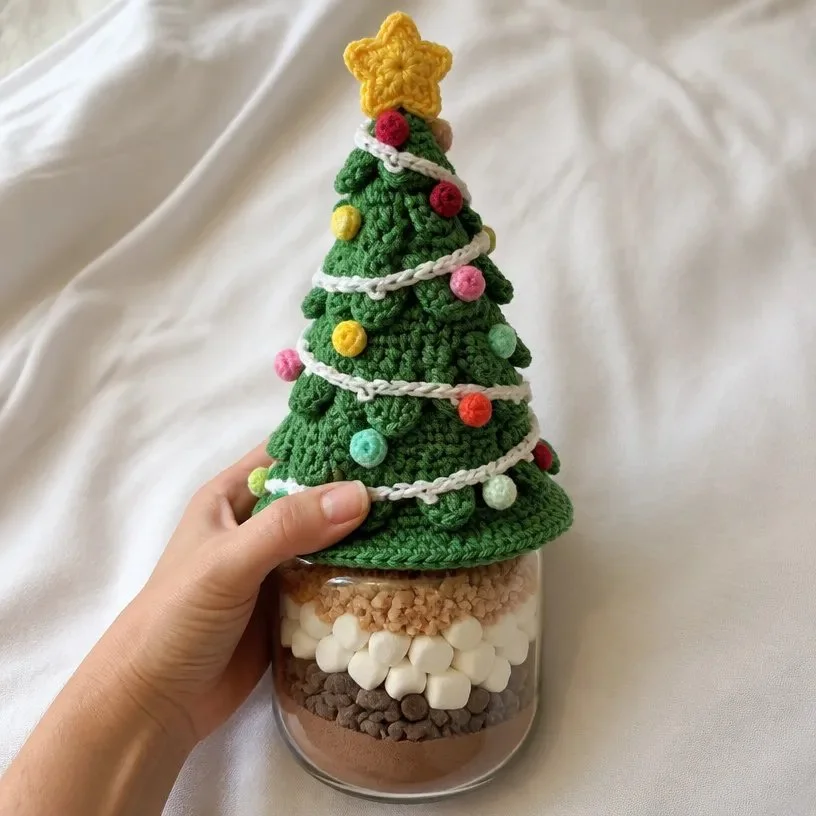
- It creates a useful seasonal decoration. The completed tree sits on a jar lid, making a practical container part of your holiday display.
- The shaping is rewarding. Repeated increases create the tapered tree base, while the outer layer adds dimensional branches.
- The details are colorful and customizable. A white garland, yellow star, and ornaments in red, pink, and mint give the tree a bright festive finish.
- It teaches several useful techniques. You will practice adjustable rings, working in back loops and front loops, picot stitches, turning, and attaching small crochet pieces.
- It makes a thoughtful handmade gift. A decorated jar can be prepared for holiday treats, small gifts, or a winter table arrangement.
My Crochet Flower Tip: Keep the tree base in a smooth, even shape as you work. Consistent tension helps the outer layer sit neatly over the graduated rounds.
Before You Start Crocheting
This project includes one green Christmas tree, two star pieces, one long garland, and 18 small ornaments. The ornaments are made as three each in four colors: Lemon, Cherry Red, Perfect Pink, and Minty F.
The construction begins with a green tree base worked from the center outward. The base is shaped with back-loop increases through Round 16. Without fastening off, you turn and use the front loops left behind to create the outer ruffled layer. The star, garland, and ornaments are made separately, then sewn to the tree with the specified yarn tails.
The pattern uses US crochet terminology. Helpful abbreviations include:
- ch: chain
- sc: single crochet
- hdc: half double crochet
- dc: double crochet
- sl st: slip stitch
The special stitch used in the pattern is a picot stitch: ch 3, slip stitch into the first chain.
Materials You’ll Need
- RED HEART® Super Saver®, 1 skein each:
- 368 Paddy Green, Color A
- 316 Soft White, Color B
- 235 Lemon, Color C
- 319 Cherry Red, Color D
- 706 Perfect Pink, Color E
- 520 Minty F
- Susan Bates® Crochet Hook 5.5 mm [US I-9]
- Yarn needle
- Jar for topper use
The Paddy Green yarn forms the tree. Soft White is used for the garland, Lemon makes the stars, and Cherry Red, Perfect Pink, and Minty F create the ornaments.
Complete Crochet Tutorial
Special Stitch
Picot Stitch: Ch 3, slip stitch into first chain.
Construction Notes
- To substitute the adjustable ring for the tree base, ch 3 and join to the first chain.
- Do not fasten off after Round 16 of the tree base.
- After the tree base, you will work into all the front loops left behind.
- Repeat the specified outer-layer rounds until reaching the top or bottom as directed.
- Keep the long yarn tails for the star, garland, ornaments, and assembly.
Christmas Tree Jar Topper Make 1 Tree
Tree Base
With Color A, make an adjustable ring as follows:
- Wrap the yarn around your finger with the yarn tail to the left and under the working yarn.
- Insert the hook through the circle from front to back.
- Yarn over using the working yarn and pull through the loop.
Round 1: Ch 1, 6 sc in adjustable ring, join to first sc. Pull the starting end tight to close the circle 6 sc.
Rounds 2 & 3: Sc in each of the next 6 sts.
Round 4: Working in back loops only, (hdc, dc) in next st, 1 dc in next st, *2 dc in next st, 1 dc in next st; repeat from * once more 9 sts.
Round 5: Working in back loops only, *2 dc in next st, 1 dc in each of next 2 sts; repeat from * 2 more times 12 dc.
Round 6: Working in back loops only, *2 dc in next st, 1 dc in each of next 3 sts; repeat from * 2 more times 15 dc.
Round 7: Working in back loops only, *2 dc in next st, 1 dc in each of next 4 sts; repeat from * 2 more times 18 dc.
Round 8: Working in back loops only, *2 dc in next st, 1 dc in each of next 5 sts; repeat from * 2 more times 21 dc.
Round 9: Working in back loops only, *2 dc in next st, 1 dc in each of next 6 sts; repeat from * 2 more times 24 dc.
Round 10: Working in back loops only, *2 dc in next st, 1 dc in each of next 7 sts; repeat from * 2 more times 27 dc.
Round 11: Working in back loops only, *2 dc in next st, 1 dc in each of next 8 sts; repeat from * 2 more times 30 dc.
Round 12: Working in back loops only, *2 dc in next st, 1 dc in each of next 9 sts; repeat from * 2 more times 33 dc.
Round 13: Working in back loops only, *2 dc in next st, 1 dc in each of next 10 sts; repeat from * 2 more times 36 dc.
Round 14: Working in back loops only, *2 dc in next st, 1 dc in each of next 11 sts; repeat from * 2 more times 39 dc.
Round 15: Working in back loops only, *2 dc in next st, 1 dc in each of next 12 sts; repeat from * 2 more times 42 dc.
Round 16: Working in back loops only, *2 dc in next st, 1 dc in each of next 13 sts; repeat from * 2 more times, then 1 hdc in next st, 1 sc in next st, slip st in next st 48 sts.
Do not fasten off.
Outer Layer of Tree
You will now be working into all the front loops left behind.
Round 1 (Outer layer): Turn, *ch 3, skip 2 sts, slip st into next front loop; repeat from * around.
Repeat this round until you have reached the top of the tree and worked the last front loop.
Next round (Outer layer): Turn, 3 sc in first ch space, sc into slip st, *(2 dc, Picot Stitch, 2 dc) in next ch space, sc in next slip st; repeat from * around.
Repeat this round until you have reached the bottom of the tree; sc in st after the last ch space.
Fasten off.
Star Tree Topper Make 2
With Color C, make an adjustable ring.
Round 1: Ch 1, 5 sc in adjustable ring, join to first sc. Pull the starting end tight to close the circle 5 sc.
Round 2: *Ch 3, turn; skip 1 ch, 1 sc in each of next 2 ch, slip st into next sc; repeat from * 4 more times.
Fasten off, leaving a 24-inch (61 cm) tail.
Garland
With Color B, ch 200.
Row 1: Slip st into 2nd ch from hook and in each ch across 199 slip sts.
Fasten off, leaving a 60-inch (152.5 cm) tail.
Christmas Ornaments Make 3 Each Using Colors C, D, E, and F
Make an adjustable ring.
Round 1: Ch 1, 6 sc in adjustable ring, join to first sc. Pull the starting end tight to close the circle.
Fasten off, leaving a 12-inch (30.5 cm) tail.
Finishing and Assembly
With a yarn needle and the long tail, join the front and back of the star together and attach it to the top of the tree.
Using the long yarn tail, attach the garland around the tree, sliding the needle and yarn through the garland between the branches.
Using the long yarn tails, attach the ornaments to the tree.
Weave in all loose ends.
Place the lid cover on top of the jar.
Ways to Display Your Finished Crochet
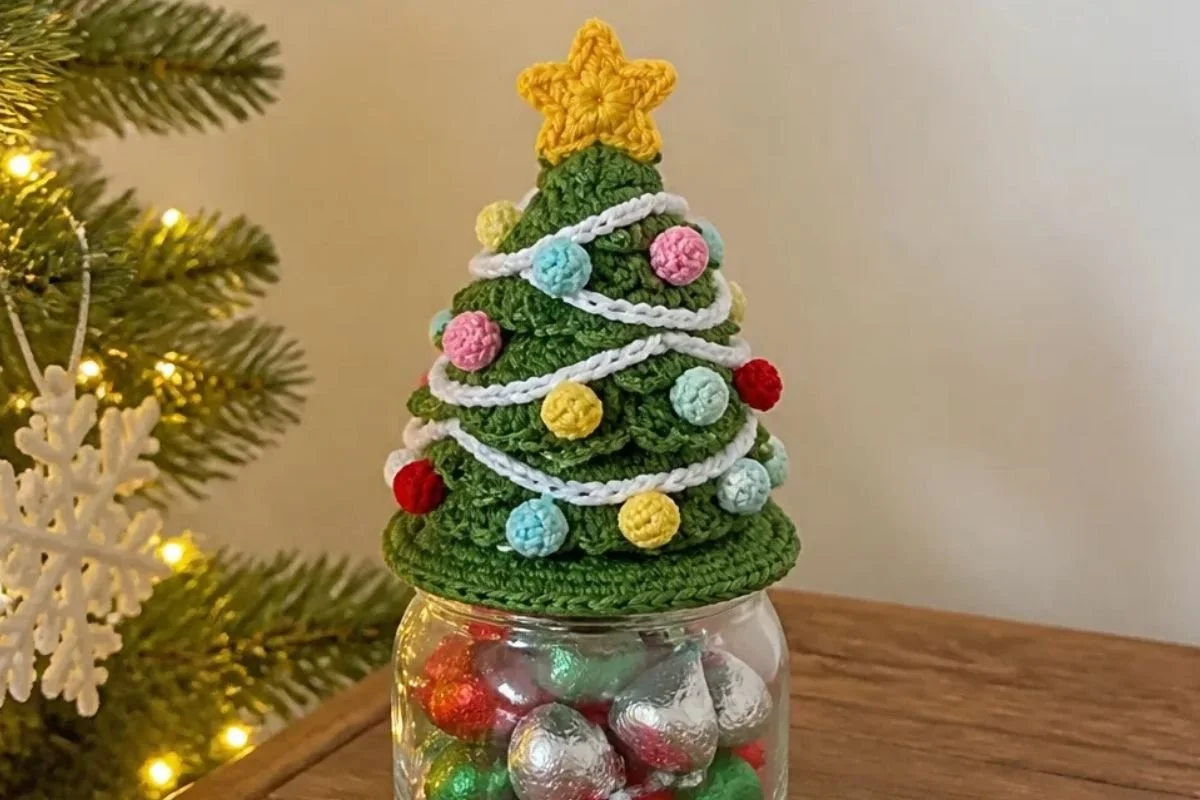
- Place the topped jar on a holiday mantel beside candles, greenery, or wrapped gifts.
- Use several jars with different ornament color combinations as a festive table centerpiece.
- Fill a jar with wrapped sweets or another small seasonal gift before adding the crochet lid cover.
- Display the topper with other handmade holiday pieces, such as a crocheted floral wreath, for a coordinated handmade arrangement.
- Make a set of jars in matching colors for place settings, party favors, or small gifts.
- Use the covered jar as a cheerful desk or entryway decoration during the winter season.
Caring for Your Crochet Project
Keep the finished topper dry and protect it from spills around the jar opening. Dust the tree gently with a soft, dry cloth or use light brushing around the branches, star, garland, and ornaments.
For a small mark, spot clean carefully rather than soaking the assembled piece. Avoid excessive heat, which may affect the yarn’s shape and the sewn attachments. Store the topper in a clean, dry container when not in use, with tissue or soft fabric around the tree to prevent the branches from being crushed.
Before storing, check that the star, garland, and ornaments remain securely attached. If the tree becomes flattened, reshape the branches gently by hand.
Tips for Better Results
- Check the working loop before every increase round. The tree base grows steadily, so a missed increase can affect the final shape.
- Work deliberately in back loops only. Through Round 16, placing stitches in the back loops leaves the front loops available for the outer layer.
- Mark the beginning of rounds if needed. A removable stitch marker can make it easier to track the round while maintaining the correct stitch count.
- Do not fasten off after Round 16. The working yarn is needed for the outer layer, so leave it attached as instructed.
- Keep the outer-layer chain spaces even. Similar chain tension helps the decorative branch rounds sit consistently around the tree.
- Leave the specified tails intact. The 24-inch star tails, 60-inch garland tail, and 12-inch ornament tails are needed for sewing and attachment.
- Arrange the small ornaments before stitching them permanently. This lets you balance the four colors around the tree.
- Weave in ends after checking the assembly. Confirm that the star, garland, and ornaments are secure before trimming or hiding the yarn tails.
Creative Ways to Customize Your Project
The approved instructions use Paddy Green for the tree, Soft White for the garland, Lemon for the stars, and four bright ornament shades. As optional styling choices, you can:
- Use a different color arrangement for the ornaments while keeping the same component quantities.
- Create a monochromatic tree with one ornament color repeated throughout.
- Choose a traditional palette of green, red, white, and gold-toned yellow.
- Coordinate the tree with another handmade accessory, such as small crochet appliqué details used on gift packaging or fabric decorations.
- Make several toppers with different garland colors for a varied holiday display.
These are optional color ideas only. If you substitute the yarn or change the hook size, the texture, shape, finished fit, and yarn requirements may change. The jar should be checked against the completed topper before making a larger set.
Frequently Asked Questions
Is this Christmas tree jar topper suitable for a beginner?
It includes beginner-friendly stitches such as single crochet, half double crochet, double crochet, chains, and slip stitches. The project also introduces adjustable rings, front-loop and back-loop placement, picot stitches, and sewn assembly, so beginners should work carefully through the stitch counts.
What yarn and hook does the pattern use?
The pattern uses RED HEART® Super Saver® with one skein each of the six listed colors and a Susan Bates® Crochet Hook 5.5 mm [US I-9].
How many pieces are made?
You make one tree, two star pieces, one garland, and three ornaments in each of four colors. That equals 18 ornaments total.
Why should I leave the yarn attached after Round 16?
The tree base continues into the outer layer. The front loops left behind during the back-loop rounds are used for the decorative chain spaces and branch-like edging.
Can I change the ornament colors?
Yes. Changing colors is an optional styling choice. Keep the approved quantities and construction if you want the same arrangement of components, and remember that different yarns may change the appearance or size.
How is the star attached?
The two star pieces are joined together with the long yarn tail left from the star, then the completed star is attached to the top of the tree.
How do I attach the garland?
Use its 60-inch tail and slide the needle and yarn through the garland between the branches as you wrap it around the tree.
How should I store the finished topper?
Store it in a dry place and protect the ruffled branches and small sewn pieces from crushing. Gentle dusting and careful spot cleaning are preferable to soaking the assembled decoration.
Conclusion
This crochet Christmas tree jar topper combines simple colorful pieces with dimensional shaping for a festive handmade decoration. The ruffled tree, star, garland, and ornaments can brighten a holiday table or turn a filled jar into a thoughtful gift. For another version of this seasonal project, compare it with the Free Easy Red Heart Christmas Tree Jar Topper Crochet Pattern.