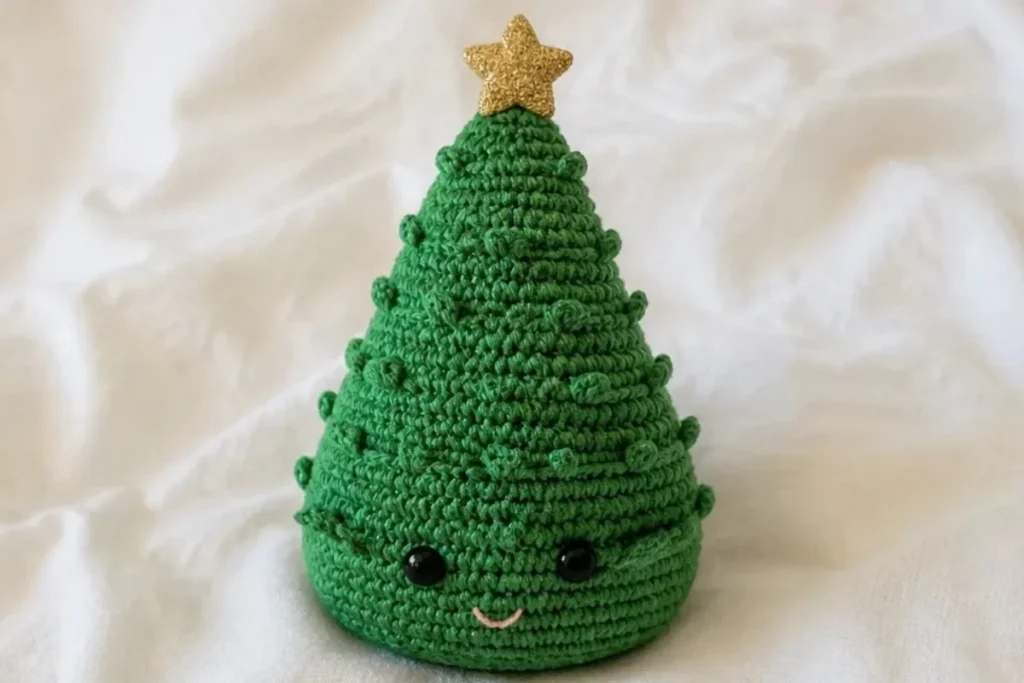
A small, cheerful amigurumi tree makes a wonderful holiday decoration, desk companion, or handmade gift. This Easy Crochet Christmas Tree Pattern for Beginners uses simple single crochet shaping, gradual decreases, and front-loop details to create layered tree needles. A weighted base helps it stand, while safety eyes, an embroidered smile, and a glitter star give it a friendly seasonal personality. Once you understand the construction, you can also explore other small handmade decorations, such as these crochet blooms for hair, for coordinating gifts and displays.
Why You’ll Love This Crochet Project
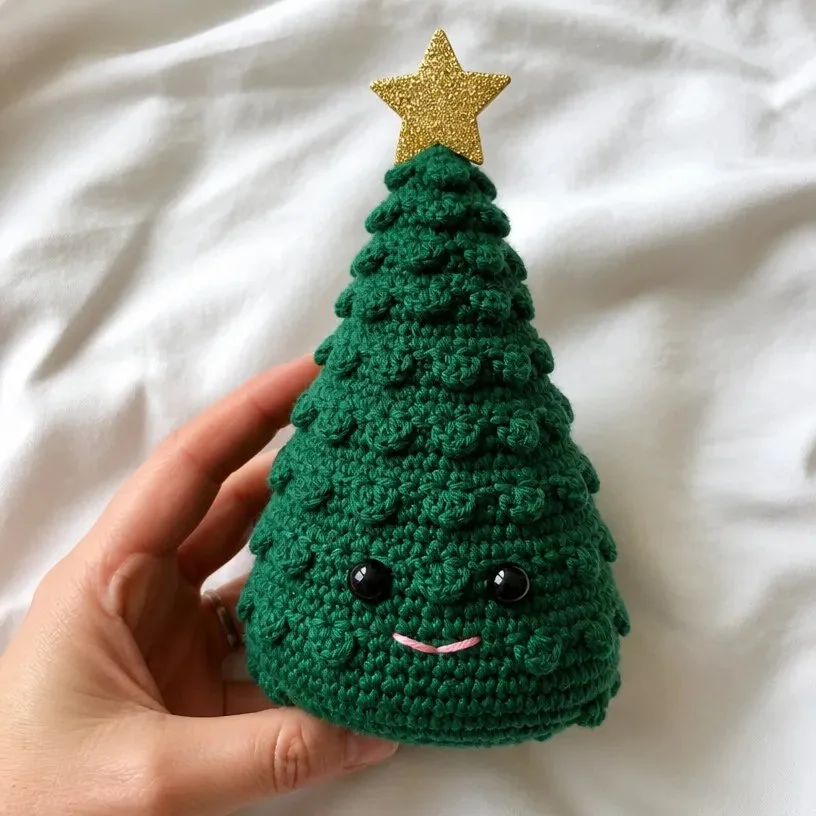
- Beginner-friendly shaping: The tree is formed with single crochet increases and decreases, making it useful practice for amigurumi construction.
- A stable display piece: Weighted stuffing placed inside a knee-high stocking gives the finished tree a sturdy base.
- A playful holiday character: Safety eyes, a pink embroidered smile, and a glitter star create a whimsical decoration.
- A compact handmade gift: The project is suitable for holiday swaps, stocking stuffers, craft fairs, and small seasonal displays.
- Decorative texture: The front-loop needle rounds form layered ridges that make the tree look full and dimensional.
My Crochet Flower Tip: Mark the beginning of every round and check the stitch count after each increase or decrease round. Consistent counting keeps the tree symmetrical.
Before You Start Crocheting
This project includes one crocheted tree, six rounds of crocheted tree needles, embroidered facial details, and a star topper. The tree is worked from the base upward in continuous rounds, so you do not join at the end of each regular round. A stitch marker identifies the beginning of the round.
The pattern begins with increases to create the base, continues with straight rounds for the sides, and then uses decreases to shape the pointed top. The tree needles are added afterward to the front loops left on selected rounds. Weighted stuffing is placed inside the toe of a knee-high stocking, and fiberfill is added as the tree progresses.
Useful abbreviations include:
- ch: chain
- sc: single crochet
- sl st: slip stitch
- sc2tog: single crochet two stitches together
- PM: place marker
- rem: remaining
Materials You’ll Need
- Red Heart® Amigurumi™ (3.5 oz/100 g; 239 yds/219 m), Santa (9962), only Green is used for this design: 1 ball
- Size U.S. B/1 (2.25 mm) crochet hook, or size needed to obtain gauge
- Stitch marker
- Fiberfill stuffing
- Two 6 mm safety eyes
- Small amount of pink embroidery floss for the mouth
- Knee-high stocking for weighted stuffing
- Weighted stuffing, such as aquarium gravel, plastic pellets, or rice
- Two 1½-inch [4 cm] self-stick glitter foam stars
- Toothpick for the star topper
Use the stocking to contain the weighted material so it remains enclosed inside the crocheted tree. Fiberfill fills the upper portion and helps the tree hold its shape.
Step-by-Step Crochet Instructions
Tree
Begin at the base of the Tree, ch 2.
- 1st rnd: 6 sc in 2nd ch from hook. Do not join. PM for beg of rnd. 6 sc.
- 2nd rnd: 2 sc in each of next 6 sc. 12 sc.
- 3rd rnd: (1 sc next sc. 2 sc in each of next sc) 6 times. 18 sc.
- 4th rnd: (1 sc in each of next 2 sc. 2 sc in next sc) 6 times. 24 sc.
- 5th rnd: (1 sc in each of next 3 sc. 2 sc in next sc) 6 times. 30 sc.
- 6th rnd: (1 sc in each of next 4 sc. 2 sc in next sc) 6 times. 36 sc.
- 7th rnd: (1 sc in each of next 5 sc. 2 sc in next sc) 6 times. 42 sc.
- 8th rnd: (1 sc in each of next 8 sc. 2 sc in next sct) 6 times. 48 sc.
The stitch text “sct” is preserved as supplied.
- 9th rnd Bottom ridge: Working in back loops only, 1 sc in each sc around. Continue to the next section as written.
Sides
- 10th to 12th rnds: Working in both loops, 1 sc in each sc around.
- 13th rnd: Working in back loops only, 1 sc in each sc around.
- 14th rnd: As 10th rnd.
- 15th rnd: (Sc2tog. 1 sc in each of next 14 sts) 3 times. 45 sts.
- 16th rnd: As 10th rnd.
- 17th rnd: As 13th rnd.
- 18th rnd: (Sc2tog. 1 sc in each of next 13 sts) 3 times. 42 sts.
- 19th rnd: As 10th rnd.
- 20th rnd: (Sc2tog. 1 sc in each of next 12 sts) 3 times. 39 sts.
- 21st rnd: As 13th rnd.
- 22nd rnd: As 10th rnd.
Attach Safety Eyes and Add Stuffing
Attach safety eyes between the 21st and 22nd rnds, approximately 9 sts apart.
Stuff with weighted stuffing placed in the toe of a knee-high stocking. Start stuffing the piece firmly. Continue stuffing the piece as work progresses.
- 23rd rnd: (Sc2tog. 1 sc in each of next 11 sts) 3 times. 36 sts.
- 24th rnd: As 10th rnd.
- 25th rnd: As 13th rnd.
- 26th rnd: (Sc2tog. 1 sc in each of next 4 sts) 6 times. 30 sts.
- 27th rnd: As 10th rnd.
- 28th rnd: (Sc2tog. 1 sc in each of next 3 sts) 6 times. 24 sts.
- 29th rnd: As 13th rnd.
- 30th rnd: (Sc2tog. 1 sc in each of next 2 sts) 6 times. 18 sts.
- 31st rnd: As 10th rnd.
- 32nd rnd: (Sc2tog. 1 sc in next st) 6 times. 12 sts.
- 33rd rnd: As 13th rnd.
- 34th rnd: (Sc2tog. 1 sc in next st) 4 times. 8 sts.
Finish stuffing the piece.
- 35th rnd: 1 sc in each st around.
Fasten off, leaving a long end. Thread through rem sts. Pull tightly. Fasten securely.
Tree Needles
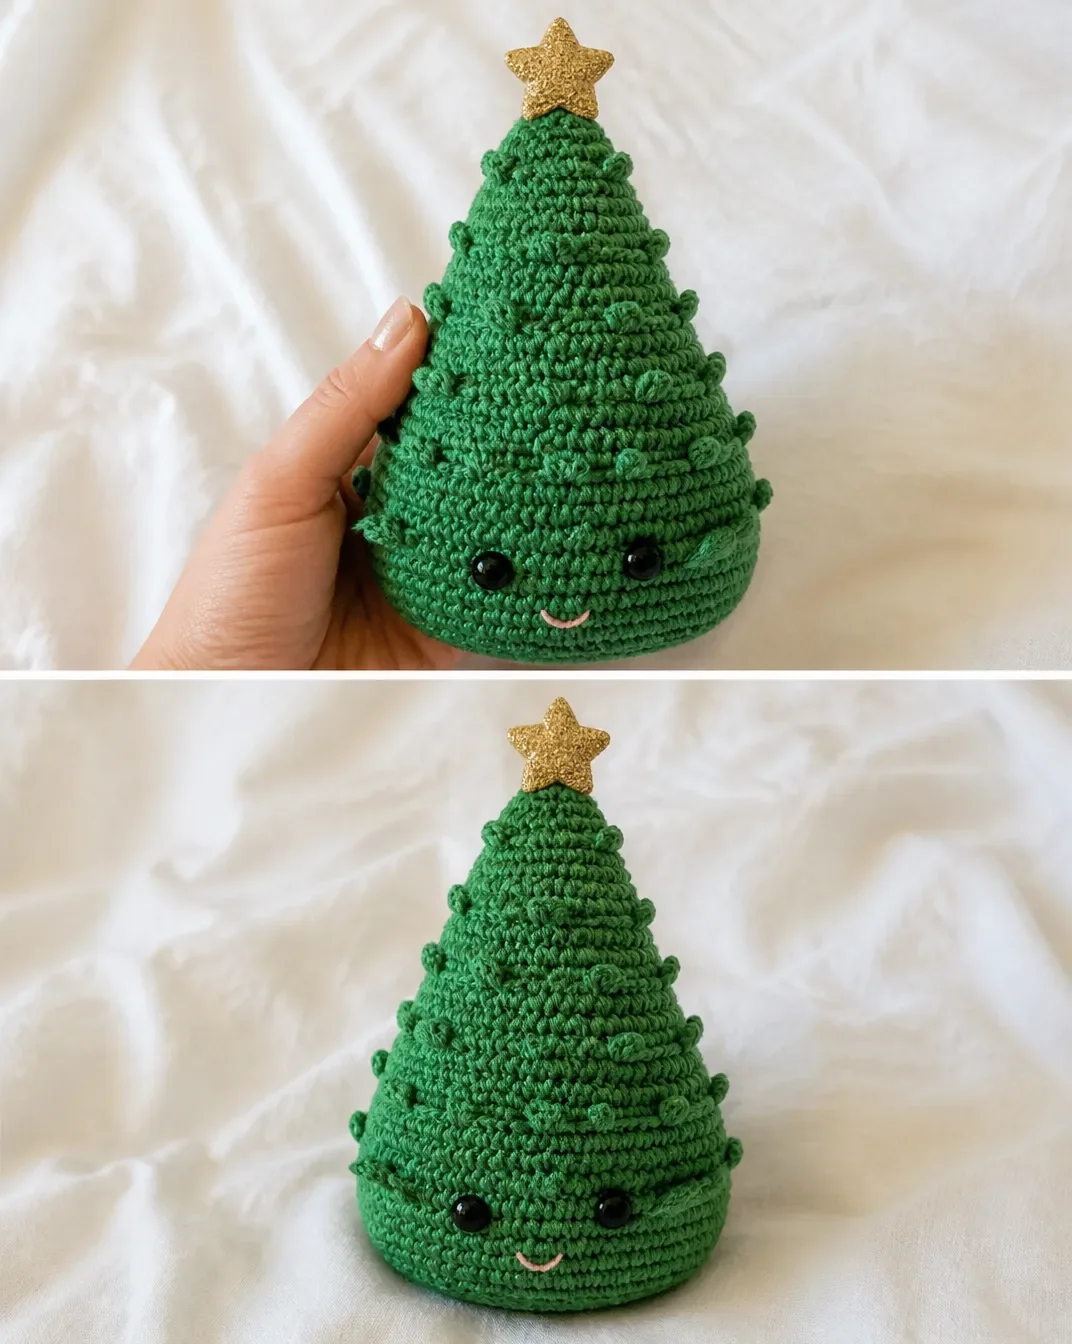
The needles are worked into the front loops only of the 13th, 17th, 21st, 25th, 29th, and 33rd rnds.
1st rnd: With tree tip facing down, join yarn with sl st to any front loop of 13th rnd.
Ch 3. Sl st in front loop of next st.
Rep from * around, working last sl st in same sp as first sl st. Fasten off.2nd rnd: With tree tip facing down, join yarn with sl st to any front loop of 17th rnd.
Rep as given for 1st rnd.Note: In the 21st row, needles are not worked on the “face” of the tree, just along the sides and back.
3rd rnd: Join yarn with sl st in front loop of second st from outside edge of one eye of 21st rnd. Working around side and back of tree toward the other eye,
Ch 3. Sl st in front loop of next st.
Rep from * to 1 front loop before second eye. Fasten off.4th, 5th, and 6th rnds: With tree tip facing down, join yarn with sl st to any front loop of corresponding 25th, 29th, and 33rd rnds.
Rep as given for 1st rnd.
Finishing
Smile
Separate 4 of 6 strands from the pink embroidery floss. Embroider a small upturned arc spanning 5 sts for the mouth.
Star Topper
With glue-side up, place one end of the toothpick in the middle of one star. Place the second star glue-side down on the glue-side of the first star. Press firmly to ensure the bond.
Stick the toothpick of the star topper down into the top of the tree.
Creative Ways to Use Your Project
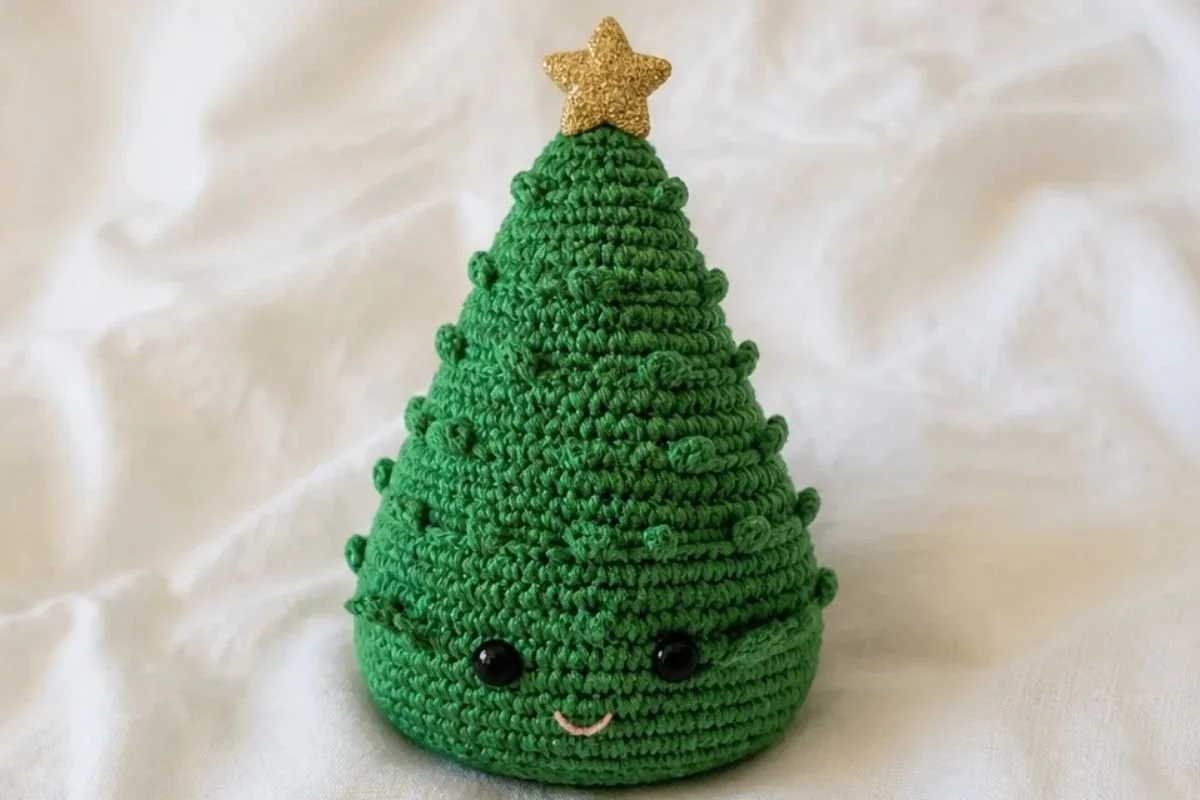
- Holiday mantel display: Place the tree beside candles, garlands, or other seasonal decorations.
- Table centerpiece: Arrange one or more crocheted trees on a tray with ornaments and greenery.
- Small handmade gift: Give the finished tree as a cheerful hostess gift or holiday exchange present.
- Desk decoration: Its weighted base makes it practical for a work area, shelf, or craft room.
- Seasonal grouping: Display trees in different shades of green if you make additional versions with suitable yarn substitutions.
- Gift wrapping accent: Use the tree as a reusable decorative element alongside a wrapped present.
Caring for Your Crochet Project
Dust the tree gently with a soft brush, microfiber cloth, or low-suction vacuum attachment. Take care around the safety eyes, embroidered mouth, foam stars, and toothpick topper.
For small marks, use careful spot cleaning with a slightly damp cloth and allow the piece to air-dry completely. Avoid soaking the stuffed and weighted tree, as moisture may remain inside the filling and stocking.
Keep the tree away from excessive heat, open flames, and prolonged direct sunlight. Store it upright or in a protective box when not in use, and avoid placing heavy objects on the pointed top or star.
Tips for Better Results
- Use the stitch marker consistently. This is a continuous-round pattern, so the marker prevents the round beginning from drifting.
- Count after shaping rounds. Confirm the stated counts after increases and decreases, especially at rounds 15, 18, 20, 23, 26, 28, 30, 32, and 34.
- Watch the loop placement. The bottom ridge and selected shaping rounds use back loops only, while the tree needles use front loops only.
- Keep the stuffing firm but flexible. Add weighted stuffing first, then continue with fiberfill so the tree stands without becoming lumpy.
- Position the eyes before the opening becomes narrow. The pattern places them between the 21st and 22nd rounds, approximately 9 stitches apart.
- Identify the tree’s face before adding needles. The 21st-round needles intentionally skip the face and continue along the sides and back.
- Secure the finishing yarn carefully. Thread through the remaining stitches, pull tightly, and fasten securely to close the top.
- Press the two stars firmly together. A strong bond helps keep the topper attached to the toothpick.
For another decorative crochet direction, a dimensional motif such as this 3D flower granny square pattern can inspire coordinating seasonal colors without changing this tree’s approved instructions.
Color and Styling Variations
These are optional ideas and do not change the approved pattern.
- Use a different green: A suitable substitute may alter the tree’s texture, size, drape, and yarn requirements, so compare the yarn weight and obtain gauge with the recommended hook size.
- Try a winter palette: White, cream, or pale blue yarn can create a snowy or frosted appearance, though the facial and topper details will remain the same.
- Change the star color: Gold, silver, or red glitter foam can coordinate the tree with another holiday display.
- Make a coordinated group: Use different approved yarn colors for multiple trees, keeping the same construction and weighted stuffing method.
- Adjust the expression: The mouth can remain the supplied five-stitch upturned arc, or its placement can be varied slightly for a different character while keeping the safety-eye spacing unchanged.
- Coordinate with handmade florals: Pair the tree with seasonal crochet decorations or a wrapped handmade bouquet; a crochet bouquet wrap offers another way to present handcrafted arrangements.
Frequently Asked Questions
Is this crochet Christmas tree pattern beginner-friendly?
Yes. The main body uses single crochet, increases, decreases, continuous rounds, and simple front-loop details. Careful stitch counting is important, but the construction is straightforward.
What yarn is recommended?
The pattern specifies Red Heart® Amigurumi™ in Santa (9962), using only Green for this design, with 1 ball required.
What crochet hook should I use?
Use a U.S. B/1 (2.25 mm) crochet hook, or the size needed to obtain gauge.
How many crocheted components does the project include?
The project has one crocheted tree body and six rounds of tree needles worked into selected front loops. The smile and star topper are added during finishing.
Where do the safety eyes go?
Attach the two 6 mm safety eyes between the 21st and 22nd rounds, approximately 9 stitches apart.
How does the tree stand upright?
Weighted stuffing is placed inside the toe of a knee-high stocking and added to the tree before fiberfill. This creates weight at the base.
Can I use a different yarn?
You can make an optional substitution, but a different yarn may change gauge, finished size, texture, shape, and the amount of yarn required. Use the hook size needed to obtain gauge.
How should I clean the finished tree?
Dust it gently and spot-clean carefully when needed. Avoid soaking because the tree contains weighted stuffing, fiberfill, safety eyes, foam stars, and a toothpick topper.
Conclusion
This easy crochet Christmas tree combines simple amigurumi shaping with cheerful finishing details, making it an inviting seasonal project for beginners. Its weighted base helps it stand, while the layered needles and glitter star add dimension. Display it on a shelf, give it as a handmade gift, or customize the colors for your holiday décor. For another version of the same seasonal idea, see this easy crochet Christmas tree pattern.