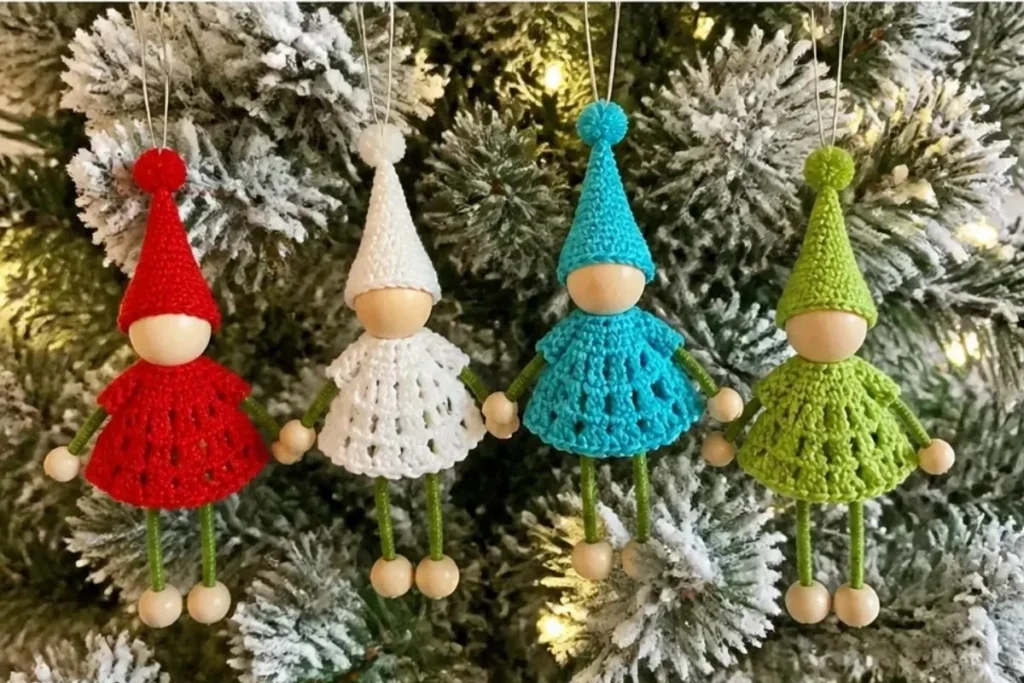
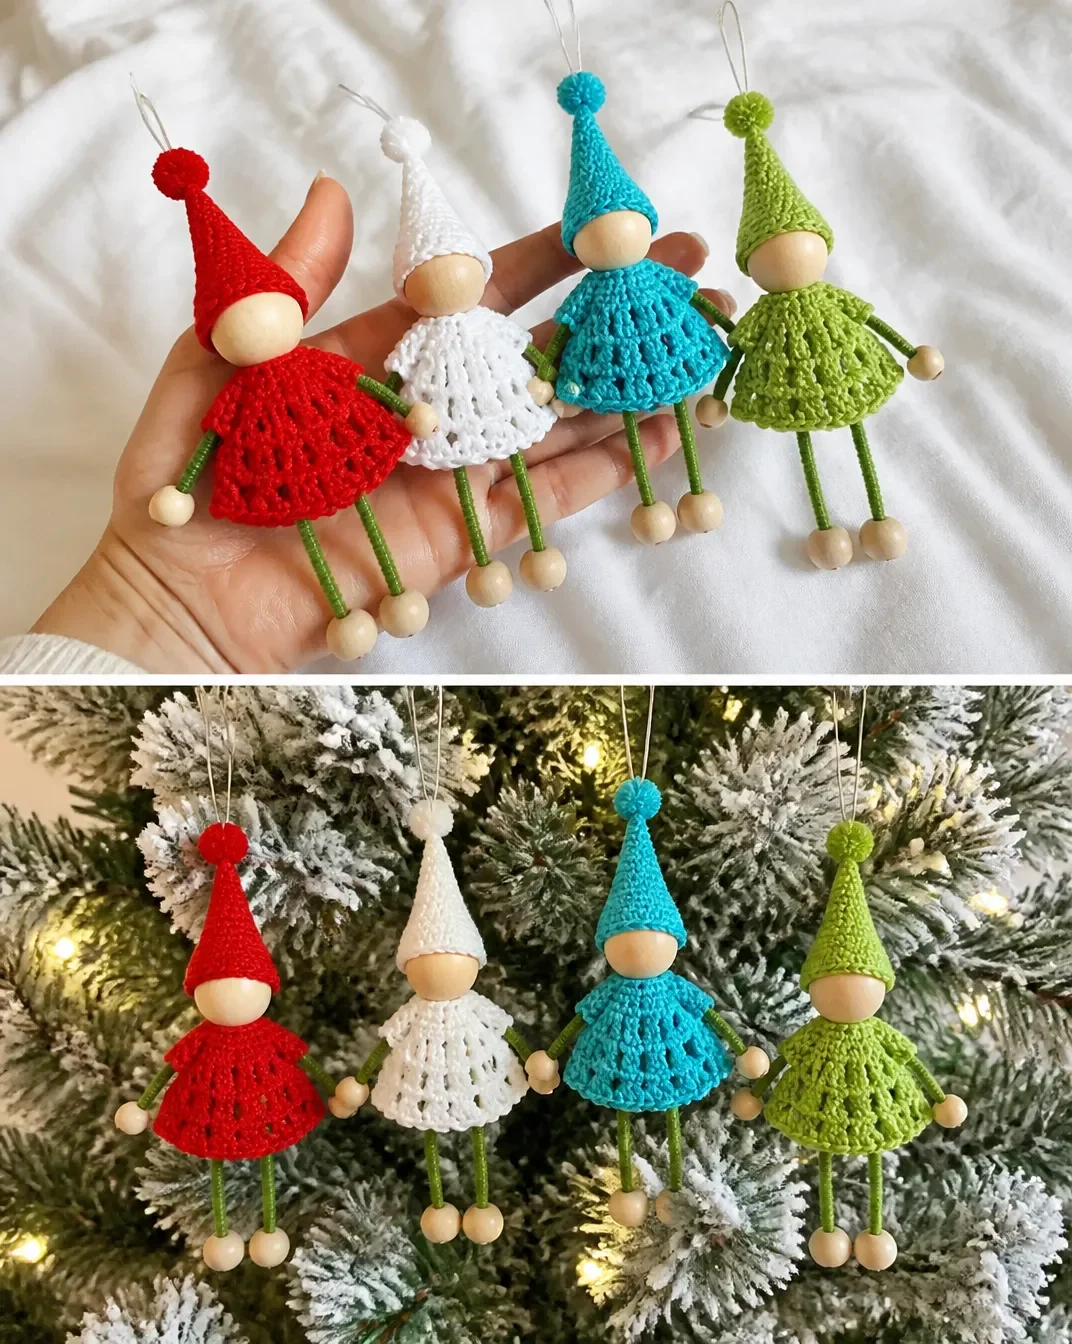
A Crochet Tree Elves Pattern by Aunt Lydia creates colorful, whimsical ornaments with crocheted tops, pointed hats, wooden heads, and pipe-cleaner limbs. These little elves can decorate a Christmas tree, bottle, gift box, or seasonal display, making them useful for handmade gifts and holiday decorating. The pattern is especially appealing to crocheters who enjoy small projects, clear shaping, and playful assembly. For another delicate Aunt Lydia’s thread idea, compare the floral details in this crochet rose earrings pattern.
Why You’ll Love This Crochet Project
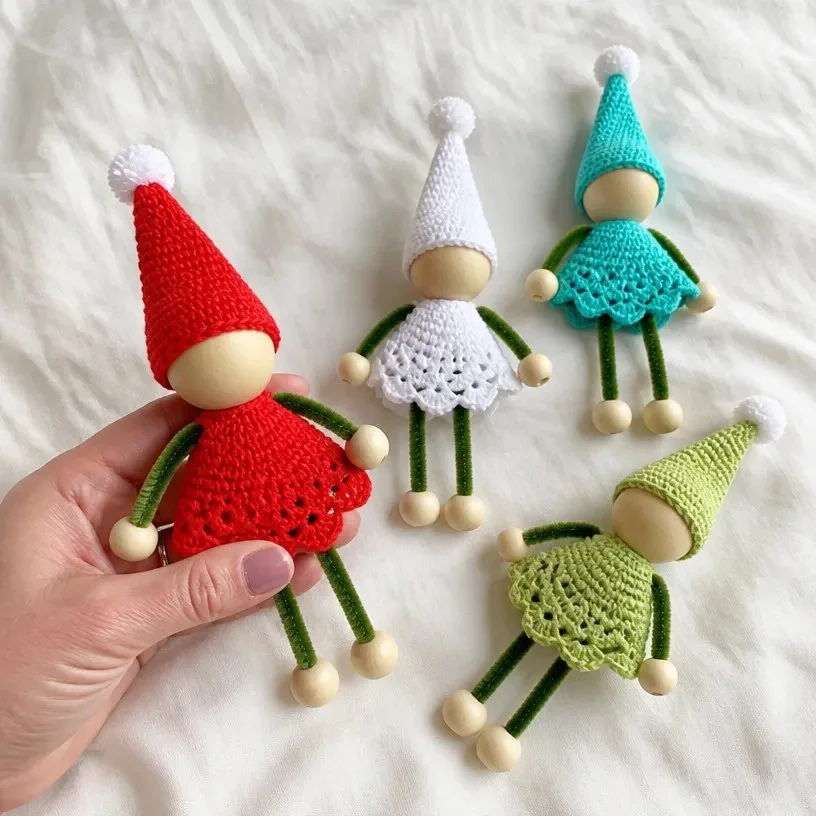
- Festive and versatile: Finished elves can hang from a Christmas tree or brighten a bottle or gift box.
- Colorful production: White, Atom Red, Wasabi, and Aqua let you create coordinated elf decorations or a cheerful multicolor collection.
- Useful shaping practice: The top uses expanding double-crochet rounds, while the hat introduces controlled single-crochet decreases.
- Good for multiples: One ball of each listed color will make approximately 10 elves, making this pattern practical for sets and gift giving.
- Creative assembly: Wooden balls, pipe cleaners, and a pom-pom turn simple crocheted pieces into dimensional decorations.
My Crochet Flower Tip: Sort the wooden balls and cut all pipe-cleaner pieces before beginning several elves. Preparing the components together makes assembly faster and helps keep every elf consistent.
Before You Start Crocheting
Each elf includes two crocheted components: one circular Elf’s Top and one tapered Elf’s Hat. The top is worked in joined rounds with a magic loop and increases from 12 to 60 double crochet stitches. The hat is worked flat in rows, decreasing at both ends until only one stitch remains.
After crocheting, the pipe-cleaner body, arms, and legs are assembled with one medium wooden ball for the head and four small wooden balls for the hands and feet. The hat is sewn, finished with a pom-pom, and glued to the head. An ornament hook makes the completed elf ready to hang.
The pattern uses two hook sizes: a U.S. B/1 (2.25 mm) hook for the top and a U.S. 7 (1.5 mm) steel hook for the hat, or the size needed to obtain gauge. If the head ball differs significantly from the specified size, the hat size may need adjustment.
Helpful Abbreviations
- ch: chain
- dc: double crochet
- sc: single crochet
- sc2tog: single crochet two stitches together
- sl st: slip stitch
- PM: place marker
- rep: repeat
- rnd: round
Materials You’ll Need
- Aunt Lydia’s® Classic™ Crochet Thread size 10:
- White: 400 yds / 366 m Elf 1: 1 ball
- Atom Red (2160): 350 yds / 320 m Elf 2: 1 ball
- Wasabi (0397): 350 yds / 320 m Elf 3: 1 ball
- Aqua (0450): 350 yds / 320 m Elf 4: 1 ball
- One ball of each color will make approximately 10 elves.
- U.S. B/1 (2.25 mm) Susan Bates® Silvalume® crochet hook for Elf’s Top
- U.S. 7 (1.5 mm) Susan Bates® Steelite® crochet hook for Elf’s Hat, or size needed to obtain gauge
- Pipe cleaner: per elf, 12″ [30.5 cm] long
- One medium wooden ball for the head: 2¼” [5.5 cm] diameter
- Four small wooden balls for the hands and feet
- Small purchased pom-pom
- Hot glue gun
The designer notes that an assorted bag of wooden balls can work well: a smaller ball may be used for the hands and a slightly larger one for the feet. If the head ball is significantly different in size, the hat size may need to be adjusted.
These decorations contain small parts and are not suitable for children under 8 years of age.
Step-by-Step Crochet Instructions
Elf’s Top
With U.S. B/1 (2.25 mm) crochet hook, make Magic Loop.
Rounds
1st rnd: Ch 3. 11 dc in magic loop. Join. PM on top of first dc for beg of rnd. 12 dc.
2nd rnd: Ch 3. 1 dc in same sp as sl st. 2 dc in each dc around. Join. 24 dc.
3rd rnd: Ch 3. 1 dc in same sp as sl st. 1 dc in next dc. *2 dc in next dc. 1 dc in next dc. Rep from * around. Join. 36 dc.
4th rnd: Ch 3. 1 dc in same sp as sl st. 1 dc in each of next 2 dc. *2 dc in next dc. 1 dc in each of next 2 dc. Rep from * around. Join. 48 dc.
5th rnd: Ch 3. 1 dc in same sp as sl st. 1 dc in each of next 3 dc. *2 dc in next dc. 1 dc in each of next 3 dc. Rep from * around. Join. 60 dc.
6th rnd: Ch 5 (counts as ch 2 and 1 dc). 1 dc in same sp as sl st. *Skip next dc. (1 dc. Ch 2. 1 dc) in next dc. Rep from * around. Skip last dc. Join with sl st to 3rd ch of ch-5. Fasten off.
Elf’s Hat
With U.S. 7 (1.5 mm) crochet hook, ch 23.
Rows
1st row: 1 sc in 2nd ch from hook and each ch to end of chain. Turn. 22 sc.
2nd row: Ch 1. Sc2tog. 1 sc in each sc to last 2 sts. Sc2tog. Turn. 20 sts.
Rep last row until 4 sts rem.
Next row: Ch 1. (Sc2tog) twice. Turn.
Next row: Ch 1. Sc2tog. Fasten off. Weave in ends.
Finishing and Assembly
Cut the pipe cleaner as follows:
- 3″ [7.5 cm] for Body
- 4″ [10 cm] for Arms
- 5″ [12.5 cm] for Legs
- Fold Leg pipe cleaner in half.
- Fold up the lower end of the Body pipe cleaner approx ½” [3 mm] to form an “U”.
- Place Legs in the “U” and twist closed.
- Insert top of Body through hole in the center of Elf’s Top and push Elf’s Top down approx 1½” [4 cm].
- Place Head wooden ball on top of Body pipe cleaner. Twist Body pipe cleaner end at top of wooden ball in a knot. Make sure it does not pull back through the hole.
- Fold Arm pipe cleaner in half and wrap it around Body pipe cleaner approx ½” [3 mm] below Elf’s Top.
- Slide Feet wooden balls onto Leg pipe cleaner and secure end. Rep for 2nd leg.
- Insert the arm through V-stitch edge of Elf’s Top and attach hand wooden ball to Arm pipe cleaner. Secure end. Rep for 2nd Arm.
- Sew back hat seam. Attach pom-pom to tip of Hat.
- Glue Hat to Head wooden ball, keeping seam at back.
- Insert an ornament hook through 2 sts at top of Hat to hang Tree Elf on Christmas Tree or on bottle or gift box.
Ways to Display Your Finished Crochet
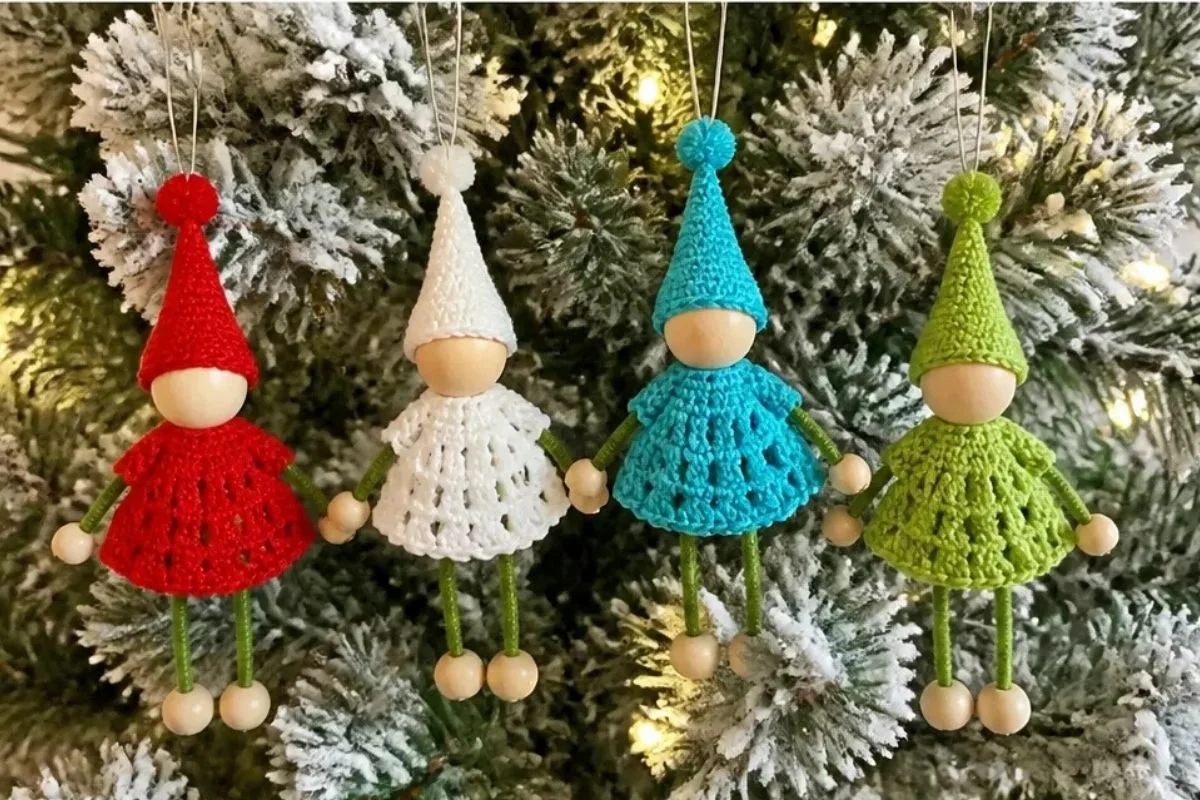
- Christmas tree ornaments: Use different top and hat colors to create a coordinated elf family across the tree.
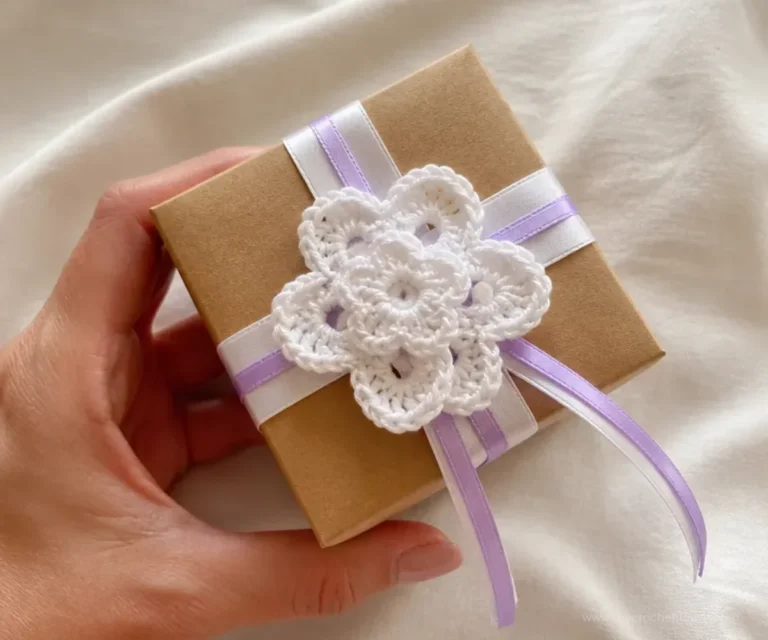
- Gift decorations: Hang an elf from a wrapped gift box for a reusable handmade embellishment.
- Bottle accents: The ornament hook allows the elf to decorate a bottle during a holiday meal or celebration.
- Seasonal centerpiece: Arrange several elves around a bowl, tray, or tabletop display with other winter decorations.
- Handmade gift sets: Make approximately 10 elves from one ball of each color and package them as a matching ornament collection.
- Color-themed décor: Use white for a snowy look, red for a traditional holiday palette, or Wasabi and Aqua for a brighter contemporary display.
A playful seasonal display can also pair well with other small handmade decorations, such as a floral holiday arrangement or a dimensional motif inspired by this 3D flower granny square pattern.
Caring for Your Crochet Project
Dust the finished elf gently with a soft, dry cloth or a clean, soft brush. Pay particular attention to the hat, pom-pom, and open stitches along the top.
Because the decoration contains wooden balls, pipe cleaners, hot glue, and a purchased pom-pom, avoid soaking, machine washing, and harsh cleaning products. For a small mark, use minimal moisture on a cloth and spot-clean the crocheted thread carefully, keeping the wooden and glued components as dry as possible.
Store the elf in a dry container away from excessive heat and direct sunlight. Heat may soften the glue, distort the crocheted top, or affect the pom-pom. Keep the decoration away from young children because it contains small parts.
Tips for Better Results
- Mark the beginning of the top rounds. The pattern uses joined rounds, so a stitch marker on top of the first double crochet helps you identify where each round begins.
- Count every increase. The top should finish with 12 dc after Round 1, then 24, 36, 48, and 60 dc. These counts confirm that the circular shaping is progressing correctly.
- Keep the magic loop closed. Pull the center snug after working the first round, but avoid tightening it so aggressively that the stitches become difficult to join.
- Use the smaller hook for the hat. The U.S. 7 (1.5 mm) steel hook creates the small, firm fabric needed for the tapered hat.
- Track both hat decreases. On the second row and each repeat of that row, work one sc2tog at each end. This keeps the hat symmetrical.
- Check the head before gluing. Position the sewn hat on the wooden ball first, keeping the seam at the back, so you can confirm its placement before applying hot glue.
- Secure pipe-cleaner ends carefully. Twist or secure the ends so the wooden hands and feet cannot slide off, and keep sharp wire ends covered within the assembly.
- Insert the ornament hook through two stitches. This gives the hanging point more stability than catching a single stitch.
For a larger seasonal handmade display, the finished elves can complement other botanical decorations, including an April flowers crochet wreath.
Creative Ways to Customize Your Project
These are optional styling ideas and do not change the approved pattern instructions:
- Rotate the supplied colors: Make the tops white with colorful hats, or pair Atom Red, Wasabi, and Aqua in alternating sets.
- Create matching groups: Use one top color for a uniform collection, then vary only the hat colors.
- Coordinate with gift wrap: Choose the thread color that matches ribbons, wrapping paper, or a holiday table setting.
- Make a winter palette: White and Aqua can create a cool, snowy appearance, while Atom Red adds a traditional accent.
- Use carefully selected substitutions: Changing thread or hook size can affect gauge, finished proportions, texture, and yarn requirements. If you use another yarn, the wooden-ball and hat fit may also change.
- Adjust the head-ball choice thoughtfully: A significantly different head-ball size may require an adjustment to the hat size, as noted by the designer.
Frequently Asked Questions
Is this pattern suitable for beginners?
It can suit beginners who are comfortable with a magic loop, joined double-crochet rounds, single crochet, and sc2tog decreases. The assembly also involves pipe cleaners, wooden balls, sewing, and hot glue.
What yarn is recommended?
The pattern specifies Aunt Lydia’s® Classic™ Crochet Thread size 10 in White, Atom Red (2160), Wasabi (0397), and Aqua (0450), with one ball of each listed color. One ball of each color will make approximately 10 elves.
Which hook is used for the top?
Use a U.S. B/1 (2.25 mm) Susan Bates® Silvalume® crochet hook for Elf’s Top.
Which hook is used for the hat?
Use a U.S. 7 (1.5 mm) Susan Bates® Steelite® crochet hook for Elf’s Hat, or the size needed to obtain gauge.
How many wooden balls are needed for one elf?
Use one medium wooden ball measuring 2¼” [5.5 cm] in diameter for the head and four small wooden balls for the hands and feet.
Can the colors be changed?
Yes. Color changes are an optional styling choice, but use the same thread type and hook sizes when possible to preserve the intended proportions. Changing yarn or hook size may affect gauge, texture, dimensions, and yarn requirements.
How is the elf hung?
Insert an ornament hook through 2 sts at the top of the Hat. The finished elf may be hung on a Christmas tree, bottle, or gift box.
How should the finished elf be cleaned?
Dust it gently and spot-clean cautiously. Do not soak or machine wash because the decoration includes wooden balls, pipe cleaners, hot glue, and a purchased pom-pom.
Conclusion
This Crochet Tree Elves Pattern by Aunt Lydia combines simple thread crochet with playful three-dimensional assembly. Make one elf as a gift accent or create a colorful group for the Christmas tree, bottles, and wrapped packages. For more classic thread décor ideas to pair with your seasonal projects, browse these Classic Crochet Thread décor patterns.