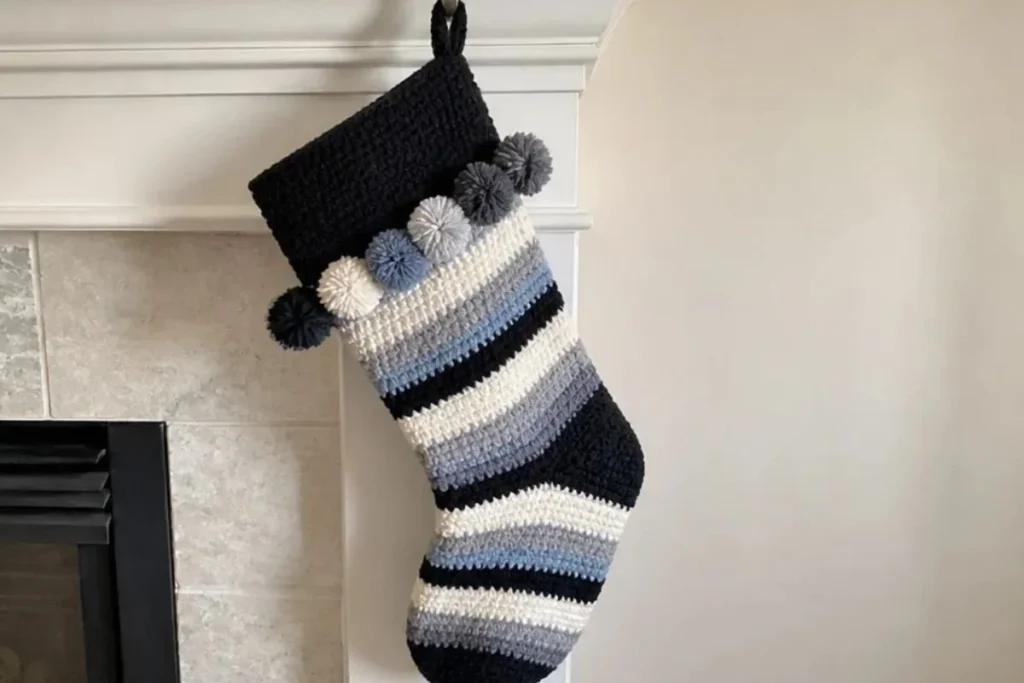
The Kitsch Striped Stocking Crochet Pattern combines bold color blocks, simple single crochet, and a playful pom-pom trim to create a cheerful holiday decoration. Its classic stocking shape works beautifully on a mantel, wall hook, or gift-giving display, while the color options make it easy to coordinate with your seasonal decor. Crocheters who enjoy practical projects, striped designs, and clear shaping will appreciate this pattern. For another colorful handmade idea, explore this 3D flower granny square color chart for inspiration.
Why You’ll Love This Crochet Project
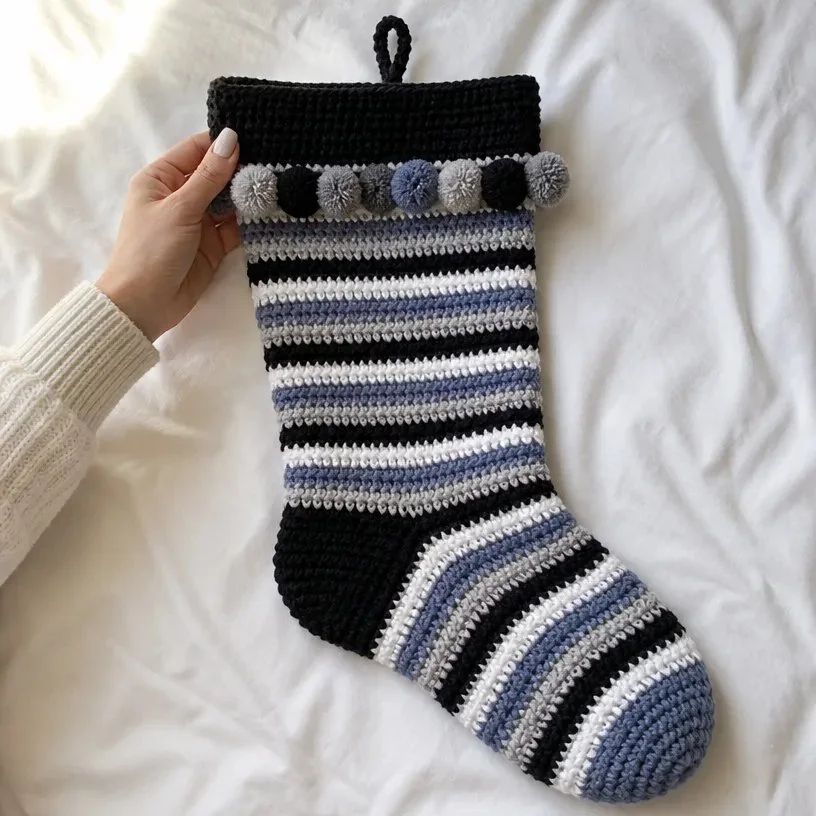
- The stripes create strong visual interest. The Leg Stripe Pat and Foot Stripe Pat use alternating colors and varied stripe widths for a kitschy, retro-inspired appearance.
- The construction teaches useful techniques. You will practice working a ribbed-looking cuff in back loops only, crocheting evenly around an edge, joining rounds, shaping a heel, and decreasing for a toe.
- It makes a thoughtful handmade gift. A finished stocking can be personalized with a color combination chosen for a family member, friend, or holiday decorating theme.
- The pom-pom trim adds character. Nine handmade pom-poms give the cuff a soft, festive border without requiring complicated stitches.
- The color choices are flexible. Seven O’Go contrast versions are provided, ranging from black and newsprint to cherry and jewel tones.
My Crochet Flower Tip: Keep your two colorways separated before beginning. Since the pattern changes colors frequently, placing each O’Go where it is easy to reach will make the stripe sequence much smoother.
Before You Start Crocheting
This project is worked as one stocking, beginning with a long, narrow cuff. The cuff is joined into a ring, then the leg is crocheted around its side edge. After the striped leg, the heel is worked back and forth, shaped, and fastened off. The foot is then rejoined around the heel and instep, followed by decreases that form the toe.
The finishing stage includes a crocheted hanging loop and nine pom-poms. The stocking uses single crochet throughout, with single crochet two together, written as sc2tog, for shaping. “RS” means right side, “WS” means wrong side, “rnd” means round, “sl st” means slip stitch, and “PM” means place marker.
The supplied instructions specify a 14″ [35.5 cm] cuff, a 2″ [5 cm] heel section, and a 1½” [4 cm] cardboard piece for making the pom-poms. The leg stripe sequence contains 31 rounds, and the foot stripe sequence contains 20 rounds.
Materials You’ll Need
Yarn
Use Red Heart® Super Saver® O’Go™ in one of the following contrast versions. Each version uses 1 O’Go of Contrast A and 1 O’Go of Contrast B.
- Version 1: Contrast A Black (07120), 1 O’Go; Contrast B Newsprint (07124), 1 O’Go
- Version 2: Contrast A Cherry (07190), 1 O’Go; Contrast B Jeweltone (07195), 1 O’Go
- Version 3: Contrast A White (07100), 1 O’Go; Contrast B Baby Rainbow (07175), 1 O’Go
- Version 4: Contrast A Gold (07160), 1 O’Go; Contrast B Peacock (07155), 1 O’Go
- Version 5: Contrast A Soft Navy (07180), 1 O’Go; Contrast B Christmas (07196), 1 O’Go
- Version 6: Contrast A Dusty Gray (07140), 1 O’Go; Contrast B Rainbow (07192), 1 O’Go
- Version 7: Contrast A Café Latte (07130), 1 O’Go; Contrast B Forest (07136), 1 O’Go
The listed yarn specifications are:
- Solids: 7 oz / 198 g; 364 yds / 333 m
- Stripes: 5 oz / 141 g; 236 yds / 215 m
Other supplies
- Stitch marker
- Yarn needle
- 1½” [4 cm] piece of cardboard for pom-poms
Step-by-Step Crochet Instructions
Before beginning, designate the two selected colors as A and B. Follow the stripe sequences exactly so the color changes remain consistent between the leg and foot.
Stripe patterns
Leg Stripe Pat
With B, work 2 rnds.
With A, work 2 rnds.
Rep from ** to ** twice more.
With B, work 6 rnds.
With A, work 2 rnds.
With B, work 2 rnds.***
Rep from *** to *** once more.
With A, work 2 rnds.
With B, work 3 rnds.
These 31 rnds form Leg Stripe Pat.
Foot Stripe Pat
With B, work 3 rnds. Join A.
With A, work 2 rnds.
With B, work 2 rnds.
Rep from ** to ** once more.
With A, work 2 rnds.
With B, work 6 rnds.
With A, work 1 rnd.
These 20 rnds form Foot Stripe Pat.
Stocking cuff
With A, ch 11.
- 1st row (RS): 1 sc in 2nd ch from hook. 1 sc in each ch to end of chain. Turn. 10 sc.
- 2nd row: Ch 1. Working in back loops only, 1 sc in each sc to end of row. Turn.
- Rep 2nd row until work from beg measures 14″ [35.5 cm], ending on a WS row. Do not fasten off.
- Proceed as follows.
Join Cuff
Working in back loops only, sl st last row and rem loops of foundation ch tog. Do not turn.
Leg
Rotate to work along side edge of Cuff and proceed as follows:
- 1st rnd: Ch 1. Work 46 sc evenly around side edge of Cuff. Join with sl st to first sc. Join B. Turn. Beg working Leg Stripe Pat.
- 2nd rnd: With B, ch 1. 1 sc in each sc around. Join.
- 3rd to 32nd rnds: Keeping cont of Leg Stripe Pat, ch 1. 1 sc in each sc around. Join.
Leg Stripe Pat is complete.
Heel
- 1st row (RS): With A, ch 1. 1 sc in same sp as last sl st. 1 sc in each of next 22 sc. Turn. Leave rem sts unworked. 23 sc.
- 2nd row: Ch 1. 1 sc in each sc to end of row. Turn.
- Rep 2nd row for 2″ [5 cm], ending on a WS row.
Shape Heel
- 1st row (RS): Ch 1. 1 sc in each of next 15 sc. Sc2tog. 1 sc in next sc. Turn. Leave rem sts unworked. 17 sts.
- 2nd row: Ch 1. 1 sc in each of first 9 sts. Sc2tog. 1 sc in next sc. Turn. 11 sts.
- 3rd row: Ch 1. 1 sc in each of first 10 sts. Sc2tog. 1 sc in next sc. Turn. 12 sts.
- 4th row: Ch 1. 1 sc in each of first 11 sts. Sc2tog. 1 sc in next sc. Turn. 13 sts.
- 5th row: Ch 1. 1 sc in each of first 12 sts. Sc2tog. 1 sc in next sc. Turn. 14 sts.
- 6th row: Ch 1. 1 sc in each of first 13 sts. Sc2tog. 1 sc in next sc. Turn. 15 sts.
- 7th and 8th rows: Ch 1. 1 sc in each of first 14 sts. Sc2tog. Turn. 15 sts.
Fasten off.
Foot
Joining rnd after heel
- Joining rnd (RS): Join B with sl st at left side of Heel Base. Ch 1. 1 sc in each of next 23 sc of instep. PM. Work 7 sc up right side of Heel, 1 sc in each of next 15 sc across end of Heel and 7 sc down left side of Heel. Join. 52 sc.
- 2nd rnd: Ch 1. 1 sc in each sc to marker. Sc2tog. 1 sc in each sc to last 2 sc. Sc2tog. Join. 50 sts.
First 2 rnds of Foot Stripe Pat are complete.
Continue Foot Stripe Pat until stated
Keeping cont of Foot Stripe Pat, rep 2nd rnd until 44 sts rem.
- 6th rnd: With B, ch 1. 1 sc in each sc around. Join.
- 7th rnd: Ch 1. 1 sc in each sc around. Join.
- 8th to 20th rnds: Keeping cont of Foot Stripe Pat, rep 7th rnd.
Foot Stripe Pat is complete.
Shape toe
- 1st rnd: With A, ch 1. (1 sc in each of next 9 sc. Sc2tog) 4 times. Join. 40 sts.
- 2nd rnd: Ch 1. (1 sc in each of next 8 sc. Sc2tog) 4 times. Join. 36 sts.
- 3rd to 8th rnds: Cont in same manner, dec 4 sts on every rnd until 12 sts rem.
Break yarn, leaving a long end. Draw end tightly through rem sts and fasten securely.
Finishing
Hanging loop
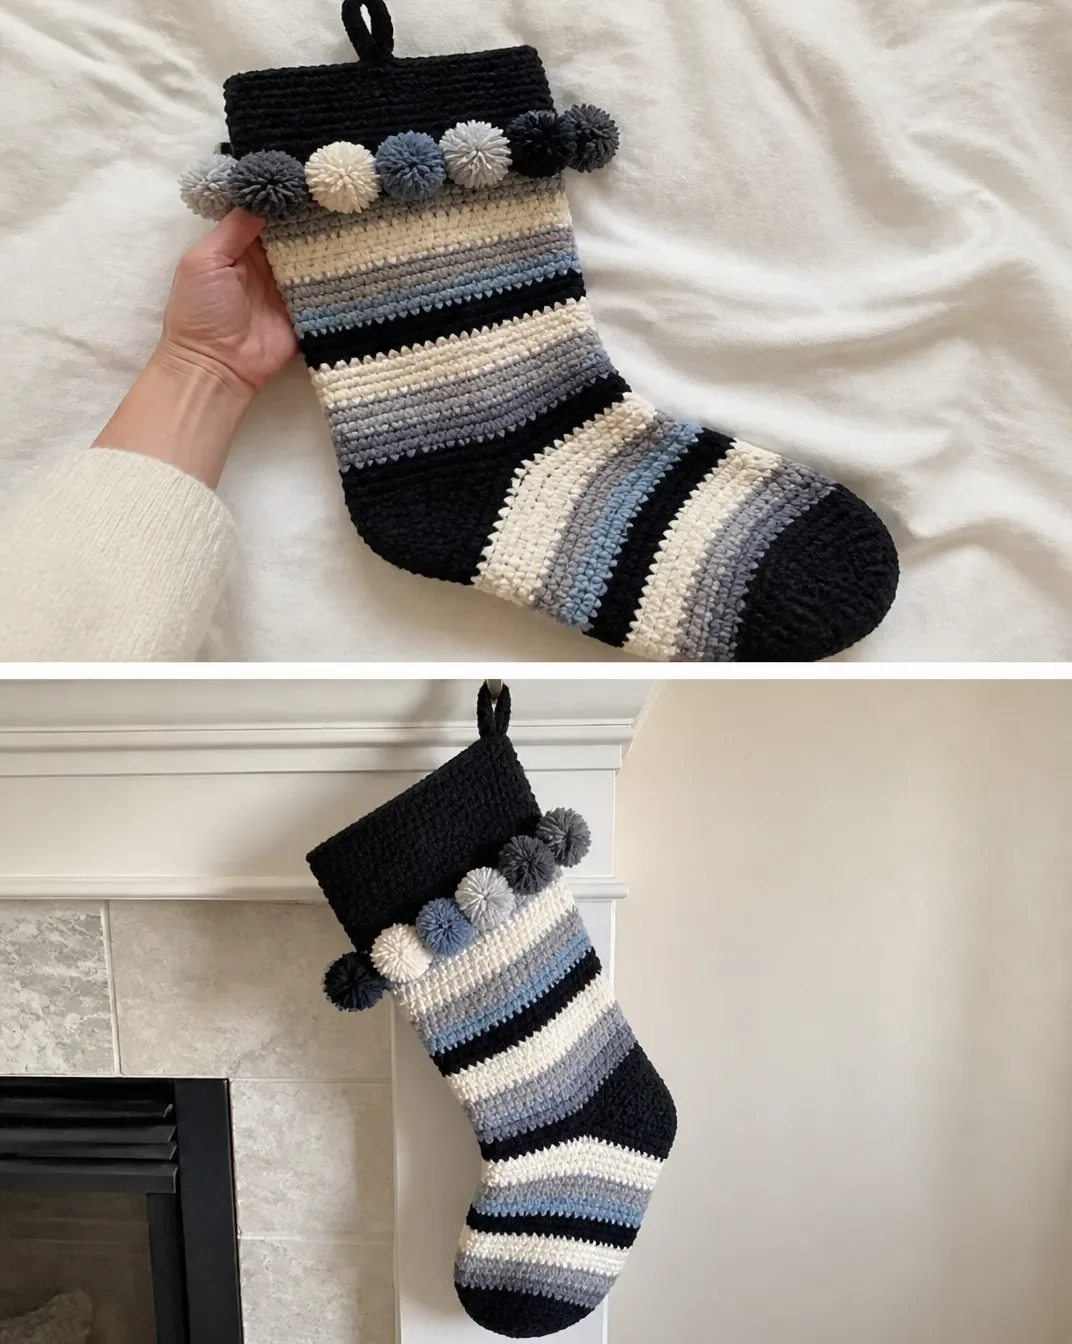
With A, ch 25. Sl st in 2nd ch from hook and each ch to end of chain. Fasten off. Fold in half and sew in position at top center back of cuff as shown in photo.
Pompoms make 9
Wind B around 1½” [4 cm] piece of cardboard 100 times. Tie yarn tightly in the middle and leave long ends for attaching to Stocking. Cut loops at both ends and trim to smooth round shape.
Sew Pompoms evenly around base of Cuff as shown in photo.
Handmade Gift and Decoration Ideas
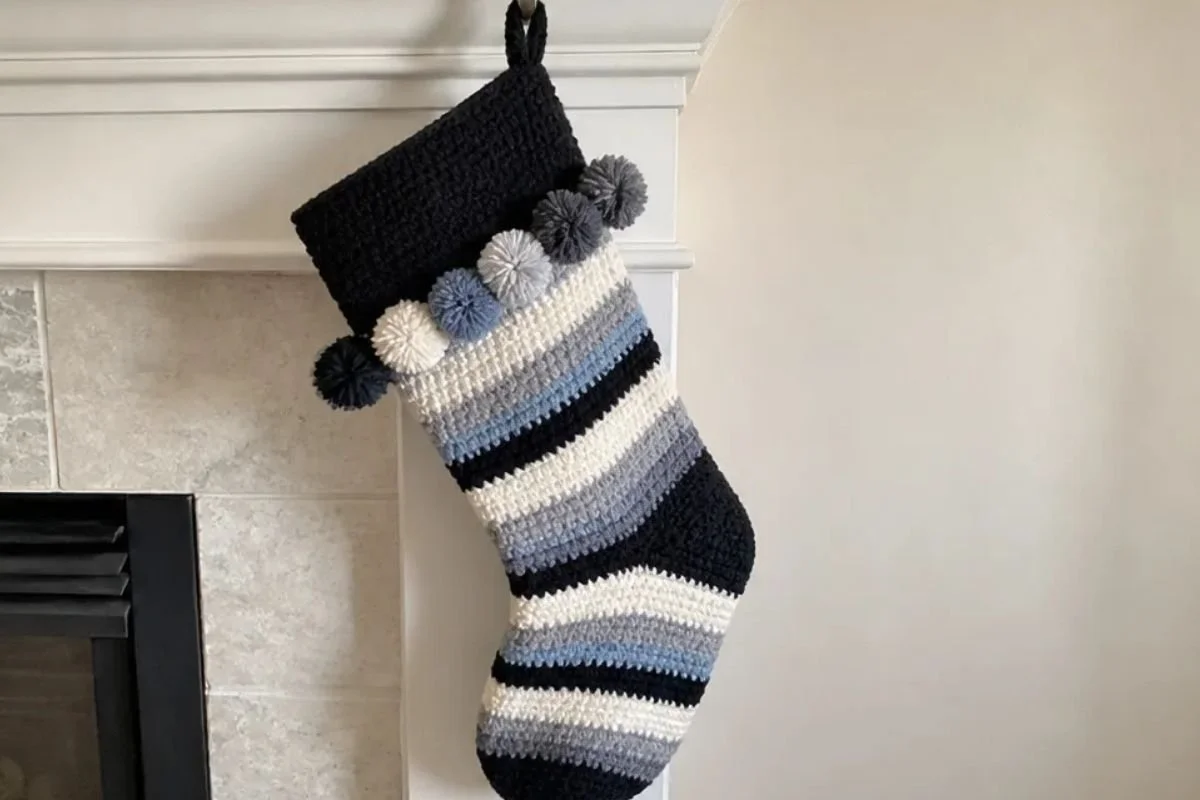
- Hang the finished stocking from a mantel, stair rail, wall peg, or decorative ladder.
- Make a coordinated set using the same stripe sequence in different color versions for each family member.
- Fill it with small wrapped gifts, notes, ornaments, or other lightweight holiday surprises.
- Use the pom-pom cuff as a visual accent in a colorful, retro-inspired seasonal display.
- Pair the stocking with other handmade decorations, such as a floral holiday arrangement or a seasonal wreath. A project such as this crochet flower wreath pattern can help extend a handmade decorating theme beyond the mantel.
- Personalize the hanging loop placement or add a separate name tag without changing the approved stocking construction.
Caring for Your Crochet Project
Keep the finished stocking dry and protected from excessive heat. Dust it gently with a soft brush or use a vacuum attachment held slightly away from the surface. Pay particular attention to the pom-poms, where loose fibers can collect dust.
For small marks, use careful spot cleaning rather than soaking the stocking. Dab gently and allow it to dry completely while lying flat. Avoid vigorous rubbing, which can distort the single crochet fabric or roughen the pom-poms.
When storing the stocking after the season, place it flat in a clean, dry container. Do not compress it beneath heavy decorations. Store the pom-poms away from items that could snag them, and keep the hanging loop from being pulled or stretched.
Tips for Better Results
- Track the color sequence. The leg and foot use different stripe patterns, so mark each completed round on a printed copy or handwritten checklist.
- Work the cuff back loops only. This creates the intended ridged texture and helps the cuff flex when it is joined.
- Measure the cuff before joining. Continue the 2nd-row repeat until the work from the beginning measures 14″ [35.5 cm], ending on a WS row.
- Distribute the 46 sc evenly. When working around the cuff’s side edge, space the stitches consistently so the leg does not flare or gather.
- Use the stitch marker carefully. The marker identifies the decrease area during the foot, so replace it if it shifts while joining rounds.
- Count after shaping. Confirm the stitch totals at the heel, foot, and toe decreases: 17, 11, 12, 13, 14, and 15 sts during heel shaping; 52 and 50 sts at the foot join; then 44 sts before the later foot rounds.
- Secure the toe firmly. Leave a long yarn end, draw it through the remaining 12 sts, and fasten securely so the opening stays closed.
- Trim pom-poms gradually. Cut the loops first, then shape the pom-pom in small snips to avoid removing too much yarn.
Color and Styling Variations
The seven approved color versions provide plenty of variety without altering the construction. Choose black and newsprint for a graphic monochrome stocking, cherry and jeweltone for a richly saturated holiday look, or white and baby rainbow for a bright, playful palette.
Gold and peacock create a jewel-toned combination, while soft navy and Christmas offer a traditional seasonal appearance. Dusty gray with rainbow gives the stripes a modern neutral foundation, and café latte with forest creates a warmer woodland-inspired palette.
These color changes are optional styling choices only; keep the pattern’s assignments of A and B consistent throughout the instructions. If you substitute a different yarn, its thickness and fiber characteristics may affect the stitch gauge, finished dimensions, drape, stripe appearance, and yarn requirements. A hook size is not specified in the supplied instructions, so do not assume a replacement yarn will produce identical results.
For a coordinating handmade accent, consider small crochet embellishments inspired by these crochet flower shoe appliques, provided they are made separately and attached only if appropriate for their intended use.
Frequently Asked Questions
Is this stocking suitable for a newer crocheter?
The pattern uses single crochet, chains, slip stitches, back-loop-only work, joining rounds, and decreases. A newer crocheter who is comfortable reading row and round instructions may enjoy it, especially when carefully tracking stitch counts.
How many yarn colors are needed?
Two colors are required: Contrast A and Contrast B. Select one of the seven listed O’Go versions, with 1 O’Go of each contrast color.
Which color is used for the cuff?
The cuff begins with A. The leg then joins B for the stripe sequence, while the heel begins with A, the foot joins B, and the toe begins with A.
How many pom-poms are required?
Make 9 pom-poms. Each one is made by winding B around a 1½” [4 cm] piece of cardboard 100 times before tying, cutting, and trimming it.
Where is the stitch marker placed?
During the joining round after the heel, place the marker after working 1 sc in each of the next 23 sc of the instep. It helps identify the decrease area during the foot.
Can the colors be changed?
Yes. The supplied pattern includes seven color versions, and you may choose among them according to your decorating style. Keep the color labels A and B consistent as you work.
How should the finished stocking be cleaned?
Use gentle dusting and careful spot cleaning. Avoid soaking, vigorous rubbing, excessive heat, and heavy compression during storage.
Can another yarn be substituted?
A substitution may be possible, but yarn thickness and fiber content can change the fabric, dimensions, stripe definition, and amount of yarn needed. Use the specified Red Heart® Super Saver® O’Go™ when you want to follow the supplied material details most closely.
Conclusion
The Kitsch Striped Stocking Crochet Pattern turns simple single crochet into a bright, characterful holiday decoration with bold stripes and a nine-pom-pom cuff. Choose one of the provided color combinations, take care with the heel and toe shaping, and enjoy making a stocking that can be displayed or gifted for years. For more seasonal inspiration, browse these free crochet Christmas stocking patterns.