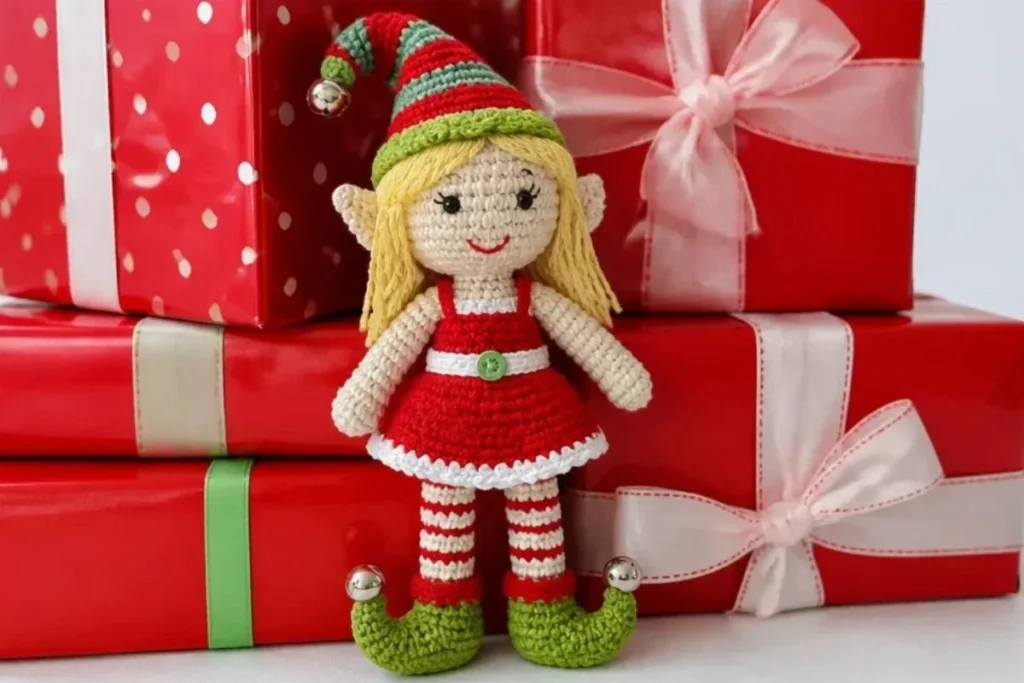
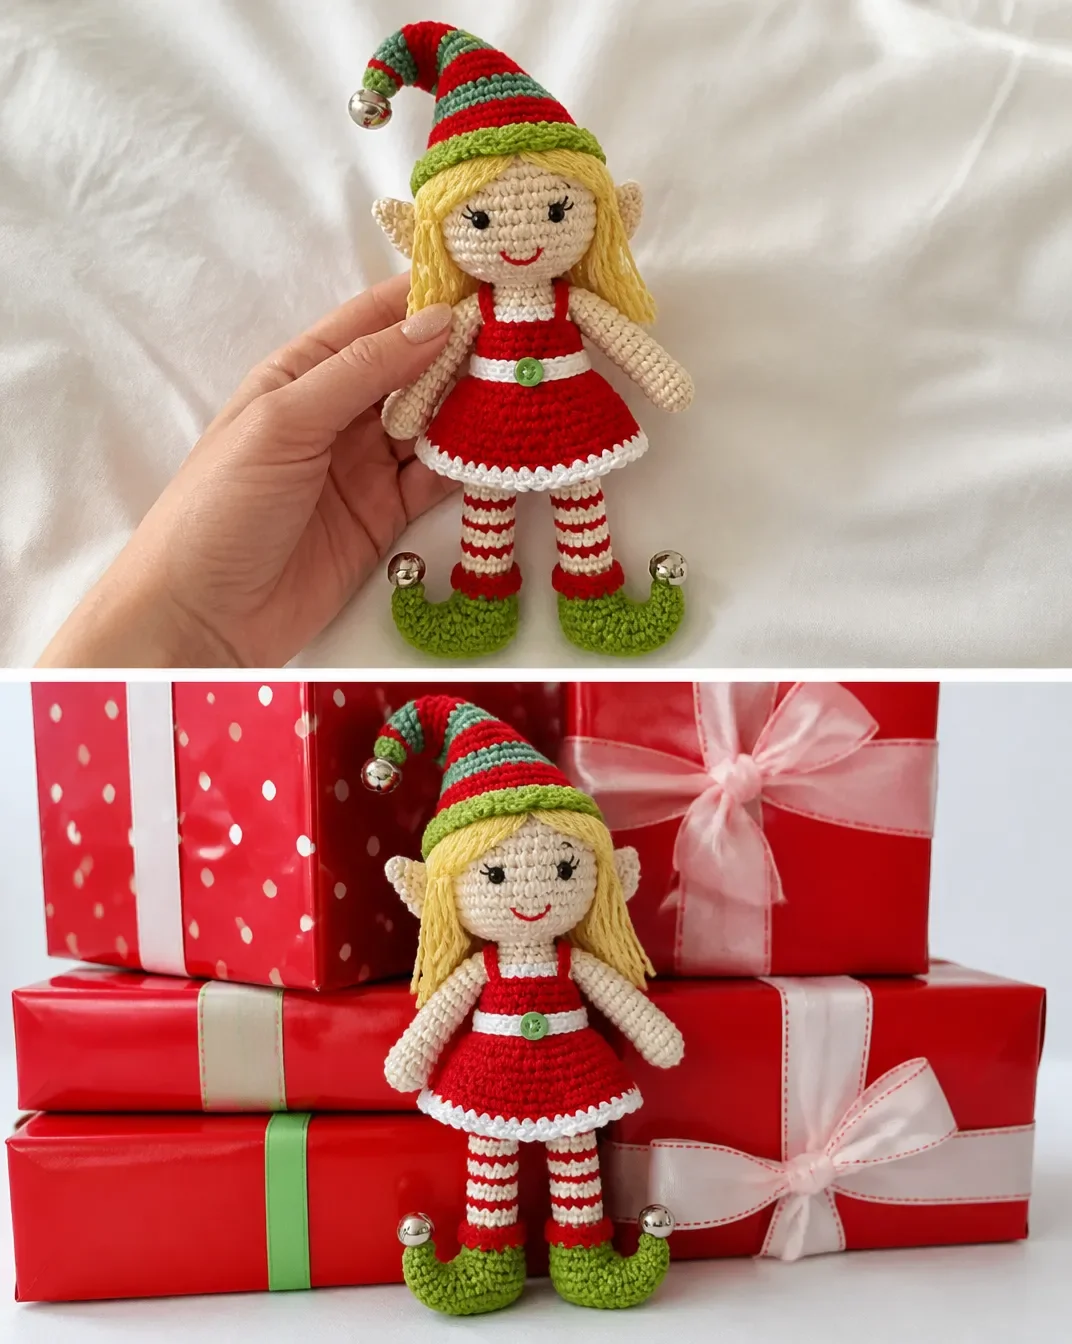
The Lily Christmas Elf Doll Pattern creates a cheerful handmade holiday character with a soft ecru face and body, bright green shoes and hat, a red dress, white trim, sunshine-yellow hair, and tiny jingle bells. This amigurumi-style doll makes a charming seasonal decoration, stocking stuffer, or handmade gift. The project combines simple single crochet shaping with half double crochet clothing, making it a rewarding choice for crocheters who enjoy detailed assembly. For another colorful crochet idea to enjoy alongside your elf, explore this 3D flower granny square pattern.
Why You’ll Love This Crochet Project
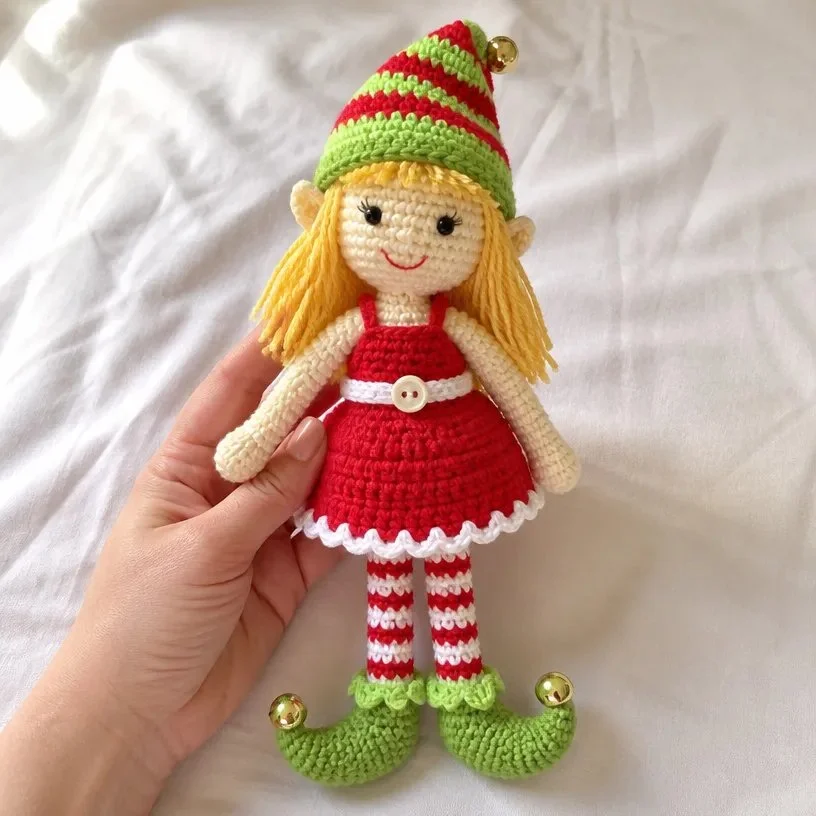
- It has plenty of festive detail. The striped hat, red dress, picot shoe edging, hair fringe, button, and jingle bells give the doll a lively Christmas character.
- It practices useful shaping techniques. You will work increases, decreases, joined rounds, short rows, stuffed sections, and color changes.
- It makes a thoughtful handmade gift. The finished elf is suitable for holiday decorating or gifting, provided small parts are kept away from young children.
- The clothing is removable during construction. The separate dress and hat make the project especially satisfying to assemble and personalize.
- It uses familiar stitches. Most of the doll is made with single crochet, while the hat and dress use half double crochet.
My Crochet Flower Tip: Keep each finished component labeled or grouped as you work. The doll contains several small parts, and organizing them will make assembly much easier.
Before You Start Crocheting
The doll is made from a stuffed head, two ears, a stuffed body, two lightly stuffed arms, and two legs with shoes. The clothing consists of a striped hat, a red dress with white edging and belt, and two straps. Sunshine-colored yarn forms the hair fringe, while beads, embroidery floss, buttons, and bells complete the face and decorations.
The construction sequence is:
- Crochet and stuff the head, then make and attach the ears.
- Crochet, close, and stuff the body.
- Make the arms and legs.
- Add the shoes, striped legs, and shoe edging.
- Assemble the body and limbs.
- Add the face, hair fringe, hat, and dress.
The pattern uses US crochet terminology. Helpful abbreviations include:
- ch: chain
- sc: single crochet
- sl st: slip stitch
- hdc: half double crochet
- tr: treble crochet
- sc2tog: single crochet two together
- hdc2tog: half double crochet two together
- yoh: yarn over hook
- rem: remaining
- MC: Main Color
Materials You’ll Need
- Lily Sugar’n Cream, 70 g / 2.5 oz; 109 m / 120 yds:
- Main Color (MC), 01004 Soft Ecru: 1 ball
- Contrast A, 01712 Hot Green: 1 ball
- Contrast B, 00095 Red: 1 ball
- Contrast C, 00001 White: 1 ball
- Contrast D, 00073 Sunshine: 1 ball
- 3.5 mm crochet hook, U.S. E or 4, or size needed to obtain gauge
- 4 mm crochet hook, U.S. G or 6, or size needed to obtain gauge
- Stuffing
- 2 small black beads for eyes
- Small amount of red embroidery floss for the mouth
- Small amount of black embroidery floss for eyelashes
- 3 jingle bells
- 1 button
The smaller hook is used for the doll’s body parts and shoes. The larger hook is used for the hat, dress, straps, and belt.
Step-by-Step Crochet Instructions
Head
With smaller hook and MC, ch 2.
- 1st rnd: 8 sc in 2nd ch from hook. Join with sl st to first sc.
- 2nd rnd: Ch 1. 2 sc in each sc around. Join with sl st to first sc. 16 sc.
- 3rd rnd: Ch 1. *2 sc in next sc. 1 sc in next sc. Rep from * around. Join with sl st to first sc. 24 sc.
- 4th rnd: Ch 1. *2 sc in next sc. 1 sc in each of next 2 sc. Rep from * around. Join with sl st to first sc. 32 sc.
- 5th rnd: Ch 1. *2 sc in next sc. 1 sc in each of next 3 sc. Rep from * around. Join with sl st to first sc. 40 sc.
- 6th rnd: Ch 1. 1 sc in each sc around. Join with sl st to first sc. Rep last rnd 10 times more.
- Next rnd: Ch 1. *Draw up a loop in each of next 2 sc. Yoh and draw through all loops on hook sc2tog made. 1 sc in each of next 3 sc. Rep from * around. Join with sl st to first sc. 32 sts.
- Next rnd: Ch 1. *Sc2tog. 1 sc in each of next 2 sc. Rep from * around. Join with sl st to first sc. 24 sts.
- Stuff Head.
- Next rnd: Ch 1. *Sc2tog. 1 sc in next sc. Rep from * around. Join with sl st to first sc. 16 sts.
- Next rnd: Ch 1. *Sc2tog. Rep from * around. Join with sl st to first st. 8 sts.
- Fasten off.
Ears
Make 2.
With MC and smaller hook, ch 2.
- 1st rnd: 8 sc in 2nd ch from hook. Join with sl st to first sc.
- 2nd rnd: Ch 1. 2 sc in each sc around. Join with sl st to first sc. 16 sc.
Shape Ears
- 1st row: Ch 1. Sc2tog. 1 sc in next sc. Sc2tog. Turn. Leave rem sts unworked.
- 2nd row: Ch 1. Sc2tog. 1 sc in last sc. Turn.
- 3rd row: Ch 1. Sc2tog. Fasten off.
Sew Ears to side of Head.
Body
With MC and smaller hook, ch 30. Join with sl st to first ch.
- 1st rnd: Ch 1. 1 sc in each ch around. Join with sl st to first sc. 30 sc.
- 2nd rnd: Ch 1. 1 sc in each sc around. Join with sl st to first sc. Rep last rnd until work from beg measures 2 ins [5 cm].
- Next rnd: Ch 1. *Sc2tog. 1 sc in each of next 3 sc. Rep from * around. Join with sl st to first sc. 24 sts.
- Next rnd: Ch 1. 1 sc in each st around. Join with sl st to first sc. Rep last rnd until work from beg measures 4 ins [10 cm].
- Next rnd: Ch 1. *Sc2tog. 1 sc in each of next 2 sc. Rep from * around. Join with sl st to first sc. 18 sts.
- Next rnd: Ch 1. 1 sc in each sc around. Join with sl st to first sc. Rep last rnd twice more. Fasten off.
Sew bottom edge of Body closed. Stuff Body.
Arms
Make 2.
With MC and smaller hook, ch 2.
- 1st rnd: 5 sc in 2nd ch from hook. Join with sl st to first sc.
- 2nd rnd: Ch 1. 2 sc in each sc around. Join with sl st to first sc. 10 sc.
- 3rd rnd: Ch 1. 1 sc in each sc around. Join with sl st to first sc.
- 4th rnd: Ch 1. 1 sc in each of next 4 sc. 1 tr in next sc (thumb). 1 sc in each of last 5 sc. Join with sl st to first sc.
- 5th rnd: Ch 1. 1 sc in each st around. Join with sl st to first sc.
- 6th rnd: Ch 1. (Sc2tog. 1 sc in each of next 3 sc) twice. Join with sl st to first sc. 8 sts.
- 7th rnd: Ch 1. 1 sc in each st around. Join with sl st to first sc. Rep last rnd until Arm from beg measures 4 ins [10 cm]. Fasten off.
- Stuff Arms lightly.
Legs and Shoes
Make 2 legs.
Shoe
With A and smaller hook, ch 2.
- 1st rnd: 4 sc in 2nd ch from hook. Join with sl st to first sc.
- 2nd rnd: Ch 1. (1 sc in next sc. 2 sc in next sc) twice. Join with sl st to first sc. 6 sc.
- 3rd rnd: Ch 1. 1 sc in each sc around. Join with sl st to first sc.
- 4th rnd: Ch 1. (1 sc in each of next 2 sc. 2 sc in next sc) twice. Join with sl st to first sc. 8 sc.
- 5th rnd: As 3rd rnd.
- 6th rnd: Ch 1. (1 sc in each of next 3 sc. 2 sc in next sc) twice. Join with sl st to first sc. 10 sc.
- 7th rnd: Ch 1. (1 sc in each of next 4 sc. 2 sc in next sc) twice. Join with sl st to first sc. 12 sc.
- 8th rnd: Ch 1. (1 sc in each of next 5 sc. 2 sc in next sc) twice. Join with sl st to first sc. 14 sc.
- 9th to 12th rnds: As 3rd rnd.
Begin working in rows:
- Next row: Ch 1. 1 sc in each of next 8 sc. Turn. Leave rem sts unworked.
- Next row: Ch 1. 1 sc in each of next 8 sc. Turn.
- Rep last row once more. Fasten off.
Heel: Fold back of shoe in half to form Heel. Sew back Heel seam.
Join and top of shoe: Join A with sl st to back of Shoe. Ch 1. Work 14 sc evenly around top edge of Shoe. Join B with sl st to first sc. Break A. Stuff Shoe.
Leg
- 1st rnd: With B, working in back loops only, ch 1. 1 sc in each sc around. Join with sl st to first sc.
- 2nd rnd: Ch 1. Working in both loops, 1 sc in each sc around. Join with sl st to first sc.
- Change colors and continue: Cont even, working 2 rnds C, 2 rnds B, until Leg from top of Shoe measures 4 ins [10 cm]. Fasten off.
Stuff Leg.
Shoe Edging
With smaller hook, join A with sl st to rem loop of top of Shoe.
*Ch 3. 1 sc in 3rd ch from hook. Sl st in same sp as last sl st picot made. Sl st in next sc. Rep from * around.
Join with sl st to first picot. Fasten off.
Finishing the Body
- Sew top of Legs closed using whip st.
- Attach Jingle Bell to tip of Shoe.
- Sew Legs to bottom of Body.
- Sew Arms to sides of Body.
- With black embroidery floss, embroider eyelashes on Head.
- Sew Beads to Head.
- With red embroidery floss, embroider mouth.
Hair Fringe
- Cut a piece of tape 5 ins [12.5 cm] long and secure onto a flat surface with sticky side up.
- Cut lengths of D 11 ins [28 cm] long and lay them across tape so strip of tape is in center of yarn.
- Holding tissue paper over top of yarn and using sewing machine, run a line of stitching along length of tape.
- Remove tape when hair is secure.
- Remove tissue paper after stitching.
- Pin fringe to top of head.
- Using backstitch and D, sew hair into place along sewn line, being sure to get all lengths secured in sts.
- Trim evenly.
Hat
Note: Ch 2 does not count as hdc.
With larger hook and A, ch 36. Join with sl st to first ch, being careful not to twist ch.
- 1st rnd: Ch 2. 1 hdc in each ch around. Join B with sl st to first hdc.
- 2nd rnd: With B, ch 2. 1 hdc in each hdc around. Join A with sl st to first hdc.
- 3rd rnd: With A, as 2nd rnd. Join B.
- 4th rnd: With B, ch 2. *1 hdc in each of next 4 hdc. (Yoh and draw up a loop in next st. Yoh and draw through 2 loops on hook) twice. Yoh and draw through all loops on hook hdc2tog made. Rep from * around. Join A with sl st to first hdc. 30 hdc.
- 5th rnd: With A, ch 2. 1 hdc in each st around. Join B with sl st to first hdc.
- 6th rnd: With B, ch 2. *1 hdc in each of next 3 hdc. Hdc2tog. Rep from * around. Join A with sl st to first hdc. 24 sts.
- 7th rnd: As 5th rnd.
- 8th rnd: With B, ch 2. *1 hdc in each of next 2 hdc. Hdc2tog. Rep from * around. Join A with sl st to first hdc. 18 sts.
- 9th rnd: As 5th rnd.
- 10th rnd: With B, ch 2. *1 hdc in next hdc. Hdc2tog. Rep from * around. Join A with sl st to first hdc. 12 sts.
- 11th rnd: As 5th rnd.
- 12th rnd: With B, ch 2, *Hdc2tog. Rep from * around. Join A with sl st to first st. 6 sts.
- 13th rnd: As 5th rnd. Fasten off, leaving a long end. Thread end through rem loops. Pull tightly and fasten securely.
Sew Jingle Bell to top of Hat.
Attach Hat to Head, sewing through all thicknesses.
Dress
Note: Ch 2 does not count as hdc.
With larger hook and B, ch 40. Join with sl st to first ch, being careful not to twist ch.
- 1st rnd: Ch 2. 1 hdc in each ch around. Join with sl st to first hdc. 40 hdc.
- 2nd rnd: Ch 2. 1 hdc in each hdc around. Join with sl st to first hdc.
- 3rd rnd: Ch 2. *1 hdc in each of next 3 hdc. Hdc2tog. Rep from * around. Join with sl st to first hdc. 32 sts.
- 4th and 5th rnds: Ch 2. 1 hdc in each st around. Join with sl st to first hdc.
- 6th rnd: Ch 2. *1 hdc in each of next 2 hdc. Hdc2tog. Rep from * around. Join with sl st to first hdc. 24 sts.
- 7th and 8th rnds: Ch 2. 1 hdc in each st around. Join with sl st to first hdc.
Begin working in rows:
- 1st row: Ch 2. 1 hdc in each of next 24 hdc. Turn.
- 2nd row: Ch 2. 1 hdc in each hdc across. Turn.
- 3rd row: Ch 5. Sl st in first hdc. (button loop made). Ch 2. 1 hdc in same st as last sl st. 1 hdc in each hdc across. Fasten off.
Edging: Join C with sl st to any rem loop of foundation ch at bottom of dress.
Ch 3. 1 sc in 2nd ch from hook. Miss next 2 ch. Sl st in next ch. Rep from * around.
Join with sl st to same sp as first sl st. Fasten off.
Straps
Make 2.
With larger hook and B, ch 9.
- 1st row: 1 sc in 2nd ch from hook. 1 sc in each ch to end of ch. Turn. 8 sc.
- 2nd row: Ch 1. 1 sc in each sc across. Turn.
- Rep last row once more. Fasten off.
Belt
With larger hook and C, ch 24. Join with sl st to first ch, being careful not to twist ch.
- 1st rnd: Ch 1. 1 sc in each ch around. Join with sl st to first sc. Fasten off.
Dress Finishing and Attachment
- Put Dress on doll, mark position for Straps.
- Sew Straps to Dress.
- Sew Belt to Dress as shown in picture.
- Sew button to back of Dress to correspond to button loop.
Creative Ways to Use Your Project
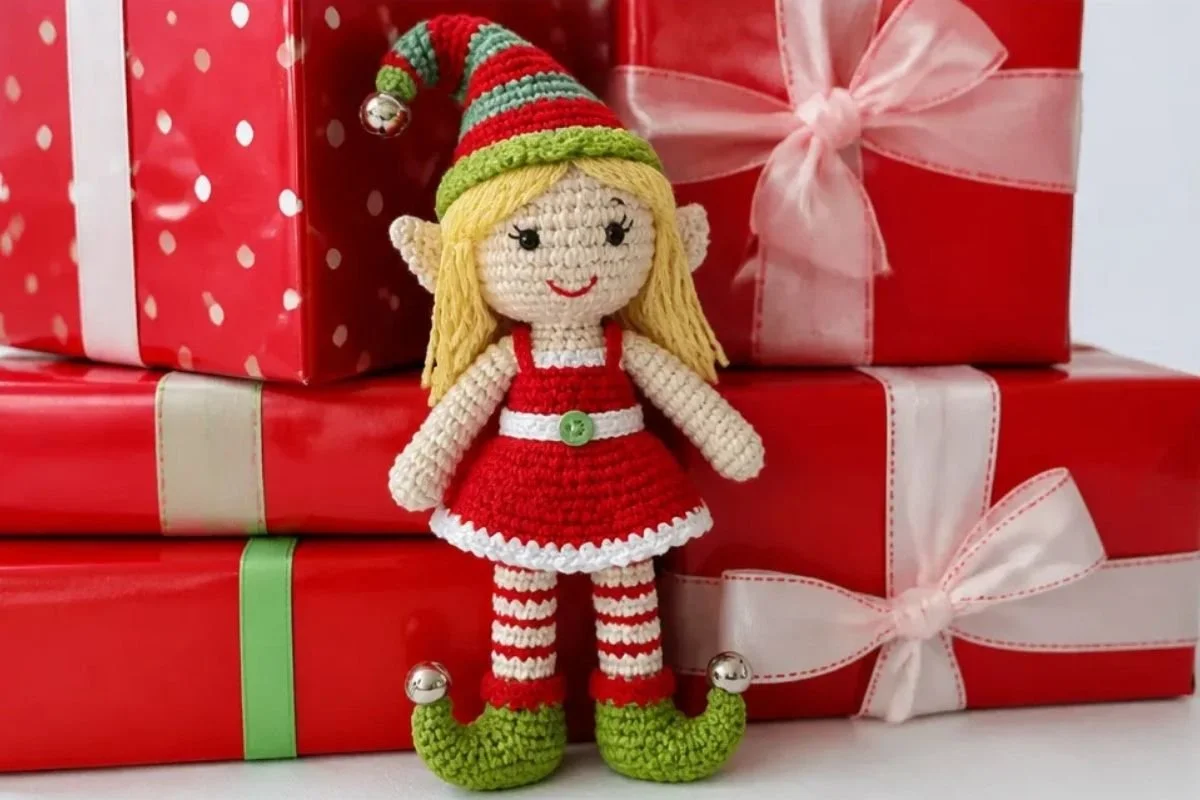
- Place the finished elf on a mantel with greenery, stockings, or other seasonal decorations.
- Use it as a festive centerpiece accent beside a candle display, while keeping yarn and bells away from open flames.
- Give it as a handmade holiday gift to a crochet enthusiast or collector.
- Add it to a child’s room as decorative seasonal artwork, taking care around the small beads, button, and bells.
- Display several handmade holiday figures together for a playful Christmas vignette.
- Pair the elf with other handmade seasonal crochet pieces; a spring-themed project such as this Celebrate Spring crochet pattern can provide inspiration for building seasonal collections throughout the year.
Caring for Your Crochet Project
Dust the doll gently with a soft brush or use a vacuum’s lowest setting with a protective cloth over the nozzle. Avoid pulling the yarn fringe, embroidery, bells, or sewn-on beads.
For small marks, use careful spot cleaning rather than soaking the stuffed doll. Excess moisture may affect the stuffing and can make the sewn decorations harder to secure. Allow any cleaned area to dry completely away from direct heat.
Store the elf upright or in a shallow box so the hat, hair, and limbs are not crushed. Keep it in a cool, dry place, and check the bells, bead eyes, button, and dress attachments periodically, especially if the doll is handled often.
Tips for Better Results
- Count every joined round. The head, body, shoes, hat, and dress all depend on specific stitch counts, so check the count before moving to the next round.
- Stuff gradually. Add stuffing to the head and body as the openings become smaller. Firm, even stuffing helps the doll hold its shape without stretching the stitches.
- Stuff the arms and legs lightly. Overstuffing can make the narrow pieces difficult to sew neatly to the body.
- Watch the working loops. The first leg round is worked in back loops only, while the second is worked in both loops. The shoe edging uses the remaining loop at the top of the shoe.
- Keep color changes tidy. The striped leg uses 2 rounds of C followed by 2 rounds of B. Carrying or fastening yarn neatly will help prevent bulky joins.
- Secure small decorations firmly. Sew the bead eyes, button, jingle bells, hair, and dress straps securely, then weave in ends carefully.
- Shape the hat before attaching it. Closing the top tightly and sewing through all thicknesses helps the hat stay securely on the head.
- Use the stitch counts as checkpoints. The hat decreases from 36 starting chains to 30, 24, 18, 12, and 6 stitches, while the dress decreases to 32 and then 24 stitches.
For a separate floral accent project using small decorative motifs, the cherry blossom applique pattern offers another way to practice careful finishing and color placement.
Color and Styling Variations
The approved pattern uses Soft Ecru, Hot Green, Red, White, and Sunshine for a traditional Christmas palette. Optional changes can personalize the doll without altering the construction:
- Replace Hot Green with a darker forest green for a classic woodland look.
- Use cream or gold in place of Sunshine for a softer hair color.
- Try a deep cranberry or burgundy dress while keeping the white belt and edging.
- Make the hat stripes alternate between two shades of green instead of green and red.
- Use metallic-looking yarn only if it matches the required gauge and remains comfortable to crochet. A different yarn type or weight may change the size, stitch definition, texture, and yarn requirements.
- If changing yarn or hook size, make a gauge swatch and expect the finished proportions to change unless the original gauge is matched.
These are optional styling ideas only; the supplied color sequence and construction remain the approved instructions.
Frequently Asked Questions
Is this Lily Christmas Elf Doll Pattern suitable for a beginner?
It is a manageable project for a beginner who is comfortable with single crochet, joined rounds, increases, decreases, stuffing, and basic sewing. The many small components and finishing details require patience and careful counting.
Which hook sizes are used?
Use a 3.5 mm hook, U.S. E or 4, and a 4 mm hook, U.S. G or 6, or the sizes needed to obtain gauge. The smaller hook is used for the doll pieces and shoes, while the larger hook is used for the hat and dress.
How many legs and arms should I make?
Make two arms and two legs. Each leg includes a shoe, a striped leg section, stuffing, a jingle bell, and shoe edging.
Can I change the yarn colors?
Yes, color changes are an optional styling choice. Keep the yarn characteristics and gauge in mind, because changing yarn weight or hook size can affect the doll’s dimensions and the fit of the dress and hat.
When should I stuff the pieces?
Stuff the head after the 24-stitch decrease round and before continuing the final decreases. Stuff the body after sewing its bottom edge closed, stuff the arms lightly after fastening off, and stuff each shoe and leg as directed.
How is the hair made?
The hair fringe is made by laying 11-inch [28 cm] lengths of Contrast D over a 5-inch [12.5 cm] strip of tape, stitching through tissue paper with a sewing machine, removing the tape and tissue paper, and sewing the fringe to the head with backstitch.
How is the dress secured?
The dress uses two crocheted straps, a white belt, and a button loop. Put the dress on the doll, mark the strap positions, sew the straps and belt in place, and sew the button to the back of the dress to correspond with the button loop.
How should the finished doll be stored?
Keep it in a cool, dry place away from excessive heat and moisture. Store it where the hat, fringe, bells, button, and bead eyes will not be crushed or snagged.
Conclusion
This Lily Christmas Elf Doll Pattern is a cheerful holiday project with engaging shaping, colorful clothing, and memorable finishing details. The jingle bells, sunshine hair, striped hat, and tiny dress give the finished doll plenty of personality. Display it with seasonal décor, give it as a handmade gift, or customize the palette for a different festive style. For the original yarn-company listing, see the Lily Christmas Elf Doll pattern resource.