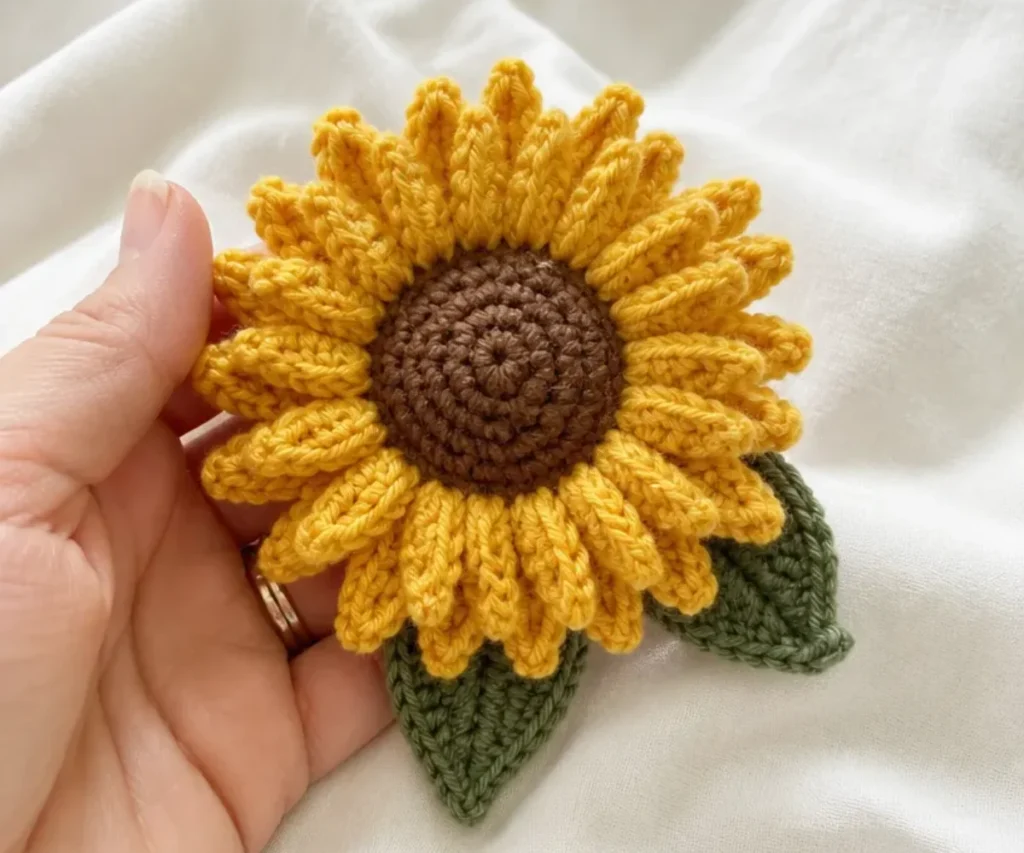
A felted sunflower pin brings the warm look of a blooming sunflower to a wearable handmade accessory. This Crochet Felted Sunflower Pin Pattern combines golden petals, a textured brown center, and two green leaves before felting gives the pieces a denser, sturdier finish. It is a charming project for practicing crocheted petals, shaping, color changes, and simple sewn assembly. Wear it on a jacket or bag, give it as a handmade gift, or use it as a cheerful accent in a seasonal display.
Why You’ll Love This Crochet Project
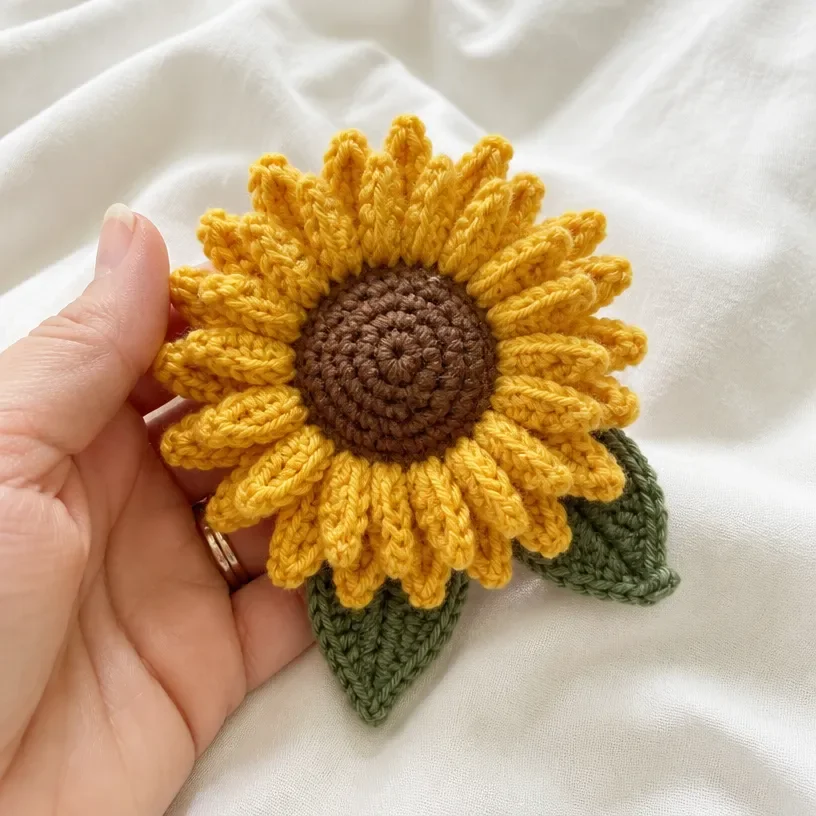
- Practice layered flower construction: The sunflower is built with two rows of petals, creating a fuller, dimensional bloom.
- Learn shaping through felting: Washing and blocking help transform the crocheted pieces into a firm botanical form.
- Make a useful handmade accessory: The finished flower becomes a wearable pin when paired with the bar pin.
- Explore several crochet techniques: The pattern uses single crochet, half double crochet, double crochet, front loops, back loops, back-hump chain work, and a picot.
- Create a thoughtful gift: A sunflower pin is easy to package and suitable for birthdays, seasonal celebrations, or nature-inspired gift baskets.
My Crochet Flower Tip: Keep the petals evenly arranged around the aluminum shaping form while they dry. This helps the sunflower maintain a balanced, open shape.
What to Know Before You Begin
This project includes one crocheted sunflower with two petal rounds, one stuffed center, two leaves, and a circular backing. The pieces are crocheted separately, felted in pillowcases in a washing machine, shaped while drying, and then sewn together.
The 5 mm [US H-8] and 8 mm [US L-11] crochet hooks are included in the supplied tools. The instructions do not assign a specific hook to an individual section, so keep both available and follow the approved pattern as written.
The project uses three colors:
- A: Honeycomb for the sunflower petals
- B: Thyme for the leaves
- C: Hazelnut for the center and backing
Useful Abbreviations
- ch: Chain
- sc: Single crochet
- slip st: Slip stitch
- hdc: Half double crochet
- dc: Double crochet
- yo: Yarn over
Special Abbreviation
3-ch-picot: Ch 3, insert hook in front loop (horizontal bar) of the dc just made and in the left strand (vertical bar) of the same st, yo and pull through all three loops.
Materials You’ll Need
Yarn
- STITCH NATION by Debbie Stoller™ Full o’ Sheep™
- 1 ball, 2605 Honeycomb A
- 1 ball, 2640 Thyme B
- 1 ball, 2350 Hazelnut C
Tools and Supplies
- Crochet hook 5 mm [US H-8]
- Crochet hook 8 mm [US L-11]
- Sharp yarn needle
- 1½” bar pin
- Fiberfill stuffing
- Straight pins
The Honeycomb yarn forms the sunflower petals, Thyme creates the leaves, and Hazelnut is used for both the center and backing. The fiberfill gives the sewn center gentle dimension, while the straight pins help hold the shaped pieces in position during assembly.
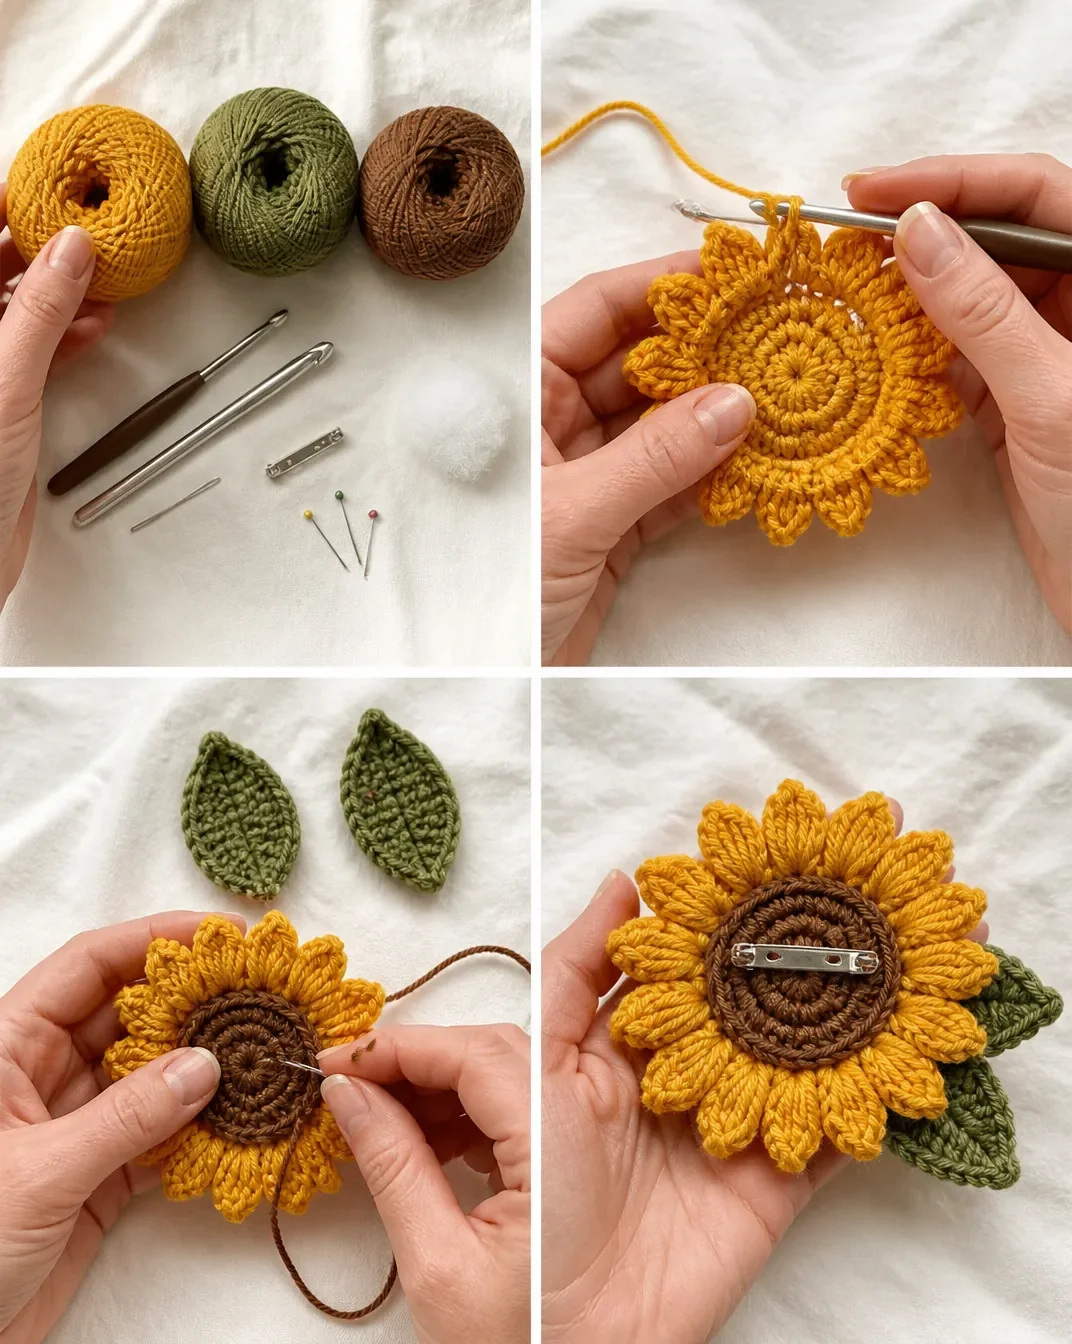
Complete Crochet Tutorial
Follow the component instructions in the order given. Pay close attention to whether a round is worked in front loops, back loops, or both loops, since those placements create the layered petal structure.
Sunflower Petals
Work the flower petals with color A.
Round 1: With A, ch 2, 6 sc in second ch from the hook; join to first sc – 6 sc.
Round 2: Ch 1, 2 sc in each sc; join to first sc – 12 sc.
Round 3: Ch 1, [2 sc in first sc, sc in next sc] 6 times; join to first sc – 18 sc.
Round 4 (First row of petals):
Working in the front loops only of the previous round, slip st into first sc, [ch 5, working in the back hump of the chain, sc in second ch from the hook and the next 3 ch, slip st in next sc] 17 times; ch 5, working in the back hump of the chain, sc in second ch from the hook and the next 3 ch, slip st into back loop of first sc – 18 petals.
This round creates the first row of long, narrow petals. Work each chain carefully so the petals remain consistent in length.
Round 5:
Working behind the petals and in the back loops only of round 3, ch 1, [2 sc in next sc, sc in next 2 sc] 6 times; join to first sc – 24 sc.
Round 6 (Second row of petals):
Working into both loops of round 5, [ch 6, sc in the back hump of the second ch from the hook and the next 4 ch, slip st in next sc] 23 times; ch 6, sc in the back hump of the second ch from the hook and the next 4 ch; join to first petal – 24 petals.
The second row uses a six-chain foundation, making these petals slightly longer than those in the first row.
Fasten off. Weave in ends.
Sunflower Center
Work the center with color C.
Round 1: With C, ch 2, 6 sc in second ch from the hook; join to first sc – 6 sc.
Round 2: Ch 1, 2 sc in each sc; join to first sc – 12 sc.
Round 3: Ch 1, sc in each sc around; join to first sc – 12 sc.
Round 4: Ch 1, [2 sc in next sc, sc in next sc] 6 times – 18 sc.
Fasten off. Weave in ends.
Leaves Make 2
Make two leaves with color B.
Round 1: With B, ch 4, 8 dc into first chain; do not join, turn.
Round 2: Ch 2, hdc in first dc, hdc in next dc, dc in next 2 dc; (3 dc, 3-ch-picot, 2 dc) in next dc; dc in next 2 dc, hdc in next dc, hdc in top of turning ch, ch 2, slip st into top of starting ch.
Fasten off. Weave in ends.
The picot forms the pointed tip of each leaf. Keep the stitches relaxed enough that the leaf can be blocked into shape after felting.
Backing
Work the circular backing with color C.
Round 1: With C, ch 2, 6 sc in second ch from the hook; join to first sc – 6 sc.
Round 2: Ch 1, 2 sc in each sc; join to first sc – 12 sc.
Round 3: Ch 1, [2 sc in next sc, sc in next sc] 6 times; join to first sc – 18 sc.
Round 4: Ch 1, [2 sc in next sc, sc in next 2 sc] 6 times; join to first sc – 24 sc.
Fasten off. Weave in ends.
Felting Procedure
Before assembling the flower, put the pieces into pillowcases and tie closed.
Place them in a washing machine with hot water and a small amount of detergent.
Check during the wash cycle regularly until desired amount of felting is achieved.
Rinse soap and squeeze out excess water.
The felting stage changes the surface and density of the crocheted wool pieces. Check regularly rather than leaving the pieces unattended for the entire wash cycle, because the desired amount of felting may vary.
Shaping the Sunflower
To shape Sunflower, make a small aluminum ball and flatten one side.
Place in the middle of the sunflower and pin or tie the petals around the ball and let dry.
Block remaining pieces into desired shapes and let dry.
Shape the petals evenly around the aluminum ball so the flower has a rounded, open profile. Allow all pieces to dry completely before assembly.
Assembly
With C, sew the sunflower center into the middle of the flower leaving a small opening; stuff center with fiber fill; finish sewing in place.
Arrange leaves on back of flower; pin into place and stitch to the sunflower with B.
Place backing on the sunflower over the leaves; pin and stitch into place with C.
Sew bar pin onto back.
Finishing
Weave in ends after each component as specified:
- Petals: Fasten off. Weave in ends.
- Sunflower Center: Fasten off. Weave in ends.
- Leaves (each): Fasten off. Weave in ends.
- Backing: Fasten off. Weave in ends.
During assembly:
- Center is stuffed with fiber fill and sewn closed.
- Bar pin is sewn onto back.
Finished Project Inspiration
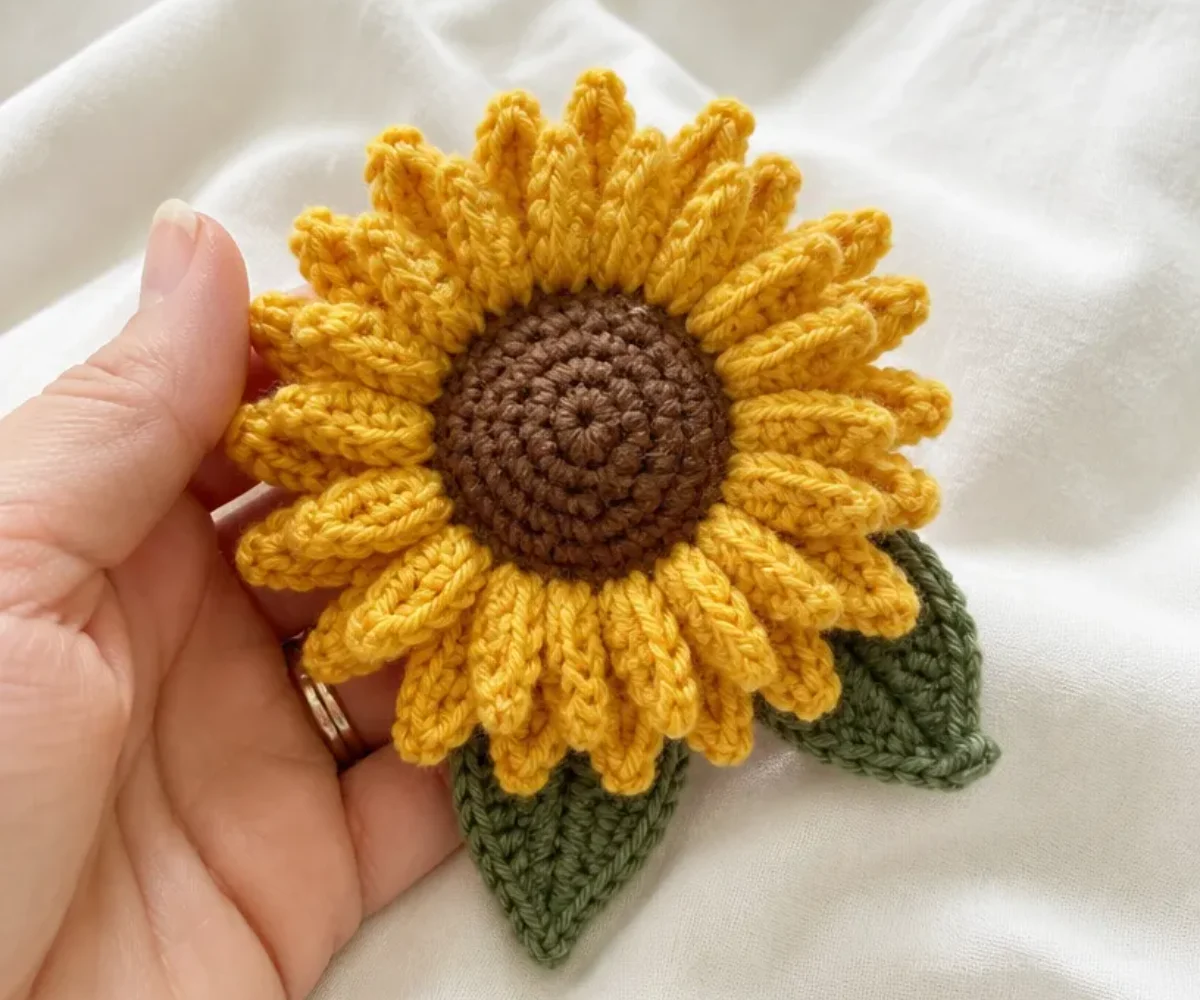
- Wear it as an accessory: Attach the pin to a jacket, cardigan, scarf, or tote bag.
- Give it as a handmade gift: Pair the sunflower pin with a card, gift box, or other nature-inspired present.
- Use it for seasonal styling: Display it on autumn clothing or incorporate it into a warm, golden seasonal arrangement.
- Decorate a gift package: Secure the pin to ribbon or fabric wrapping so the decoration becomes part of the gift.
- Build a floral grouping: Make additional crocheted flowers in coordinating colors and arrange them together as a botanical display.
- Create a nature-themed accent: Place the pin on a fabric-covered display board, wreath, or decorative textile where the leaves and petals can be appreciated.
Caring for Your Crochet Project
Because the sunflower has been felted, shaped, stuffed, and sewn to a bar pin, handle it gently after finishing.
- Dust the flower lightly with a soft brush or clean, dry cloth.
- For a small mark, use careful spot cleaning rather than soaking the entire piece.
- Avoid pulling the petals or leaves, especially where they are stitched to the backing.
- Store the pin flat or in a shallow container so the petals are not crushed.
- Keep it away from excessive heat, which could affect the felted shape and sewn components.
- If a petal becomes bent, gently reshape it by hand and allow it to rest flat before wearing or displaying it.
- Keep the bar pin closed during storage to protect nearby fabric and prevent accidental snags.
Tips for Better Results
- Count every round. The petal base changes from 6 to 12, 18, and then 24 stitches. Confirm each count before beginning the next round.
- Watch loop placement. Round 4 is worked in the front loops only, Round 5 is worked in the back loops only of Round 3, and Round 6 is worked into both loops of Round 5.
- Use the back hump consistently. The petal chains are worked through the back hump, which gives the edges a neat, defined appearance.
- Keep petal tension even. Tight chains can make the petals curl sharply, while loose chains can make them look uneven. Aim for the same tension across each repeated petal.
- Do not join the first leaf round. The leaf instructions specifically say, “do not join, turn.” Follow this before beginning Round 2.
- Form the picot carefully. The 3-ch-picot is worked through the specified front loop and left strand of the dc just made.
- Felt before assembling. Complete the washing, shaping, and drying stages before sewing the center, leaves, backing, and bar pin together.
- Pin the petals evenly. When shaping around the aluminum ball, distribute the petals around the form rather than grouping them on one side.
- Leave the center opening small. Sew the center into place while leaving only the opening needed to add the fiberfill, then close it securely.
- Use matching assembly colors as directed. Stitch the leaves to the flower with B and the backing to the flower with C for a coordinated finish.
Creative Ways to Customize Your Project
The approved pattern uses Honeycomb, Thyme, and Hazelnut for a classic sunflower palette. Optional color changes can give the same design a different seasonal mood.
- Try another warm shade for the petals to create a golden, rust, or muted autumn flower.
- Use a darker or lighter brown-toned yarn for the center while keeping the green leaves unchanged.
- Make several flowers with different petal colors for a mixed floral pin collection.
- Coordinate the sunflower with other handmade crochet flowers in a bouquet-inspired display.
- Use the finished pin as one element in a seasonal arrangement of fabric, yarn, and botanical decorations.
- Experiment with alternative yarn only if you are prepared for changes in felting behavior, texture, dimensions, and yarn requirements. Different fibers may not felt in the same way as the specified wool yarn.
- Changing hook size is also optional, but it can affect stitch size, petal proportions, finished shape, and the amount of yarn needed. The approved instructions use the listed hooks and should remain unchanged unless you intentionally adapt the design.
Frequently Asked Questions
Is this sunflower pin suitable for a beginner?
It is a manageable project for a crocheter who knows basic stitches and is ready to practice working in front loops, back loops, chain back humps, repeated petals, and a picot. The felting and assembly stages also require careful shaping and sewing.
What yarn is recommended?
The pattern specifies STITCH NATION by Debbie Stoller™ Full o’ Sheep™, with one ball each of 2605 Honeycomb A, 2640 Thyme B, and 2350 Hazelnut C.
Which crochet hooks are used?
The supplied tools include a 5 mm [US H-8] crochet hook and an 8 mm [US L-11] crochet hook. Keep both available while working the pattern as written.
How many leaves are included?
Make two leaves in color B. They are arranged on the back of the sunflower before the backing is attached.
Can the colors be changed?
Yes, color changes are an optional customization. Keep the approved color assignments when following the original pattern, or substitute colors while remembering that the flower’s overall appearance will change.
When does felting take place?
Felting takes place before assembly. Put the crocheted pieces into tied pillowcases, wash them in hot water with a small amount of detergent, check regularly, rinse, squeeze out excess water, and let the shaped pieces dry.
How is the sunflower shaped?
Make a small aluminum ball and flatten one side. Place it in the middle of the sunflower, then pin or tie the petals around the ball and let the flower dry. Block the remaining pieces into desired shapes.
How is the center finished?
Sew the sunflower center into the middle of the flower while leaving a small opening. Stuff it with fiberfill, then finish sewing it in place.
How is the bar pin attached?
After the leaves and backing are sewn onto the flower, sew the 1½” bar pin onto the back.
Conclusion
This felted sunflower pin combines dimensional petals, a softly stuffed center, and pointed green leaves in a compact handmade accessory. Follow the felting and shaping stages carefully, then customize the finished flower for clothing, gifts, or seasonal displays. For another sunflower-inspired project idea, explore this felted sunflower pin crochet pattern.