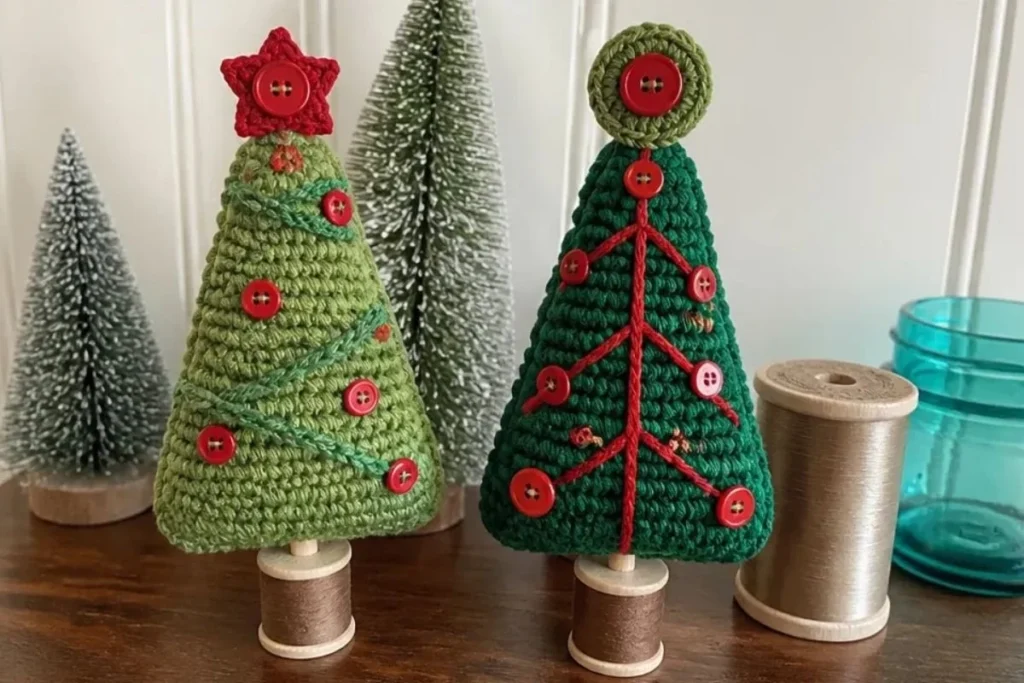
A Double Christmas Tree Crochet Pattern for Holiday Decor creates two dimensional, stuffed tabletop trees with contrasting ornaments, garlands, and sturdy spool-and-dowel trunks. The matching pair works beautifully on a mantel, holiday table, entryway shelf, or as a handmade seasonal gift. Crocheters who enjoy simple shaping, sewn embellishments, and creative finishing will appreciate how the trees combine basic single crochet with playful decorative details. For another small seasonal crochet idea, pair these trees with a simple crochet flower accessory pattern for handmade gift wrapping or festive displays.
Why You’ll Love This Crochet Project
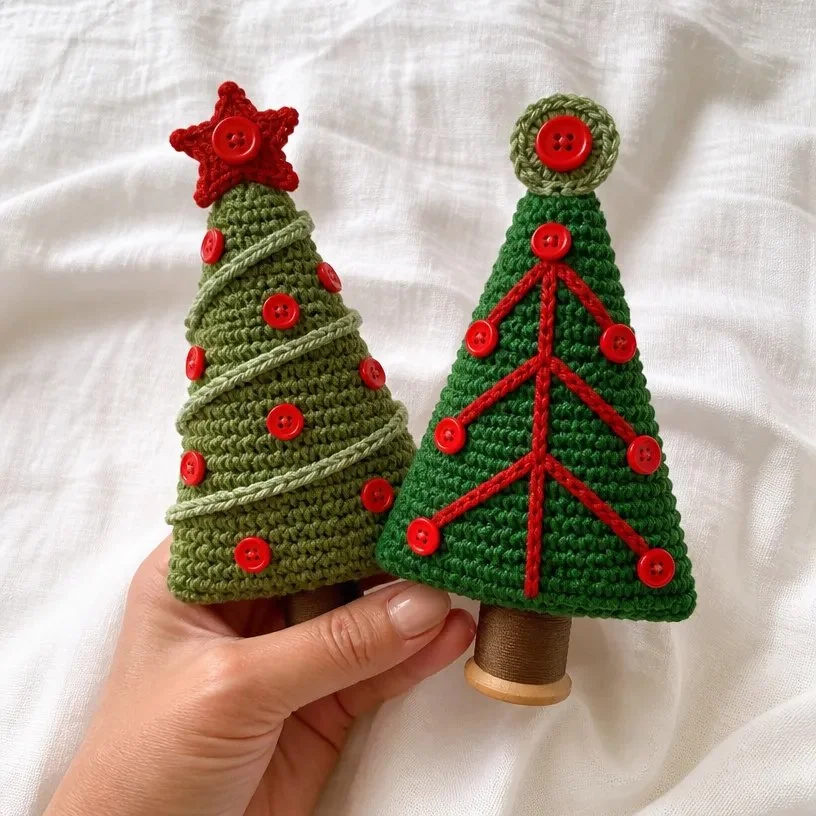
- It creates a coordinated pair. Making two trees gives you a balanced display for a mantel, shelf, or centerpiece.
- The shaping is approachable. Each tree is built from three gradually widening sides and one bottom piece, making it a useful project for practicing increases and consistent single crochet.
- The decorations are customizable. One tree features a red star and green garland, while the other uses a green circle and red branch details.
- It makes a thoughtful handmade gift. The finished trees are seasonal decorations that can be displayed year after year.
- It uses sewn details creatively. Buttons, chains, and crocheted motifs add color and texture without requiring complicated stitch patterns.
My Crochet Flower Tip: Keep the decorative pieces organized in labeled groups as you work. The two trees use different button sizes and embellishments, so separating them prevents assembly mix-ups.
Before You Start Crocheting
This pattern makes two stuffed crochet trees. For each tree, you will crochet three tree sides and one tree bottom, join the pieces, add stuffing, and close the final seam. Both trees use the same main tree construction.
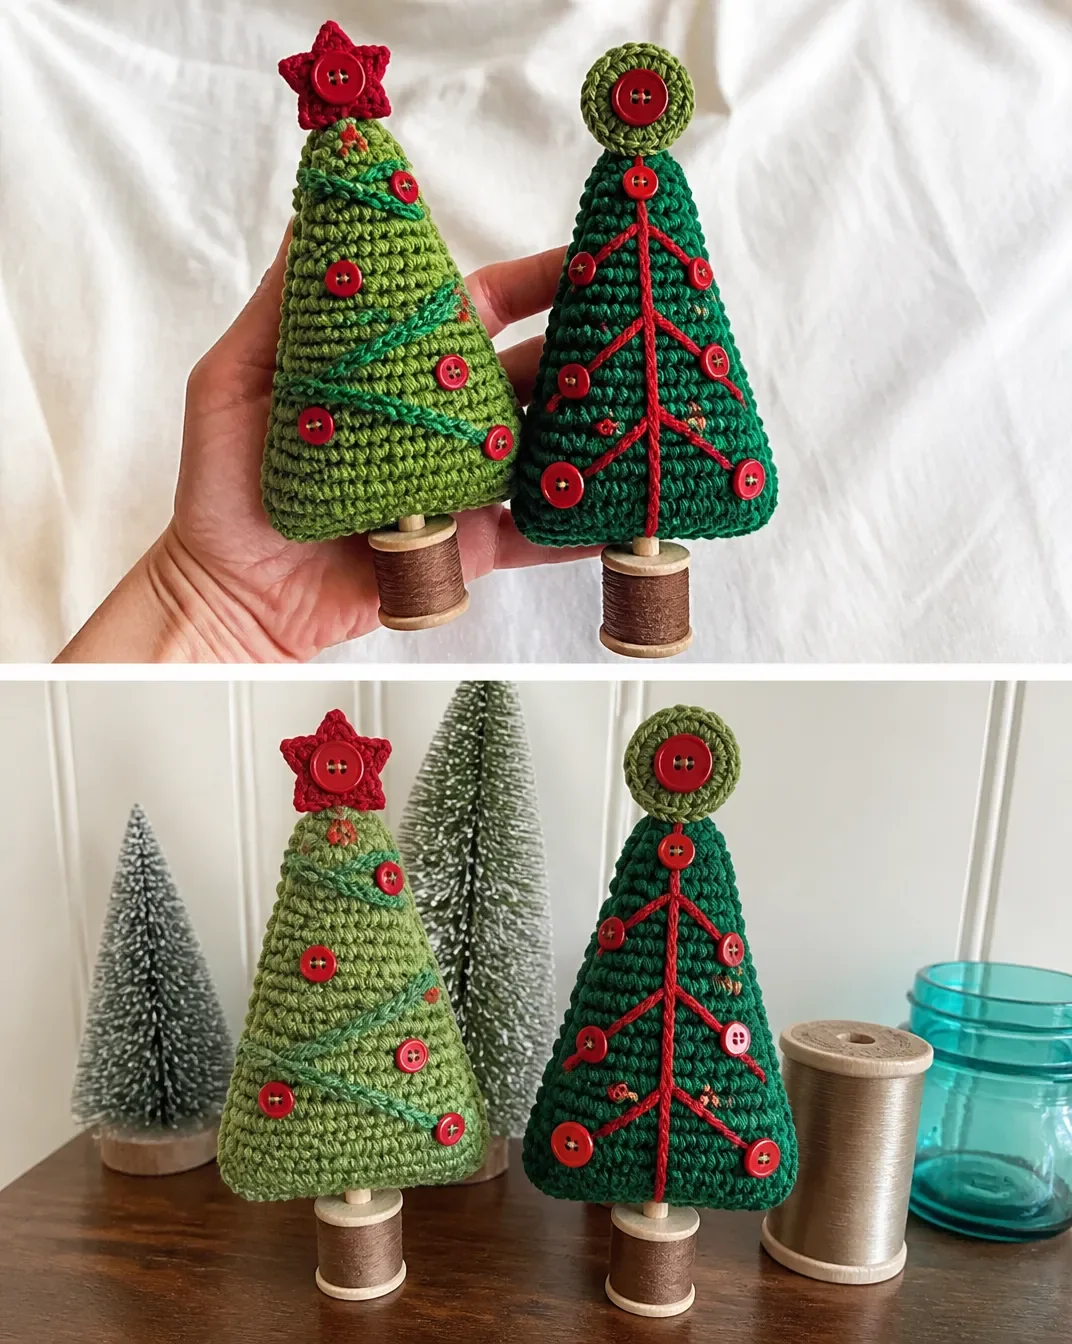
Tree 1 is finished with two red stars, four green chain garlands, and red buttons. Tree 2 is finished with two green circles, three red center stems, and three red branches in each of three lengths. Each tree is mounted on a wood-dowel-and-thread-spool trunk.
The pattern uses US crochet terminology. Helpful abbreviations include:
- ch: chain
- sc: single crochet
- sl st: slip stitch
- hdc: half double crochet
- dc: double crochet
- st/sts: stitch/stitches
Maintain consistent tension while crocheting the flat pieces so their edges align during sewing. Leave the specified sewing lengths on the bottom and embellishment pieces.
Materials You’ll Need
- RED HEART® Super Saver®: 1 skein each of 629 Green Tones A, 979 Mistletoe B, and 0319 Cherry Red C
- 5.0mm [US H-8] crochet hook
- Yarn needle
- Buttons:
- Tree 1: 21 to 24 7/16-inch red buttons and 2 3/4-inch red buttons
- Tree 2: 18 9/16-inch red buttons and 2 3/4-inch red buttons
- Two spools of Coats Cotton Machine Quilting Thread, color #8975, for the tree trunks
- Two 1/8-inch × 7 1/2-inch wood dowels or 1 set of wood chopsticks
- Sewing needle and red sewing thread
- Tacky glue
- Stuffing for the tree bodies
The dowels provide internal support, while the thread spools form the bases. Tacky glue secures the trunk assembly after the crocheted trees are sewn and stuffed.
Step-by-Step Crochet Instructions
Tree Body Make 2
Each tree body consists of three tree sides and one tree bottom.
Tree Sides Make 3 for Each Tree
Starting at the bottom, with A, ch 2.
- Row 1: 3 sc in 2nd ch from hook; turn 3 sc
- Row 2: ch 1, sc in each st across, turn
- Row 3: ch 1, 2 sc in first st, sc in next sc, 2 sc in last st; turn 5 sc
- Rows 4–6: ch 1, sc in each st across; turn
- Row 7: ch 1, 2 sc in first st, sc in each st across to last st, 2 sc in last st; turn 7 sc
- Rows 8–27: Repeat rows 4–7 five times.
- Rows 28–32: Repeat Row 4.
Fasten off.
Repeat these instructions until you have three matching sides for each tree.
Tree Bottom
With A, ch 2.
- Row 1: 3 sc in 2nd ch from hook; turn 3 sc
- Row 2: ch 1, sc in each st across, turn.
- Row 3: ch 1, 2 sc in first st, sc in each st across to last st, 2 sc in last st; turn 5 sc
- Row 4: ch 1, sc in each st across; turn.
- Rows 5–16: Repeat rows 3 and 4 six times 17 sc at end of last row.
Fasten off, leaving a sewing length.
Make one bottom for each tree.
Tree Body Finishing
With wrong sides facing, sew the bottom edge of 3 tree sides to the edges of the tree bottom.
With right side facing, sc 2 tree sides together.
Add stuffing and sc the last 2 tree sides together, adding additional stuffing as needed.
Weave in ends.
Take care not to overfill the trees. The pieces should hold their triangular shape while remaining firm enough for the dowel to enter the center bottom.
Tree 1 Embellishments
Star Make 2
With C:
Ch 4, slip st in first ch to form a ring.
Round 1:
Ch 1, work 10 sc in ring; join with a slip st in first sc 10 sc.
Round 2:
Ch 1, sc in first sc, ch 5, sc in 2nd ch from hook, hdc in next ch, dc in next 2 ch, skip next sc in round 1*, sc in next sc, repeat from * around ending last repeat at **, join with a slip st in first sc 5 points.
Fasten off, leaving a sewing length.
Star Assembly
With right sides facing, sew two stars together, matching sts.
Sew the star to the top of the tree.
With sewing needle and thread, sew one 3/4-inch button to the center of each side of the star.
Weave in ends.
Garland
With B, make 4 chains in different lengths for the garland to wrap around the tree.
Fasten off, leaving a sewing length.
Start at the bottom or top, placing garland chains 1 1/2 inches apart.
Sew the garlands in place.
With sewing needle and thread, sew 7/16-inch buttons between the garland, on each side of the tree.
Tree 2 Embellishments
Circle Make 2
With B, ch 2.
Round 1:
6 sc in 2nd ch from hook; join with a slip st in first sc 6 sc.
Round 2:
Ch 3, which counts as dc, dc in first sc, 2 dc in each sc around; join with a slip st in top of beginning ch-3 12 dc.
Fasten off, leaving a sewing length.
Circle Assembly
With right sides facing, sew circles together, matching sts.
Sew the assembled circle to the top of the tree.
With sewing needle and thread, sew one 3/4-inch button to the center of each side of the circle.
Weave in ends.
Center Tree Stem Make 3
With C, ch 33.
Fasten off, leaving a sewing length.
Tree Branches Make 3 in Each Length
Branch 1:
With C, ch 15.
Fasten off, leaving a sewing length.
Branch 2:
With C, ch 19.
Fasten off, leaving a sewing length.
Branch 3:
With C, ch 23.
Fasten off, leaving a sewing length.
Tree 2 Branch, Stem, and Button Placement
Sew one stem to the center of each side of the tree.
Sew the tree branches to the stem in a triangular shape as pictured.
Sew one 9/16-inch button at the ends of each branch.
Before stitching the branches permanently, arrange them so the shorter branches sit above the longer branches and the overall shape remains balanced.
Tree Trunk For Both Trees
Insert the wood dowel into the thread spool.
Add glue to the top of the spool.
Insert the remaining dowel into the center bottom of the tree and glue the spool to the tree.
Allow the glue to set securely before moving or displaying the finished trees.
Ways to Display Your Finished Crochet
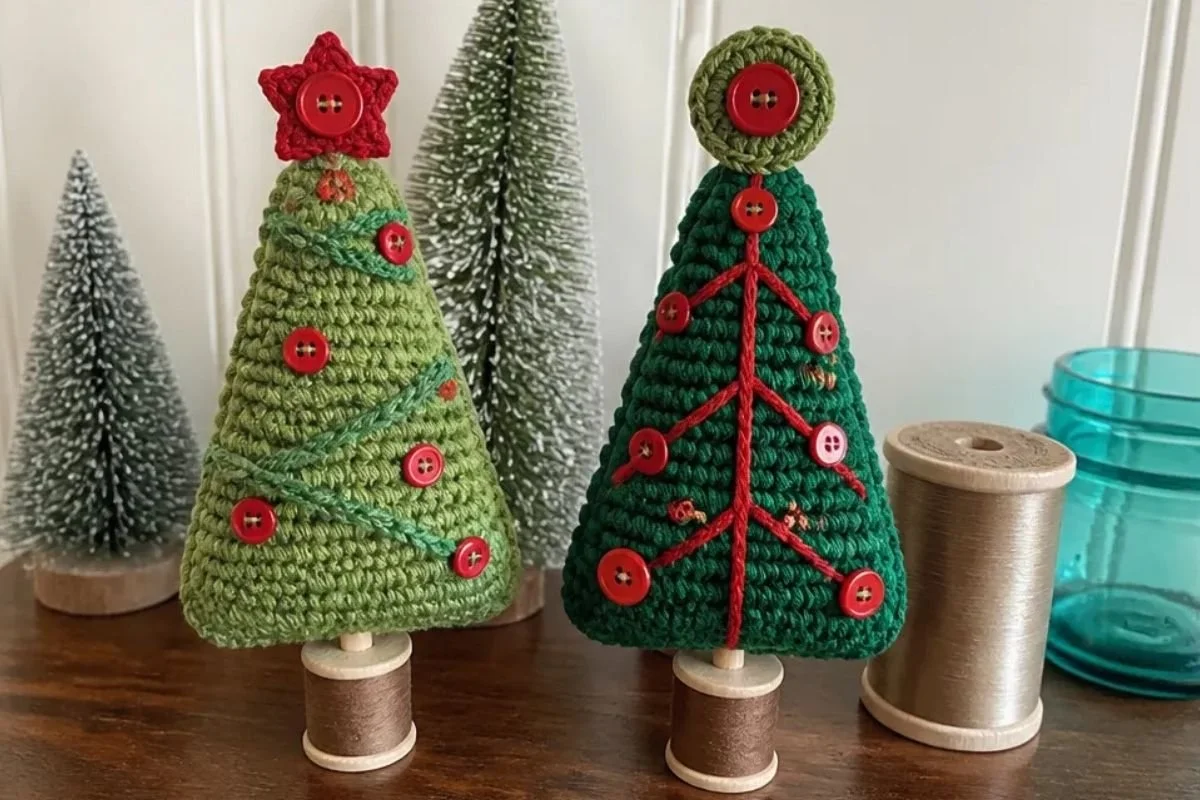
- Arrange the two trees at different positions on a mantel, shelf, or console table.
- Use them as a holiday table centerpiece, placing greenery or fabric beneath the bases.
- Display one tree on each side of a framed seasonal sign or candle arrangement.
- Give the pair as a handmade Christmas gift for a friend, host, or family member.
- Combine the trees with other crocheted decorations, such as a three-dimensional flower granny square design used as a festive table mat or decorative backdrop.
- Place the trees in a covered display cabinet where the buttons and small embellishments can be protected from frequent handling.
Caring for Your Crochet Project
Dust the trees gently with a soft brush, lint roller, or the low-suction setting of a handheld vacuum. Avoid pulling against the buttons, sewn garlands, branches, or stars.
For small marks, use careful spot cleaning with a barely damp cloth and allow the area to air-dry completely. Do not soak the finished trees, since the stuffed bodies, glued trunks, wooden dowels, and thread spools should remain as dry as possible.
Keep the trees away from excessive heat, open flames, and strong moisture. Store them upright or in a roomy box with tissue paper around the embellishments. Avoid compressing the points of the trees or placing heavy items on top of them.
Tips for Better Results
- Count each increase row carefully. The tree sides widen at Row 3 and Row 7, then continue with the repeated Row 4–7 sequence. A missed increase will make the edges difficult to align.
- Mark the first stitch of each round. This is especially helpful for the stars and circles, where the joining slip stitch affects the finished shape.
- Keep sewing lengths intact. The tree bottom, stars, circles, stems, and branches all require extra yarn for assembly.
- Match the sides before sewing. Lay the three tree sides around the bottom piece and confirm that the edges meet evenly before stitching.
- Add stuffing gradually. Fill the body as you close the final seams so the stuffing reaches the corners without distorting the tree.
- Arrange embellishments before sewing. Temporarily position the garland, branches, buttons, and toppers to check spacing and balance.
- Use the correct button sizes. Tree 1 requires 7/16-inch buttons for the garland, while Tree 2 requires 9/16-inch buttons for the branch ends.
- Secure the trunk carefully. Center the dowel in the bottom of the stuffed tree and ensure the glued spool sits flat before the adhesive dries.
Creative Ways to Customize Your Project
The approved pattern uses green, mistletoe, and cherry red, but the decorative color placement can inspire optional variations.
- Use a different contrasting color for the Tree 1 garland while keeping the red star and buttons.
- Replace the traditional red-and-green palette with white and silver for a snowy winter display.
- Choose coordinating buttons in metallic gold or silver, provided the selected sizes remain appropriate for the design.
- Display the trees with a crochet flower accent or seasonal textile underneath; a bouquet-inspired project such as a crocheted bouquet wrap can also provide ideas for coordinating handmade presentation.
- Arrange the pair with one tree slightly behind the other to create depth on a shelf.
- Use a different yarn only as an optional modification. Changing yarn weight or hook size may affect the tree’s dimensions, stuffing requirements, stitch definition, and the fit of the trunk assembly, so make a small test piece first.
These ideas are optional styling choices and do not change the approved construction instructions.
Frequently Asked Questions
Is this pattern suitable for a beginner?
It uses basic stitches, repeated single crochet rows, chains, slip stitches, and simple sewn assembly. Beginners should be comfortable counting stitches and working increases, or have access to help with those techniques.
How many crocheted tree bodies are made?
The pattern makes two trees. Each tree requires three tree sides and one tree bottom before stuffing and assembly.
What hook size should I use?
Use a 5.0mm [US H-8] crochet hook as specified.
Which yarn colors are assigned to each part?
Yarn A is used for the tree bodies, yarn B is used for Tree 1 garlands and Tree 2 circles, and yarn C is used for Tree 1 stars, Tree 2 stems and branches, and the cherry-red decorative details.
How many stars and circles are needed?
Make two stars for Tree 1 and two circles for Tree 2. Each pair is sewn together before being attached to the top of its tree.
Can I change the colors?
Yes, color changes are an optional styling choice. Keep track of the color assignments so the intended contrast between each tree body and its embellishments remains clear.
How are the trees supported?
Each tree uses a wood dowel inserted into a thread spool. The remaining dowel is inserted into the center bottom of the crocheted tree and glued to the spool.
How should I clean the finished trees?
Dust gently and spot-clean cautiously. Avoid soaking because the trees contain stuffing, wooden supports, glued components, buttons, and thread spools.
Conclusion
This double Christmas tree crochet pattern combines simple shaping with cheerful stars, circles, garlands, branches, buttons, and sturdy trunks. The finished pair can brighten a holiday shelf, centerpiece, or handmade gift presentation. Once these trees are complete, continue building a seasonal collection with free crochet Christmas ornament patterns that complement their colors and style.