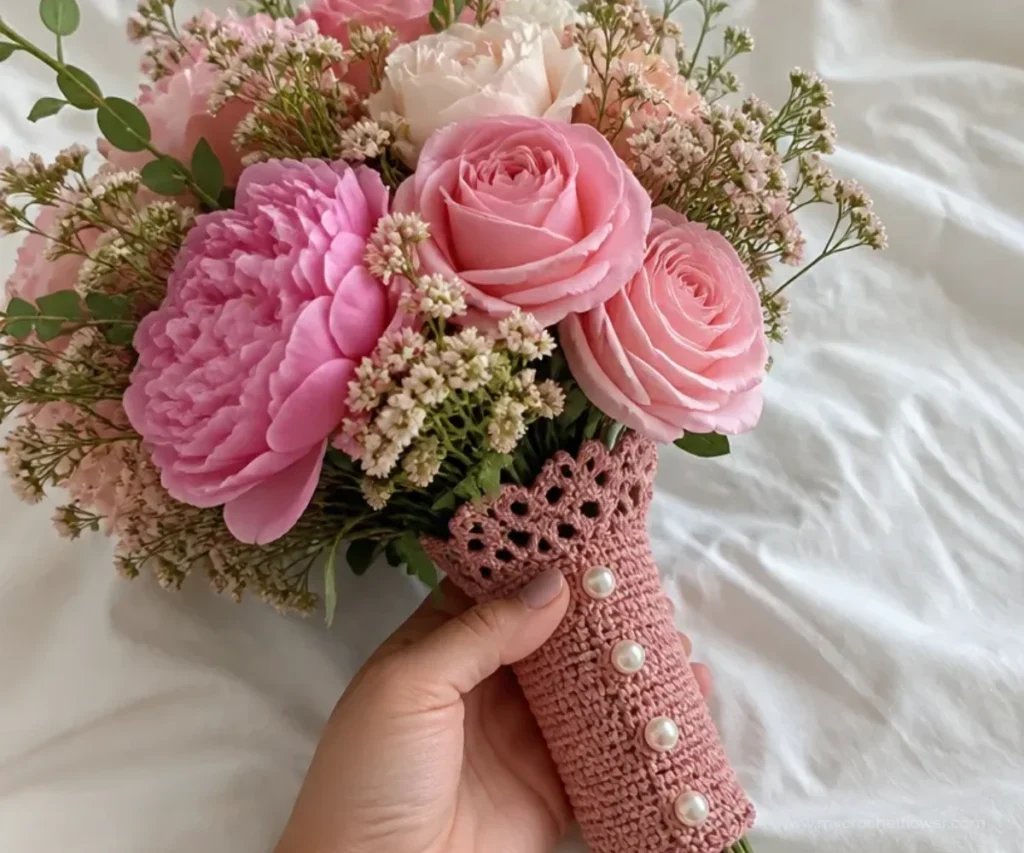
A crochet bridal bouquet wrap adds a delicate handmade finish to a wedding bouquet, anniversary arrangement, or special floral gift. This design uses a simple half double crochet rectangle and a decorative lace edge, making the Crochet Bridal Bouquet Wrap Pattern approachable while still looking elegant. The Warm Rose thread creates a romantic accent, and the button closure makes the wrap easy to arrange around a bouquet. For another wedding-inspired floral project, compare it with this crochet bridal nosegay pattern.
What Makes This Pattern Special
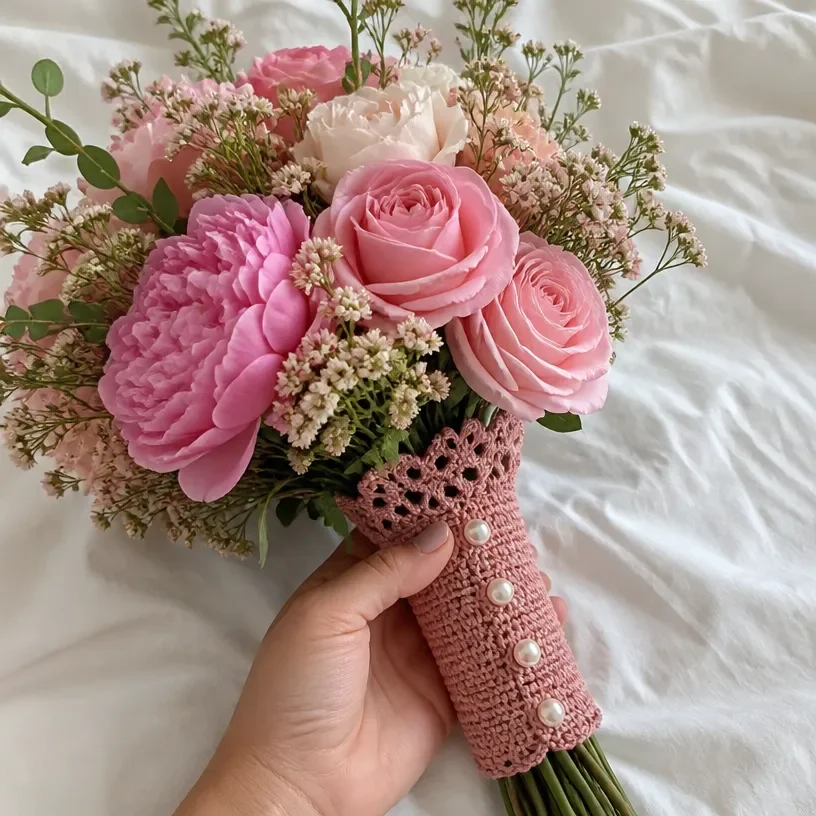
This bouquet wrap is useful for several reasons:
- It creates a polished presentation. The lace edge gives the finished wrap a refined border that complements formal flowers.
- It practices foundational stitches. The main section uses half double crochet, while the border introduces single crochet, double crochet, chain spaces, and decorative groupings.
- It offers a handmade wedding detail. A crocheted wrap can personalize a bridal bouquet, bridesmaid bouquet, or anniversary arrangement.
- It can be used beyond weddings. Wrap it around a gift bouquet, table arrangement, or decorative bundle of artificial or crocheted flowers.
- It uses a button closure. Rather than permanently sewing the wrap around the bouquet, the buttons allow the piece to be arranged and removed.
My Crochet Flower Tip: Before sewing the buttons, loosely position the wrap around the bouquet and check that the lace edge sits evenly along the visible side.
Before You Start Crocheting
The project consists of one rectangular wrap with a lace edge worked across the final two rows. The body is crocheted first in half double crochet, then the lace border is formed using skipped stitches, chain spaces, single crochet, and double crochet groups.
The wrap begins with a chain of 30 and produces 29 half double crochet stitches in the first row. Rows 2 through 28 continue across the same 29 stitches. Rows 29 and 30 create the decorative edge, after which the wrap is fastened off and finished with four buttons.
The finishing process is simple: arrange the wrap around a bouquet, determine where the buttonholes and buttons meet, sew the buttons in place, and weave in the yarn ends.
Abbreviations
- ch: chain
- sc: single crochet
- hdc: half double crochet
- dc: double crochet
- rep: repeat
Materials You’ll Need
- Aunt Lydia’s® Fashion Crochet Thread, Size 3: 1 ball, 775 Warm Rose
- Susan Bates® Crochet Hook: 3.5mm [US E-4]
- Yarn needle
- Four ½” (12 mm) buttons
The crochet thread creates a fine, neatly defined fabric suitable for a decorative bouquet accessory. The yarn needle is used to sew on the buttons and weave in the finished ends.
Complete Crochet Instructions
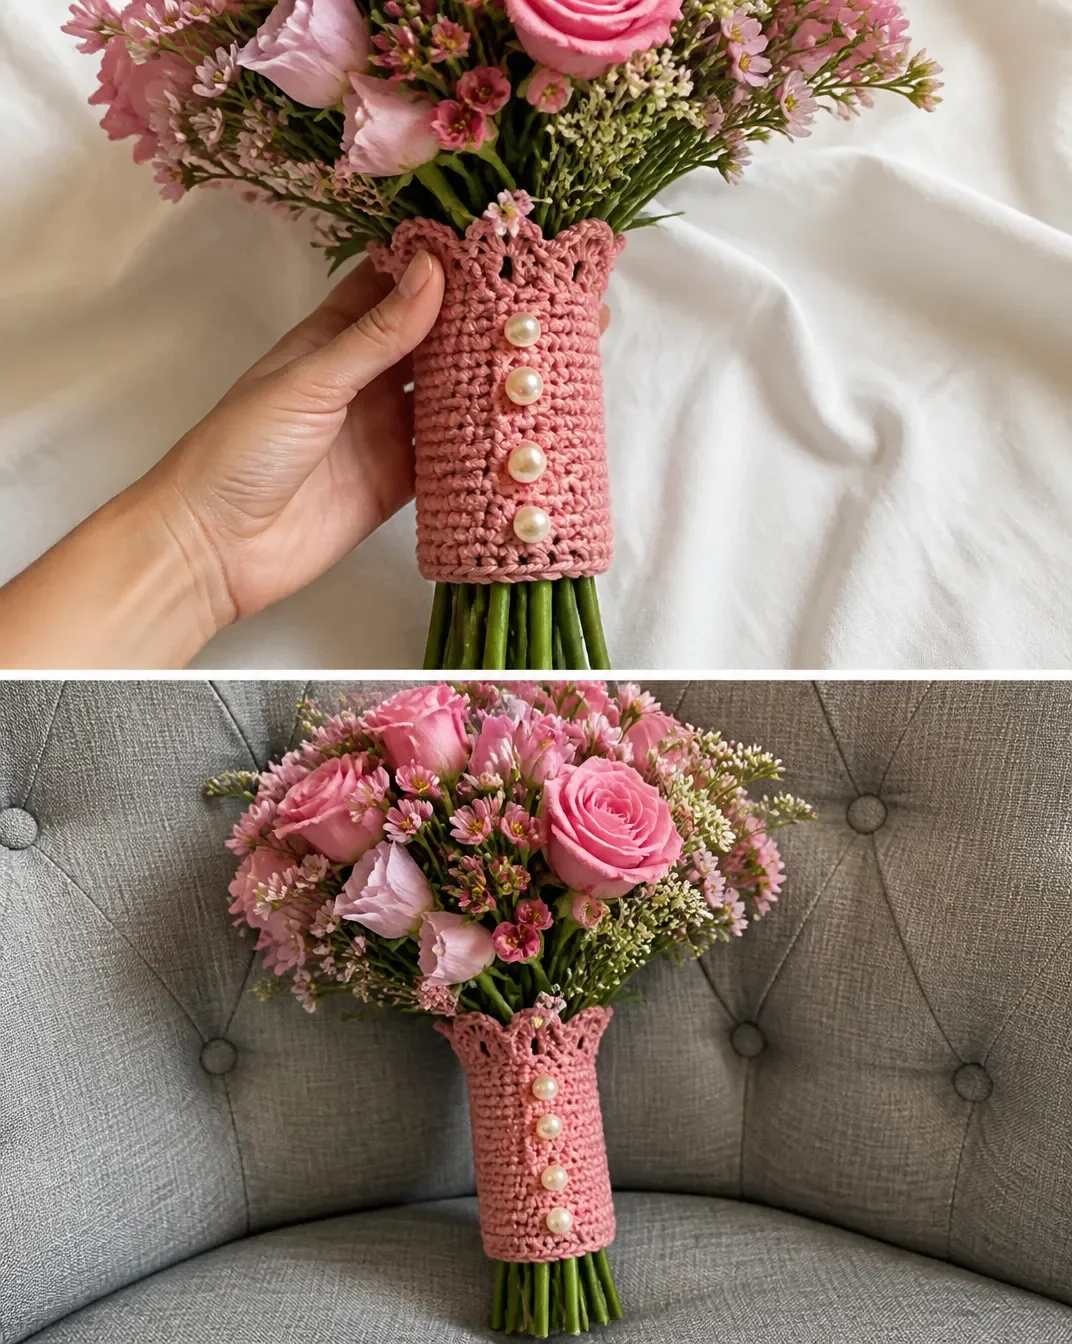
Work the approved pattern in the order below. The beginning chain instructions and stitch counts are important, especially because the lace edge is built from the 29-stitch foundation row.
Wrap
Row 1 Wrong Side
Ch 30, hdc in third ch from hook (beginning ch-2 counts as hdc) and each ch across; turn 29 hdc.
Rows 2–28
Ch 2, hdc in second hdc and each hdc across; turn 29 hdc.
At the end of Row 28, keep the fabric flat and check that the edge contains 29 half double crochet stitches before beginning the lace edge.
Lace Edge
Row 29
Ch 3 (counts as hdc, ch-1), skip next hdc, sc in next hdc,
*skip 2 hdc, (2 dc, ch 2, 2 dc) in next hdc, skip 2 hdc, (sc, ch 3, sc) in next hdc;
rep from * twice, skip 2 hdc, (2 dc, ch 2, 2 dc) in next hdc, skip 2 hdc,
sc in next hdc, ch 1, skip next hdc, hdc in top of ch-2; turn.
The lace edge alternates between shell-like double crochet groups and small chain-3 arches. Work the skipped stitches carefully so the border remains balanced across the wrap.
Row 30
Ch 3 (counts as dc), 2 dc in next ch-1 space,
*(sc, ch 3, sc) in next ch-2 space, (2 dc, ch 2, 2 dc) in next ch-3 space;
rep from * twice, (sc, ch 3, sc) in next ch-2 space,
3 dc in last ch-3 space. Fasten off.
Finishing
Arrange Wrap around a bouquet to determine button placement.
Sew buttons opposite holes created by Lace Edge.
Weave in ends.
When arranging the wrap, avoid pulling the lace edge too tightly. The decorative border should lie smoothly around the bouquet while the buttons remain secure but easy to fasten.
Creative Ways to Use Your Project
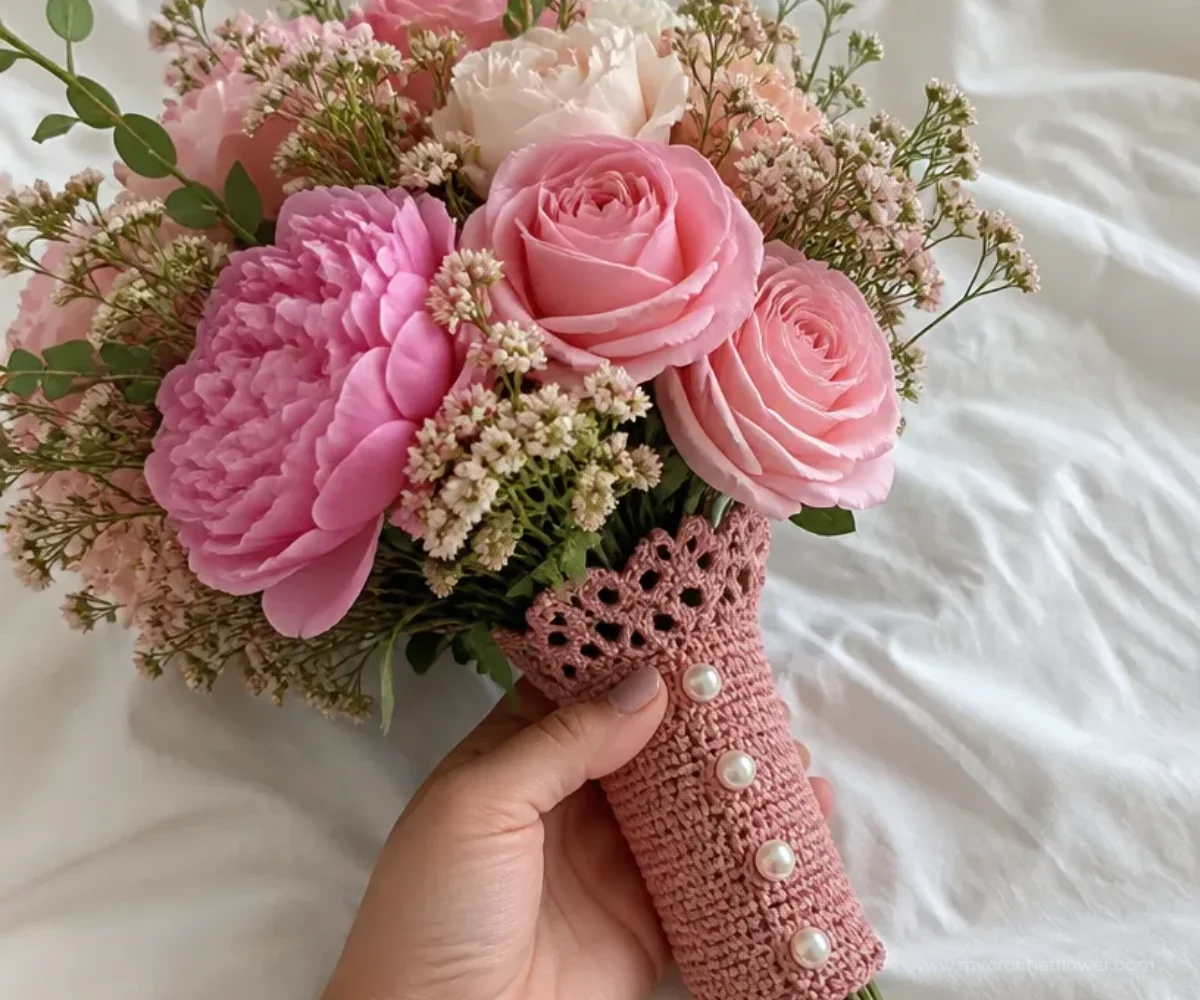
The finished wrap can be styled in several ways:
- Bridal bouquet accent: Position the Warm Rose wrap around the handle or lower portion of a bridal bouquet for a soft, romantic detail.
- Bridesmaid bouquet decoration: Use the same wrap on smaller bouquets to coordinate the wedding party’s flowers.
- Anniversary gift presentation: Pair the wrap with fresh flowers and remove it later for continued use.
- Table centerpiece detail: Arrange it around a compact floral bundle placed in a vase or decorative container.
- Crochet flower bouquet accessory: Combine it with handmade flowers for a completely fiber-crafted display. A crochet rose bouquet pattern can provide a romantic floral arrangement to coordinate with the wrap.
- Seasonal color styling: Make the wrap in a different thread color for spring celebrations, holiday arrangements, or formal gift baskets.
Caring for Your Crochet Project
Treat the finished wrap as a delicate decorative accessory. Store it away from moisture, direct sunlight, and anything that could snag the lace edge or thread.
- Dust it gently with a soft, dry cloth or a clean, soft brush.
- If a small area needs attention, use careful spot cleaning rather than aggressive rubbing.
- Avoid pulling the chain arches or double crochet groups when fastening the buttons.
- Store the wrap flat or loosely rolled so the lace edge does not become sharply creased.
- Keep the buttons secured and check their stitching occasionally, especially if the wrap is used frequently.
- Avoid excessive heat, which can affect the thread and may damage the finish of the buttons.
If the wrap is displayed around fresh flowers, protect it from water and damp stems by keeping the crocheted fabric above the vase opening or bouquet water source.
Tips for Better Results
- Maintain even tension. Consistent tension helps the 29-stitch body remain straight and gives the lace edge a uniform appearance.
- Count the foundation row. After Row 1, confirm that you have 29 half double crochet stitches before continuing.
- Observe the turning chain. In Row 1, the beginning ch-2 counts as a half double crochet, exactly as stated in the pattern.
- Locate spaces carefully. The lace edge depends on working into the correct ch-1, ch-2, and ch-3 spaces. Identify each space before inserting the hook.
- Respect the skipped stitches. Skipping too few or too many stitches in Row 29 can shift the lace motifs and make the final edge uneven.
- Avoid tightening chain arches. Keep the chain-3 sections relaxed enough to form visible decorative loops.
- Check button placement before sewing. Wrap the piece around the bouquet first, then mark or hold the buttons opposite the lace-edge holes.
- Weave in ends securely. Thread the yarn needle through the back of nearby stitches without pulling the fabric out of shape.
For additional inspiration when planning a mixed floral arrangement, consider adding a classic crochet daisy bouquet beside the finished wrap.
Color and Styling Variations
The approved instructions use Aunt Lydia’s Fashion Crochet Thread, Size 3 in 775 Warm Rose. Changing the color is an optional styling choice and does not alter the written stitch sequence.
- Soft bridal palette: Try white, ivory, blush, or pale pink to coordinate with light-colored flowers.
- Romantic contrast: Use burgundy, dusty rose, or deep mauve around a lighter bouquet.
- Spring styling: Pair a yellow, lavender, or soft green wrap with seasonal flowers.
- Classic neutral: A cream or white wrap can complement nearly any bouquet color.
- Coordinated button detail: Choose buttons that echo the flowers, ribbon, or bouquet handle.
If substituting a different thread or yarn, remember that the fabric’s size, drape, lace definition, and yarn requirements may change. A different hook size can also affect the finished dimensions and the way the buttonholes fit the buttons, so substitutions should be treated as optional experimentation rather than changes to the approved pattern.
A cheerful alternative arrangement could pair this wrap with a crochet daffodil bouquet for a bright seasonal display.
Frequently Asked Questions
Is this crochet bouquet wrap suitable for beginners?
The main body uses repeated half double crochet rows, making it approachable for a crocheter familiar with basic stitches. The lace edge requires closer attention because it includes skipped stitches, chain spaces, single crochet, and double crochet groups.
What yarn is recommended?
The pattern specifies Aunt Lydia’s® Fashion Crochet Thread, Size 3, using one ball of 775 Warm Rose. Using the specified thread helps preserve the intended fabric texture and lace definition.
What hook size should I use?
Use a Susan Bates® Crochet Hook measuring 3.5mm [US E-4], as specified in the pattern.
How many pieces are crocheted?
The pattern creates one wrap. The lace edge is worked directly onto the wrap rather than crocheted as a separate component.
How are the buttons attached?
First, arrange the wrap around a bouquet to determine button placement. Then sew the four ½” (12 mm) buttons opposite the holes created by the lace edge.
Can I change the thread color?
Yes. Changing the color is an optional styling variation. Keep in mind that changing the fiber, thread size, or yarn weight may affect the fabric and final fit.
Can I use the wrap with fresh flowers?
Yes, but keep the thread away from standing water and damp stems. It is best used around the dry handle or outer portion of the bouquet.
How should I store the finished wrap?
Store it flat or loosely rolled in a dry place, protected from sunlight, snagging, and excessive heat. Avoid placing heavy items on the lace edge.
Conclusion
This crochet bridal bouquet wrap combines a straightforward half double crochet body with an elegant lace edge and button closure. It is a lovely way to personalize a wedding bouquet, gift arrangement, or handmade floral display. For the original pattern reference, visit the Aunt Lydia’s bridal bouquet wrap pattern, or browse additional bouquet wrap pattern ideas for further inspiration.