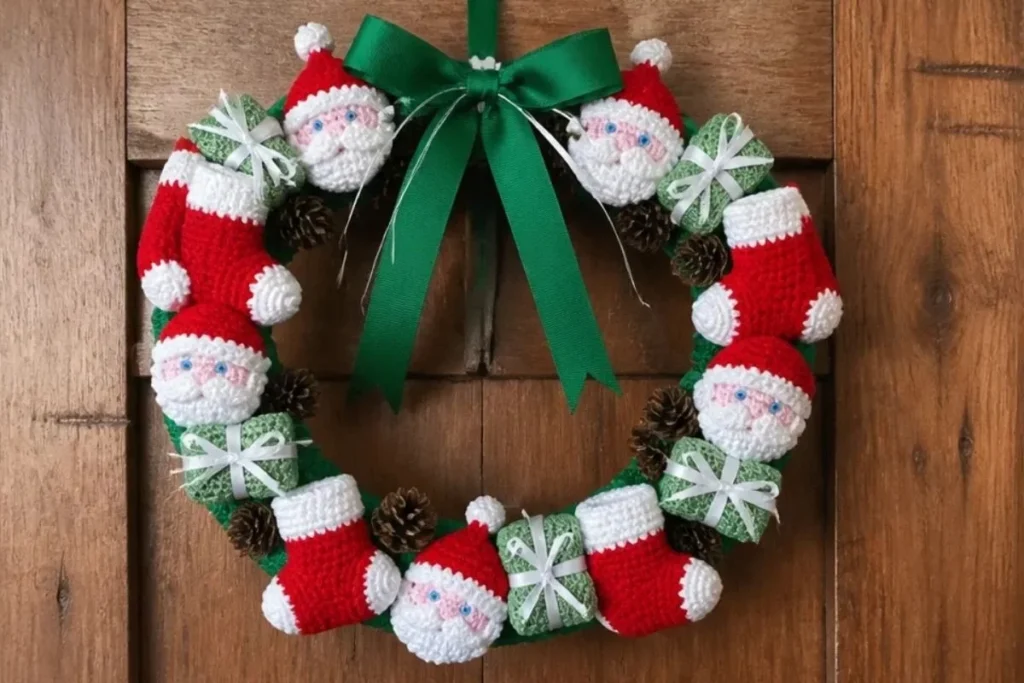
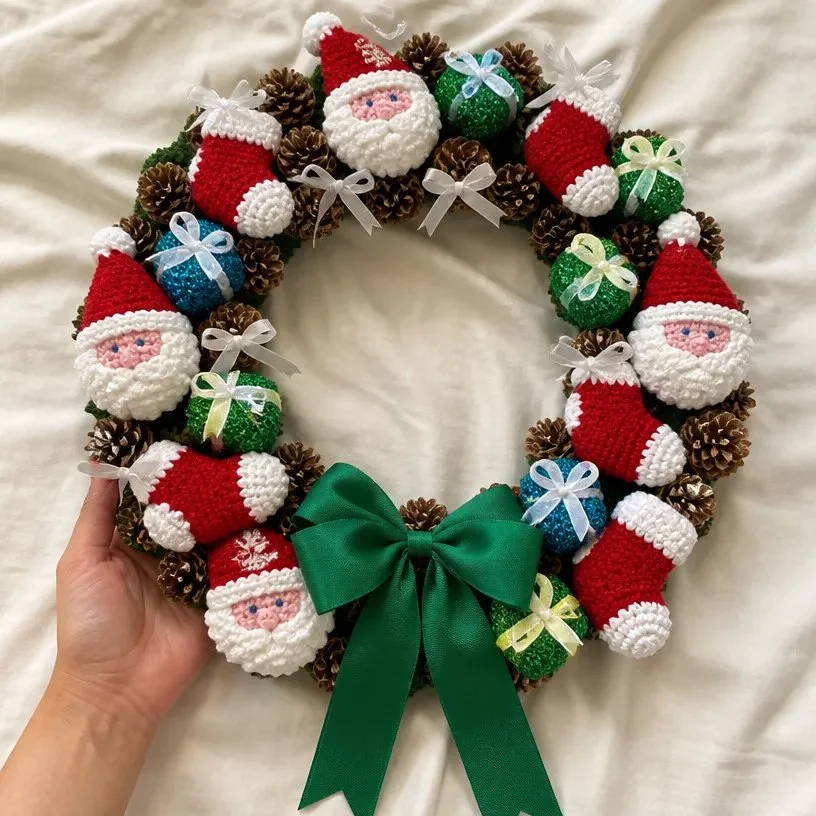
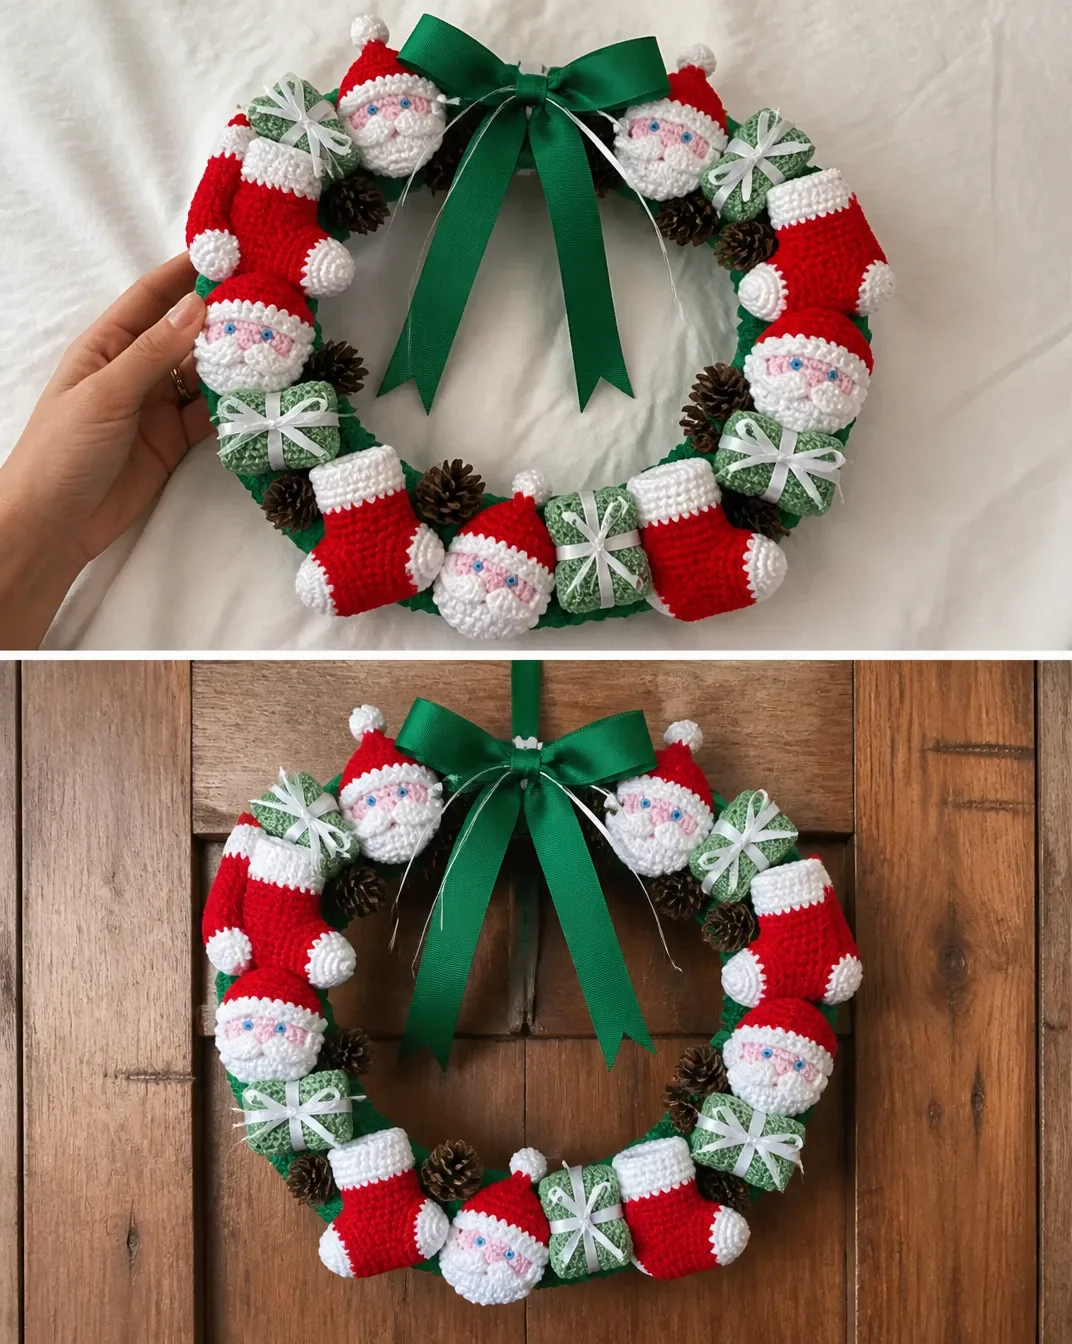
A handmade wreath brings together the charm of crochet, traditional Christmas colors, and simple seasonal embellishments. This DIY Merry Christmas Wreath Pattern features three cheerful Santas, four stockings, five sparkling gift boxes, pine cones, and ribbon arranged on a 12-inch wreath form. It is a festive project for crocheters who enjoy making small decorative pieces and assembling them into one display. For another cheerful handmade decoration, you may also enjoy this easy daisy granny square crochet tutorial.
Why You’ll Love This Crochet Project
- It combines several manageable motifs. The Santas, stockings, and gift boxes are made separately, so you can focus on one small component at a time.
- It practices useful crochet skills. You will work chains, single crochet, double crochet, slip stitches, color changes, shaping, seaming, and light stuffing.
- It makes a distinctive seasonal decoration. The finished wreath can brighten a front door, mantel, wall, or holiday table.
- It offers a handmade gifting option. A completed wreath makes a thoughtful Christmas gift for a family member, teacher, neighbor, or host.
- It can be customized without changing the core pattern. Ribbon, yarn-wrapped wreath forms, and the placement of the motifs can all be adjusted to suit your décor.
My Crochet Flower Tip: Make and finish all the small crochet pieces before beginning assembly. This lets you arrange the wreath components freely and balance the colors before using hot glue. You may also find Crochet Easy Red Roses Bouquet 2 useful.
Before You Start Crocheting
This wreath is assembled from 3 Santas, 4 stockings, and 5 gift boxes, then attached to a 12-inch [30.5 cm] Styrofoam wreath. Twenty small dried pine cones, green ribbon, and white ribbon complete the design. If desired, the wreath form can first be covered with one ball of Sugar’n Cream in Emerald.
The crochet work uses mostly single crochet, with double crochet in the Santa face. The stockings involve several shaped sections: a cuff, leg, heel, foot, and toe. The gift boxes are built from one main piece and two side pieces, then lightly stuffed and wrapped with ribbon.
Use a 4 mm (U.S. G or 6) crochet hook, or the size needed to obtain gauge. The technical notes indicate that one ball each of Colors A, B, and C makes 15 Santas; one ball each of Colors A and C makes 7 stockings; and one ball of Sparkle makes 5 gift boxes.
Abbreviations
- ch: chain
- sc: single crochet
- dc: double crochet
- sl st: slip stitch
- RS: right side
- rep: repeat
- st/sts: stitch/stitches
- yoh: yarn over hook
- Sc2tog: single crochet two together
Materials You’ll Need
- Lily Sugar’n Cream Cotton 4 ply Solids 2.5 oz [70.9 g] / Sparkles 2 oz [56.7 g]
- Color A (Red): 1 ball
- Color B (Baby Pink): 1 ball
- Color C (White): 1 ball
- Color D (Mistletoe Sparkle): 1 ball
- Small amount of blue yarn
- Size: 4 mm (U.S. G or 6) crochet hook or size needed to obtain gauge
- Stuffing
- Glue gun and glue sticks
- Green ribbon: 2 yds [1.8 m] of ⅝ inch [15 mm] wide
- White ribbon: 3 yds [2.75 m] of ¼ inch [10 mm] wide
- 20 small dried pine cones
- Styrofoam wreath: 12 ins [30.5 cm] in diameter
- 1 ball Sugar’n Cream (Emerald) to wrap wreath, optional
The blue yarn is used to embroider the Santa eyes. Stuffing gives the stockings and gift boxes their shape, while the glue gun secures the completed crochet pieces and pine cones to the wreath.
Technical notes: 1 ball each of A, B, and C makes 15 Santas. One ball each of A and C makes 7 stockings. One ball of Sparkle makes 5 gift boxes.
Step-by-Step Crochet Instructions
Santa Make 3
Face
With B, ch 6. Join with sl st to form ring.
1st rnd: Ch 3. 7 dc in ring. Break B and join C in last dc. With C, 8 dc in same ring. Sl st in first dc.
2nd rnd: Ch 3. Sl st in top of first B st.
Ch 3. Sl st in top of next st. Rep from * to * for all B sts.
Ch 5. Sl st into next C st. Rep from to to complete ring.
Fasten off.
Hat
With A, ch 9.
1st row: 1 sc in 2nd ch from hook. 1 sc in each sc to end of ch. 8 sc. Turn.
2nd row: Ch 1. Miss first sc. 1 sc in each sc to end of row. Turn.
Rep 2nd row until one st remains. Fasten off.
Pompom
Join C with sl st to point of Hat.
Ch 4. Join with sl st to form ring.
1st rnd: Ch 1. 12 sc in ring.
Break yarn leaving 6 ins [15 cm] end. Thread yarn through a needle and draw through top of each st in ring. Draw up firmly and fasten off.
Finishing Santa
Sew Hat to Face as illustrated.
Embroider two eyes using blue yarn.
Stocking Make 4
Cuff
With C, ch 13.
1st row (RS): 1 sc in 2nd ch from hook. 1 sc in each ch to end of ch. 12 sc. Ch 1. Turn.
2nd row: 1 sc in each sc to end of row. Ch 1. Turn.
Rep 2nd row once more, joining A at end of last row.
Leg
With A, 1 sc in each sc to end of row. Ch 1. Turn.
Rep last row until work from beg measures 3 ins [7.5 cm] ending with RS facing and omitting turning ch at end of last row. Fasten off.
Heel
With RS of work facing, miss first 9 sc.
Join C with sl st in next sc. Ch 1. 1 sc in same sc. 1 sc in each of last 2 sc.
Bring other side of leg around.
Work 1 sc in each of first 3 sc. Ch 1. Turn.
Next row: 1 sc in each of first 4 sc. Ch 1. Turn.
Next row: 1 sc in each of first 2 sc. Ch 1. Turn.
Next row: 1 sc in each of next 2 sc. 1 sc in next sc of long row below. 3 sts. Ch 1. Turn.
Next row: 1 sc in each of next 3 sc. 1 sc in next sc of long row below. 4 sts. Ch 1. Turn.
Cont as for last 2 rows until 6 sts of Heel have been worked, omitting turning ch at end of last row. Fasten off.
Foot
With RS of work facing, miss first 3 sc of Heel.
Join A with sl st in next sc. Ch 1.
1 sc in same sc.
1 sc in each of next 2 sc of Heel.
Miss next sc of Leg.
1 sc in each of next 4 sc.
Miss next sc of Leg.
1 sc in each of next 3 sc of Heel.
Ch 1. Turn. 10 sts.
Next row: 1 sc in each sc to end of row. Ch 1. Turn.
Next row: 1 sc in each sc to end of row, changing to C in last sc. Ch 1. Turn.
Toe
Next 2 rows: With C, 1 sc in each sc to end of row. Ch 1. Turn.
Next row: (Draw up a loop in each of next 2 sc. Yoh and draw a loop through all loops on hook Sc2tog made) 5 times. Fasten off.
Finishing Stocking
Sew Cuff and Leg back seams.
Sew Foot and Toe seams.
Sew corners of Heel closed.
Stuff lightly.
Gift Box Make 5
Box Main Piece
With D, ch 8.
1st row: 1 sc in 2nd ch from hook. 1 sc in each ch to end of ch. Turn. 7 sc.
2nd to 6th rows: Ch 1. 1 sc in each sc to end of row. Turn. 7 sc.
7th row: Ch 1. 1 sc in back loop only of each sc to end of row. Turn.
8th to 10th rows: Ch 1. 1 sc in each sc to end of row. Turn.
11th row: Rep 7th row.
Rep from 2nd to 6th once. Fasten off.
Box Sides Make 2
Ch 7.
1st row: 1 sc in 2nd ch from hook. 1 sc in each ch to end of row. Turn. 6 sc.
2nd to 4th rows: Ch 1. 1 sc in each sc to end of row. Turn.
Fasten off.
Finishing Gift Box
Sew first row of Main Piece to last row to form a box with sides open.
Sew one Box Side in position.
Stuff Box.
Sew remaining Box Side in position.
Tie a length of ribbon around Box, tie a bow, and stitch in place.
Assembly
If desired, wrap yarn around Styrofoam Wreath to cover completely.
Using photo as a guide, glue Santas, Stockings and Gift Boxes on Wreath as illustrated.
Glue on pine cones and ribbon bow.
MERRY CHRISTMAS
Ways to Display Your Finished Crochet
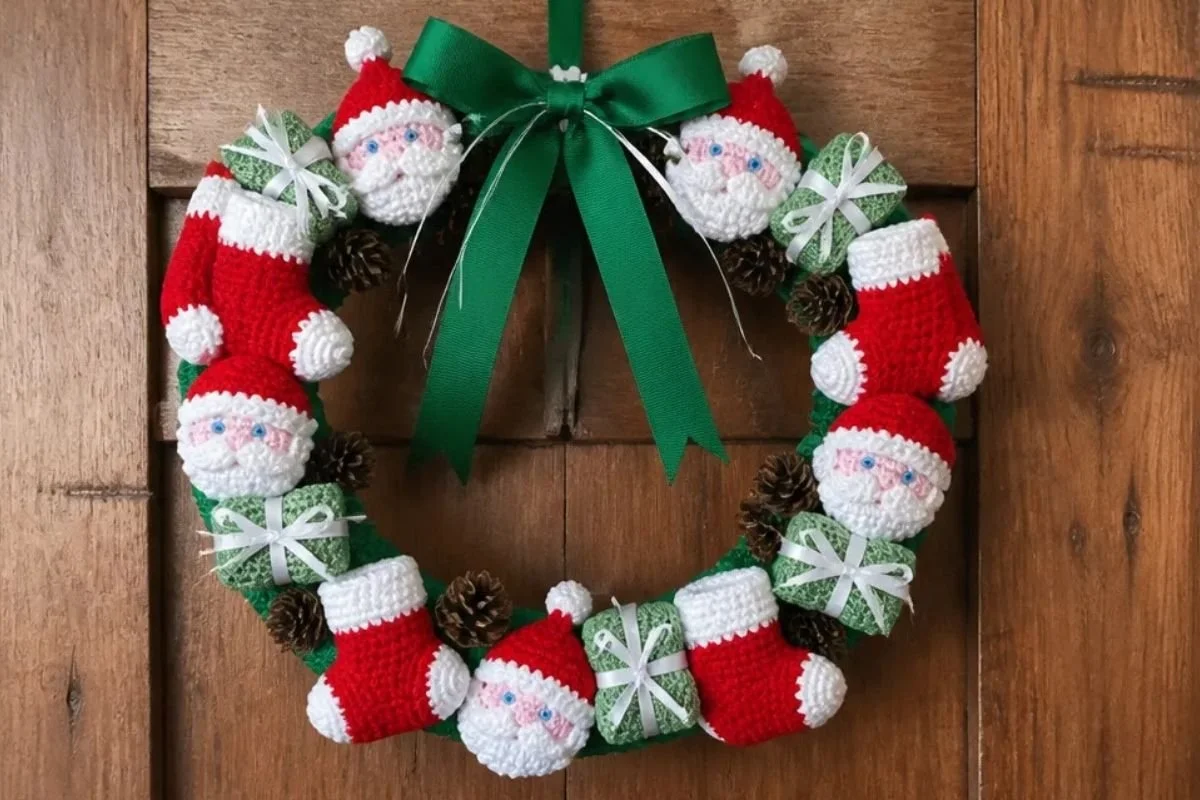
- Hang it on an interior door. The lightweight Styrofoam base makes it suitable for a bedroom, craft room, entryway, or pantry door.
- Use it as a mantel decoration. Lean the wreath against the wall or secure it carefully above the mantel as part of a Christmas display.
- Create a festive table arrangement. Place the wreath flat as a centerpiece, keeping candles and other heat sources safely away from the yarn, ribbon, dried pine cones, and glue.
- Give it as a seasonal gift. Add a simple gift tag and package the wreath so the raised crochet pieces are not crushed.
- Coordinate it with other handmade décor. A floral wreath project such as this crochet April flowers wreath pattern can inspire another seasonal wreath-making project when you want to build a collection of handmade decorations.
Caring for Your Crochet Project
- Dust the wreath gently with a soft, dry cloth or a cool air setting held at a distance.
- Avoid soaking or machine washing because the project includes stuffing, hot glue, ribbon, a Styrofoam base, and dried pine cones.
- For a small mark, use a barely damp cloth and dab carefully rather than rubbing the crochet.
- Keep the wreath away from radiators, fireplaces, direct heat, and prolonged strong sunlight.
- Store it in a clean, dry container large enough that the Santas, stockings, and gift boxes are not compressed.
- Before storing, check the glued pieces, stitched bows, and pine cones. Repair loose parts before the next holiday season.
- Keep the wreath away from moisture, which can affect the yarn, ribbon, dried pine cones, glue, and Styrofoam.
Tips for Better Results
- Count the starting chains carefully. The face, hat, stocking, and gift box pieces all rely on specific foundation-chain counts.
- Mark the right side of the stocking. The heel instructions begin with the RS facing, so identifying that side will help keep the shaping oriented correctly.
- Watch the color changes. Join A at the end of the last cuff row, change to C in the last sc of the foot, and follow the specified Santa color changes closely.
- Respect the back-loop-only row. The 7th row of the gift-box main piece is worked in the back loop only, creating the intended ridge or fold detail.
- Do not overstuff. The stockings and gift boxes should be lightly stuffed so their seams remain neat and the wreath stays visually balanced.
- Leave the specified yarn tail for the pompom. The 6-inch [15 cm] end is used to gather the top of each pompom securely.
- Sew before gluing. Complete all seams, embroidery, stuffing, bows, and yarn-end finishing before attaching the motifs to the wreath.
- Arrange before applying adhesive. Place the Santas, stockings, gift boxes, pine cones, and ribbon bow on the wreath first, then glue once the composition looks balanced.
Color and Styling Variations
These ideas are optional and do not change the approved crochet instructions.
- Use the original red, baby pink, white, and Mistletoe Sparkle palette for a soft traditional Christmas look.
- Arrange the Santas evenly around the wreath, then fill open spaces with stockings, gift boxes, and pine cones.
- Wrap the Styrofoam wreath in Emerald yarn for a stronger green background, or leave the form unwrapped if you prefer a simpler base.
- Substitute coordinating seasonal ribbon colors only if desired, remembering that a different ribbon width can change the appearance of the gift-box bows and wreath bow.
- Reposition the motifs for a fuller lower cluster, a balanced circular arrangement, or a design with one Santa as the visual focal point.
- If you use a different yarn or hook size, the dimensions, texture, shaping, and amount of yarn required may change. Make the approved components as written and expect the finished motifs to vary in size.
Frequently Asked Questions
Is this wreath pattern suitable for a beginner?
It includes beginner-friendly stitches such as single crochet, double crochet, chains, and slip stitches. The stocking heel and foot require closer attention because they involve shaping and skipped stitches, while the final assembly involves sewing and gluing.
How many crochet pieces does the wreath include?
The pattern calls for 3 Santas, 4 stockings, and 5 gift boxes. It also includes 20 small dried pine cones and ribbon as part of the finished wreath decoration.
What hook size should I use?
Use a 4 mm (U.S. G or 6) crochet hook, or the size needed to obtain gauge.
Can I change the yarn colors?
Yes, color changes are an optional styling choice. Keep the color roles clear while crocheting: A is used for red hats and stocking legs, B for the Santa face section, C for white details, and D for the sparkling gift boxes.
How are the pieces attached to the wreath?
After completing and finishing the crochet pieces, optionally wrap the Styrofoam wreath with Emerald yarn. Then use the photo as a guide to glue the Santas, stockings, gift boxes, pine cones, and ribbon bow onto the wreath.
Should the stockings and gift boxes be firmly stuffed?
No. The stockings should be stuffed lightly, and the gift boxes should be stuffed enough to hold their shape without stretching the seams.
Can I wash the completed wreath?
Washing is not recommended for the assembled wreath because it contains stuffing, hot glue, ribbon, dried pine cones, and a Styrofoam base. Dust gently and spot-clean cautiously instead.
Can I use a different wreath form?
A different size or material may be used as an optional variation, but it will change the finished proportions and may require a different arrangement of the crochet pieces.
Conclusion
This DIY Merry Christmas Wreath Pattern turns small crochet motifs into a cheerful holiday display filled with Santas, stockings, sparkling gifts, pine cones, and ribbon. Finish the pieces carefully, arrange them before gluing, and store the completed wreath gently between seasons. For another creative wreath-inspired holiday craft, pair your crochet project with this wreath watercolor Christmas card tutorial.