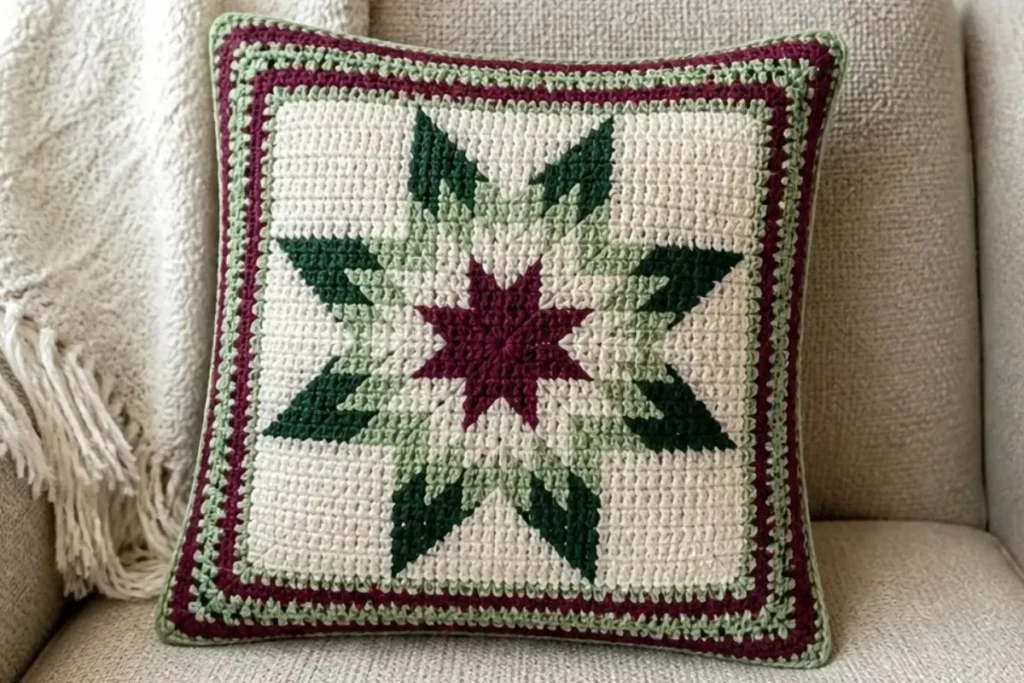
This Crochet Christmas Star Throw Pillow Pattern creates a coordinated seasonal set: a star-inspired throw made from colorful Afghan-stitch blocks plus a matching 16-inch pillow. The Aran Fleck, burgundy, dark sage, and light sage palette gives the project a warm traditional look that suits holiday decorating and handmade gifting. The charted colorwork also makes each block engaging to crochet, while the repeated construction keeps the larger throw organized. For another color-charted crochet idea, compare the structure with this 3D flower granny square pattern before choosing your preferred color arrangement.
Why You’ll Love This Crochet Project
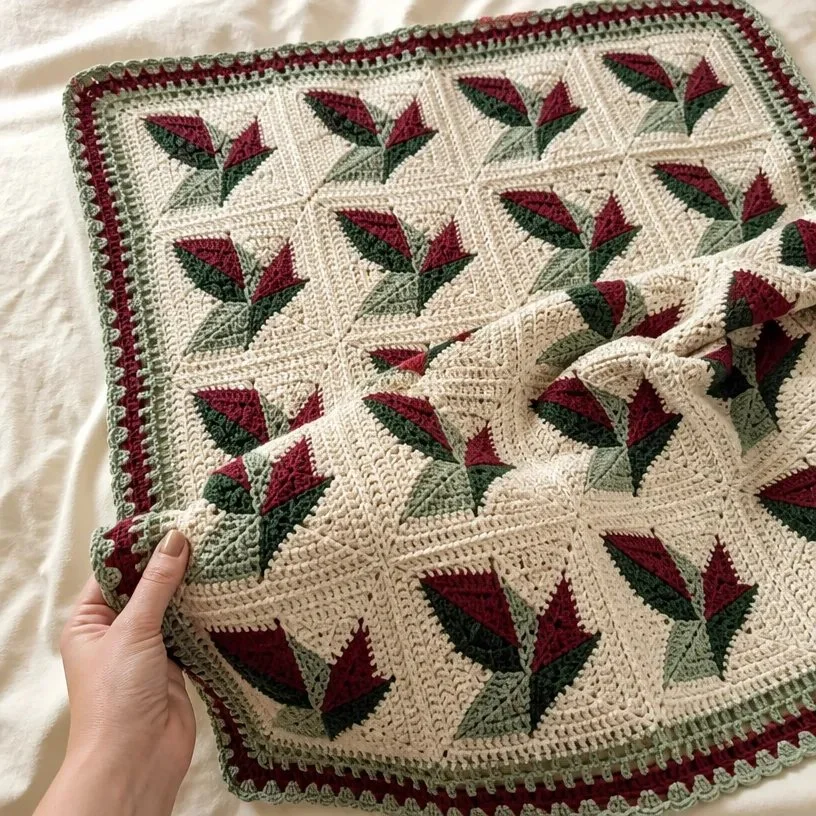
- It creates a coordinated set. The throw and pillow use the same yarn palette and chart-based design, making them easy to display together.
- It offers useful stitch practice. You will work Afghan stitch, slip-stitch joining, charted color changes, double crochet borders, single crochet rounds, and raised stitches worked into earlier rounds.
- It makes a thoughtful handmade gift. A seasonal pillow can be given on its own, while the throw makes a substantial holiday present.
- It works well for home decoration. Place the finished pieces on a sofa, reading chair, guest bed, or holiday display.
- It teaches careful color handling. Separate yarn balls and controlled color changes help create defined blocks without unwanted holes.
My Crochet Flower Tip: Before beginning the charted blocks, label each color ball A, B, C, or D. This small step makes the color instructions easier to follow when several yarn sections are active. You may also find Crochet Bloomin Shoe Appliques Pattern useful.
Before You Start Crocheting
The throw consists of 20 crocheted blocks, arranged four blocks wide by five blocks long. Each block begins with a chain of 31 and is worked through Row 30, followed by a one-round border. The blocks are joined with slip stitches while holding wrong sides together, and the complete throw then receives a seven-round border.
The pillow has a front and back. The back is worked in Afghan stitch without a chart. The front includes a central 31-stitch chart section, five stitches at each side, and a surrounding block border. The front and back are joined on three sides, the 16-inch pillow form is inserted, and the final opening is whipstitched closed.
Use separate balls of yarn for each large block of color. Pick up new yarn from under the old yarn to twist the yarns and prevent holes.
The core stitch is Afghan stitch, as referenced in the gauge information and the Row 1 construction. The pattern uses US crochet terminology.
Useful Abbreviations
- ch: chain
- dc: double crochet
- sc: single crochet
- sl st: slip stitch
- st/sts: stitch/stitches
- yo: yarn over
Materials You’ll Need
Yarn
Use RED HEART® “Super Saver®”:
- 7 skeins 4313 Aran Fleck (A)
- 2 balls 376 Burgundy (B)
- 2 balls 633 Dark Sage (C)
- 1 ball 631 Light Sage (D)
Hook and Tools
- Afghan crochet hook: 6 mm [US J-10]
- Yarn needle
- 16-inch pillow form
Step-by-Step Crochet Instructions
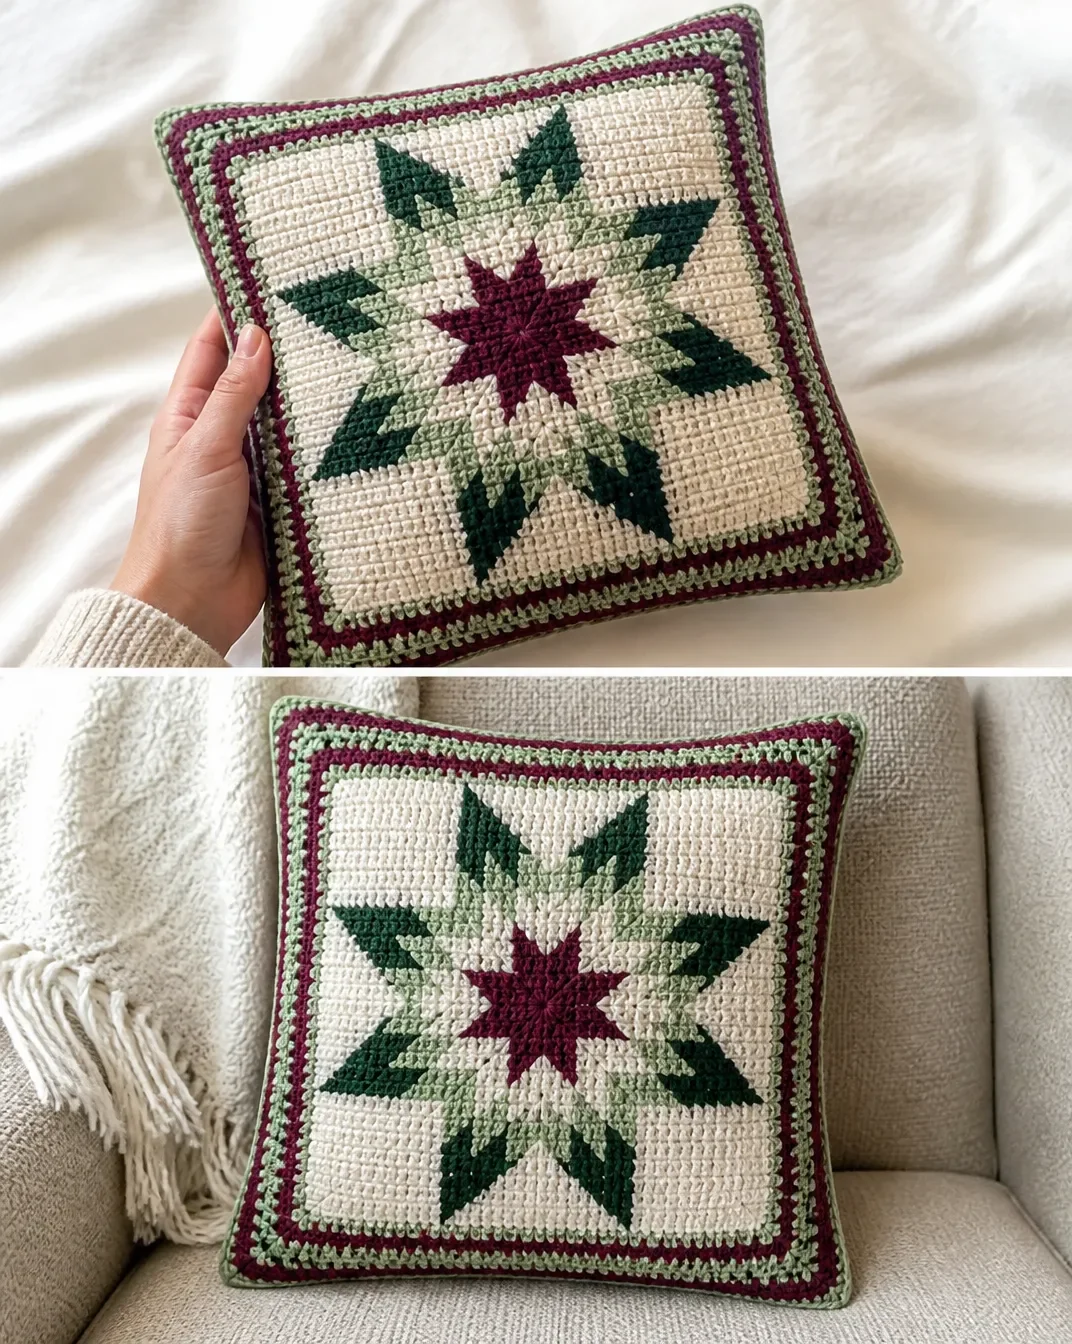
Color Handling and Construction
Use a separate ball of yarn for each large block of color. Pick up new yarn from under old yarn to twist yarns and prevent holes.
Throw Block Make 20
Starting Chain
With Afghan hook and A, ch 31.
Row 1
First half: Insert hook in 2nd ch from hook, yo, draw yarn through st. Insert hook in next ch, yo, draw yarn through st; repeat from * across 31 loops on hook.
Second half: Yo, draw yarn through first loop on hook, yo, draw yarn through 2 loops on hook; repeat from * across until 1 loop remains on hook,* (counts as first loop of next row).
Rows 2–29
Beginning with Row 2, follow Chart through Row 29.
Row 30
Slip st in each vertical st across. Fasten off.
Throw Block Border
With right side facing and crochet hook, join A in upper right-hand corner st.
Round 1
Ch 3, counts as dc, dc in corner st, dc in next 2 sts, [skip next st, dc in next 3 sts] across to 3 sts from corner, skip next st, dc in next st, 2 dc in next st, ch 2, turn.
Work along side edge: 2 dc in edge of first row, dc in edge of each row to last row, 2 dc in last row, ch 2, turn.
Work along opposite edge of foundation ch: dc in next st, dc in next 2 sts, [skip next st, dc in next 3 sts] across to 3 sts before next corner, skip next st, dc in next st, 2 dc in next st, ch 2, turn.
Work along side edge: 2 dc in edge of first row, dc in edge of each row to last row, 2 dc in last row, ch 2, turn.
Slip st in top of beginning ch. Fasten off.
Join the Throw Blocks
Arrange the blocks four wide by five long.
Holding wrong sides together, join A in one block with crochet hook, working through the sts of two blocks. Slip st the blocks together. Repeat until all blocks are joined.
Throw Border
Border Round 1
With right side facing, join A in upper right-hand corner dc. Ch 3, counts as first dc, dc in each dc and ch-space around, working (2 dc, ch 2, 2 dc) in each corner ch-2 space. Join with slip st to top of beginning ch.
Border Round 2
Ch 1, sc in each dc around, working (2 sc, ch 2, 2 sc) in each corner ch-2 space. Join with slip st to first sc.
Border Round 3
Ch 3, counts as first dc, dc in each sc around, working (2 dc, ch 2, 2 dc) in each corner ch-2 space. Join with slip st to top of beginning ch 3.
Border Round 4
Ch 1, sc in each dc around, working 4 sc in each corner ch-2 space. Join with slip st to first sc.
Border Round 5
Ch 3 with B, [dc with D in next sc, dc with B in next sc] around, end with D. Join with slip st in top of beginning ch. Cut B.
Border Round 6
With D only, ch 3, counts as first dc, dc in same st, ch 1, skip next dc, [dc in next dc, ch 1, skip next dc] 56 times, [2 dc in next dc, ch 1, skip next dc] 4 times.
Turn to work along side edge: [dc in next dc, ch 1, skip next dc] 85 times, [2 dc in next dc, ch 1, skip next dc] 4 times.
Turn to work along next edge: [dc in next dc, ch 1, skip next dc] 57 times.
Turn to work along side edge: [dc in next dc, ch 1, skip next dc] 85 times, [2 dc in next dc, ch 1, skip next dc] 3 times.
Join with slip st to top of beginning ch 3. Fasten off.
Border Round 7
Join B in top of beginning ch 3, ch 1, sc in same space.
- [sc in next dc, dc in next dc 2 rounds below, pulling dc up to current level of work] across to first set of 2 dc of next corner, [sc in next 2 dc, dc in next dc 2 rounds below, pulling dc up to current level of work] 4 times; repeat from * around to last side, [sc in next dc, dc in next dc 2 rounds below, pulling dc up to current level of work] across to first set of 2 dc of next corner, [sc in next 2 dc, dc in next dc 2 rounds below, pulling dc up to current level of work] 3 times.
Join with slip st to first sc. Fasten off. Weave in ends.
Pillow Back
The back is worked in Afghan stitch only, with no chart.
Starting Chain
With Afghan hook and A, ch 51.
Row 1
First half: Insert hook in 2nd ch from hook, yo, draw through st; insert hook in next ch, yo, draw through st; repeat from * across 51 loops on hook.
Second half: Yo, draw yarn through first loop on hook, *yo, draw yarn through 2 loops on hook; repeat from * across until 1 loop remains on hook, counts as first loop of next row.
Back Rows
Repeat Row 1 until 41 rows have been worked.
Last row: Slip st in each vertical st across. Fasten off.
Pillow Front
Starting Chain
With Afghan hook and A, ch 51.
Row 1
Work Row 1 exactly as for the back: complete the first half across 51 loops on hook, then complete the second half. The remaining loop counts as the first loop of the next row.
Rows Before the Chart
Repeat Row 1 until 8 rows have been worked.
Begin the Chart
On the next row, work 5 sts, beginning with Row 3, work Chart across 31 sts, then work 5 sts.
Continue to work the Chart as established until 29 rows have been worked.
Repeat Row 1 for 6 rows.
Final Row
Slip st in each vertical st across. Fasten off.
Pillow Front Block Border
With right side of Front facing, join D in upper right-hand corner st.
Ch 3, counts as first dc, 2 dc in corner st, ch 1, [skip next st, dc in next st] across to last st, 3 dc in last st.
Turn to work along side edge: 2 dc in edge of row, [ch 1, skip next row, dc in next row] across to last 2 rows, ch 1, skip next row, 2 dc in last row.
Turn to work along opposite edge of foundation ch: 3 dc in first st, ch 1, [skip next st, dc in next st] across to last st, 3 dc in last st.
Turn to work along side edge: 2 dc in edge of row, [ch 1, skip next row, dc in next row] across to last 2 rows, ch 1, skip next row, 2 dc in last row, ch 1.
Join with slip st to top of beginning ch 3. Fasten off.
Pillow Border Round 2
Join B in top of beginning ch, ch 1, sc in first 3 dc.
- [dc in next dc 2 rounds below, pulling dc up to current level of work, sc in next dc] across to first dc of corner 5-dc,** sc in next 5 dc; repeat from * around to last side, [dc in next dc 2 rounds below, pulling dc up to current level of work, sc in next dc] across to last 2 dc, sc in next 2 dc.
Join with slip st in first sc.
Pillow Border Round 3
Ch 1, sc in first 3 sts, [skip next st, sc in next 3 sts] 12 times, sc in next 48 sts; repeat from * around to last side, [skip next st, sc in next 3 sts] to last 2 sts, sc in next 2 sc.
Join with slip st in first sc.
Repeat the border around the Pillow Block.
Pillow Finishing
Holding wrong sides together, join B in one Block with crochet hook, working through sts of two blocks.
Ch 1, sc in each st around 3 sides. Turn to work along the last side, sc in each st across on only 1 piece.
Fasten off. Insert pillow form. Whipstitch the opening closed. Weave in ends.
Chart Reference and Stitch Key
For the throw, Throw Block Rows 2–29 follow the Chart through Row 29.
For the pillow front, the chart is worked across 31 sts beginning with Row 3 and continuing until 29 rows have been worked, with 5 sts at each side as specified.
The stitch key is:
- B = red square
- C = green square
- D = dark green square
The chart shows 31 stitches across its width.
Finished Project Inspiration
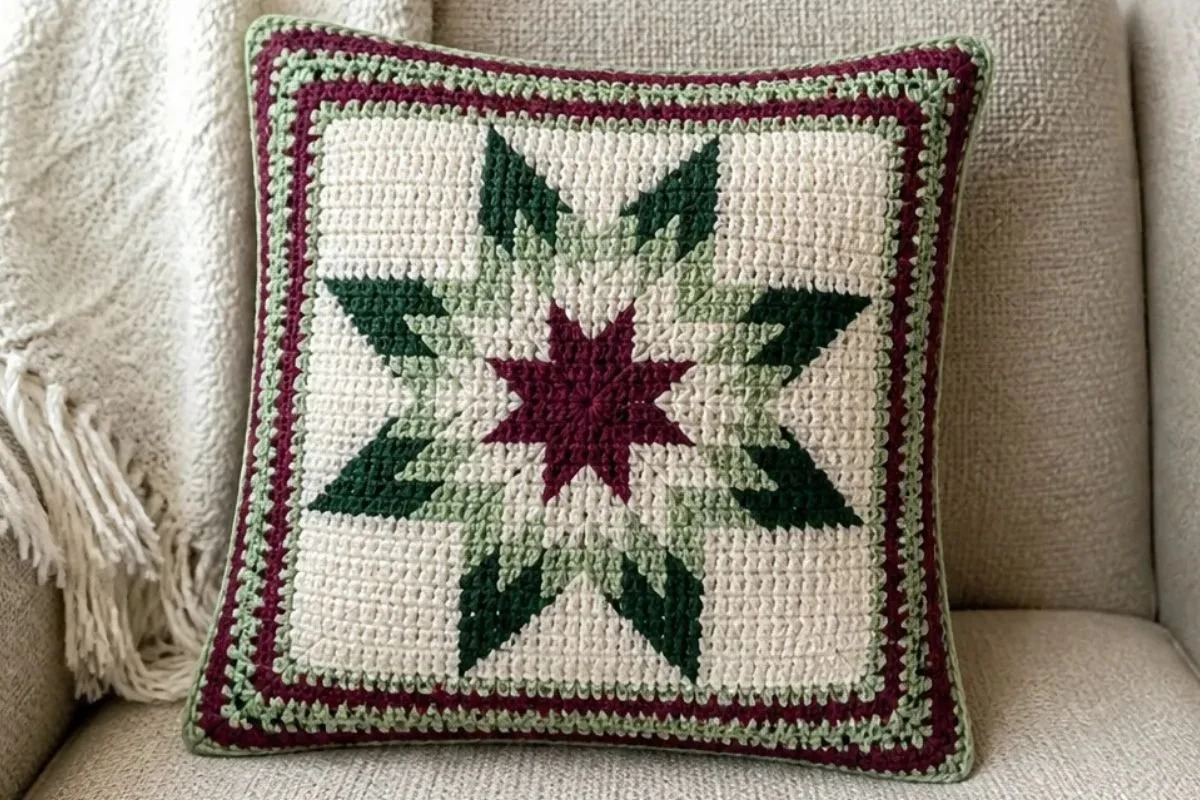
- Display the throw folded over the back of a sofa or armchair so the charted blocks remain visible.
- Place the pillow in front of the throw for a coordinated holiday seating arrangement.
- Give the pillow as a seasonal hostess gift or housewarming present.
- Use the throw as an accent layer on a guest bed during the holiday season.
- Pair the set with neutral cream, wood, or deep green decorations so the burgundy and sage colors remain the focus.
- Arrange the pillow and folded throw near a Christmas tree, reading nook, or entryway bench.
Cleaning and Storing Your Crochet
Follow the yarn manufacturer’s care instructions for the RED HEART® “Super Saver®” yarn. Because the pillow contains a form and the throw has multiple joined sections, avoid rough handling that could stretch the borders or distort the seams.
Dust the finished pieces gently and spot-clean carefully when needed. Avoid excessive heat, which can affect the yarn’s shape and the pillow form. When storing the set, keep it completely dry in a breathable container or clean fabric bag. Do not compress it under heavy items, especially while the raised border stitches are still being blocked into shape.
Tips for Better Results
- Keep the Afghan-stitch loops even. Consistent loop height helps the blocks remain uniform and makes joining easier.
- Count the starting loops carefully. Each throw block begins with 31 loops, while each pillow piece begins with 51 loops.
- Use separate color balls. This follows the construction rule and reduces long, loose carries behind large color sections.
- Pick up yarn from underneath. Twisting the new yarn under the old yarn helps prevent holes where colors change.
- Mark chart rows. The throw chart runs through Row 29, while the pillow front begins its chart section with Row 3 and continues until 29 charted rows have been worked.
- Check block orientation before joining. Arrange all 20 throw blocks four wide by five long before slip-stitching them together.
- Keep corner spaces visible. The throw border uses ch-2 corner spaces for its increases, so avoid tightening these spaces.
- Weave in ends securely. The throw contains many blocks and color changes, making careful finishing important for a durable result.
For a seasonal handmade display beyond blankets and pillows, a floral decoration such as this crochet April flowers wreath can complement the project without changing its construction.
Color and Styling Variations
The approved pattern uses Aran Fleck, burgundy, dark sage, and light sage for a traditional holiday palette. Optional color changes can give the same design a different mood:
- Replace burgundy with a deeper red for a brighter Christmas look.
- Use cream instead of light sage for a softer, neutral border.
- Try forest green, cranberry, and oatmeal for a rustic palette.
- Choose icy blue, white, and silver-toned shades for a winter display.
- Make the pillow in the original colors while using a simplified two-color palette for the throw.
These are optional styling choices, not changes to the approved instructions. Changing yarn or hook size may affect gauge, dimensions, texture, stitch definition, and yarn requirements, so make a practice section before committing to a substitution.
Frequently Asked Questions
How many blocks are used for the throw?
The throw uses 20 blocks arranged four blocks wide by five blocks long.
What hook size is required?
Use a 6 mm [US J-10] Afghan crochet hook.
Is the chart used for every pillow section?
No. The pillow back is worked in Afghan stitch only and has no chart. The pillow front includes the chart across 31 stitches, with 5 stitches at each side.
How are the throw blocks joined?
Hold the wrong sides together and join A by slip-stitching through the corresponding stitches of two blocks. Repeat until all blocks are joined.
Which colors are used in the chart?
The chart key identifies B as the red square, C as the green square, and D as the dark green square.
How is the pillow closed?
Join the front and back around three sides, insert the 16-inch pillow form, then whipstitch the opening closed and weave in the ends.
Can the yarn colors be changed?
Yes, color changes are optional. Keep the color roles clear while following the chart, and remember that a different yarn or hook can affect the finished result.
Is the border worked before or after joining the throw blocks?
The one-round border is worked around each individual block first. After all blocks are joined, the complete throw receives its seven-round border.
Conclusion
This Crochet Christmas Star Throw Pillow Pattern combines charted Afghan-stitch blocks, rich seasonal colors, and decorative borders into a coordinated holiday set. Make the throw and pillow together for a matched display, or begin with the pillow as a smaller project. For another free seasonal crochet reference, see this Red Heart Christmas Star throw and pillow pattern.