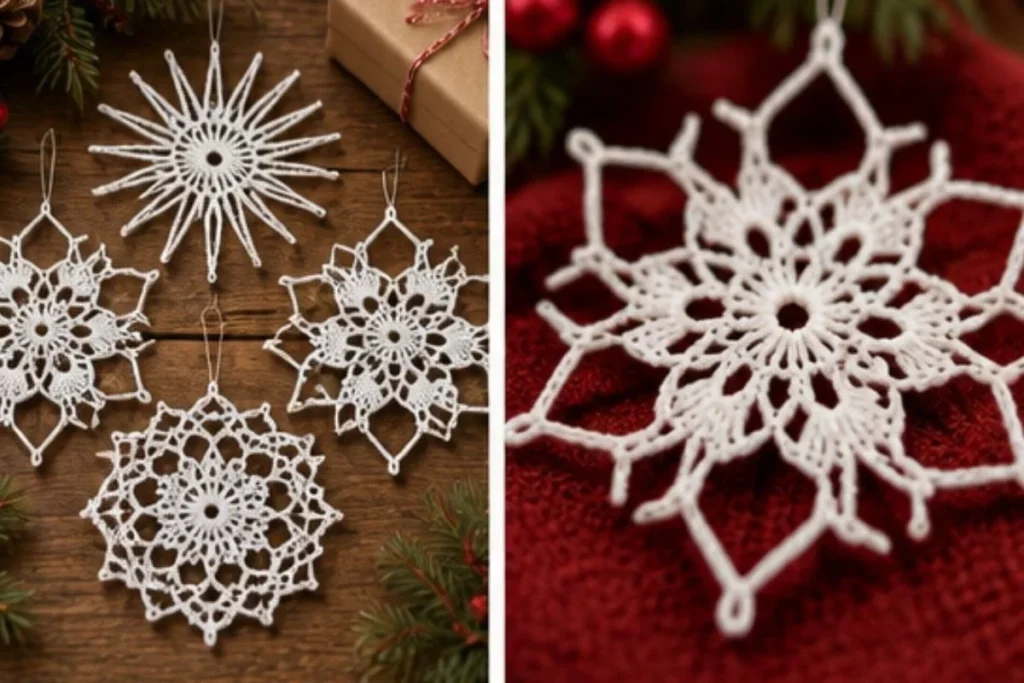
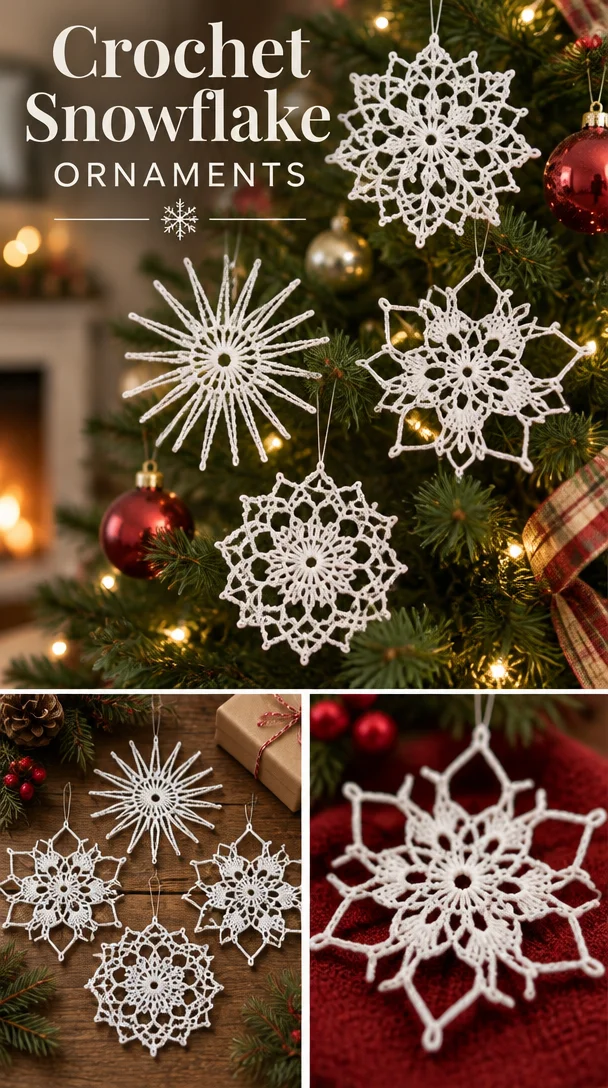
A delicate Crochet Flurry of Snowflakes Pattern creates four distinct lacy designs from fine white crochet thread. Each snowflake can become a tree ornament, package embellishment, winter display, or handmade gift. The collection includes easy and intermediate styles, so you can choose a simple open motif or challenge yourself with picots, tall stitches, and layered loops. For another dimensional crochet project with a botanical feel, you may also enjoy this 3D flower granny square pattern.
Why You’ll Love This Crochet Project
This snowflake collection is useful for both seasonal decorating and stitch practice.
- Four design options: Make one favorite style or crochet all four for a varied display.
- Skill-building: The patterns introduce chain loops, clusters, picots, treble crochet, and double treble crochet.
- Lightweight decorations: Size 10 thread produces airy motifs that work well on trees, windows, wreaths, and gifts.
- Handmade gift potential: Stiffened snowflakes can be given as ornaments or attached to wrapped presents.
- Flexible display: A group of matching white snowflakes creates a coordinated winter arrangement.
My Crochet Flower Tip: Block and stiffen each snowflake while carefully arranging its points. The final shape depends on how evenly the loops are spread before the stiffener dries.
Before You Start Crocheting
The pattern includes four individual snowflake styles. Styles 1 and 3 are intermediate, while Styles 2 and 4 are easy. Each design is worked in rounds from a small chain ring, then fastened off, woven in, shaped, and stiffened.
The construction sequence is straightforward: crochet the selected snowflake, secure the thread ends, arrange the points with rustproof pins, and apply fabric stiffener according to its directions. Ornament hangers can then be used to display the finished pieces.
Helpful Abbreviations
- ch: chain
- sc: single crochet
- dc: double crochet
- tr: treble crochet
- dtr: double treble crochet
- slip st: slip stitch
- picot: a small decorative loop formed with chains and a single crochet
Materials You’ll Need
- AUNT LYDIA’S® Classic Crochet Thread, Size 10: 1 ball, 001 White
- Susan Bates® Steel Crochet Hook: 1.5mm [US 7]
- Thread needle
- Rustproof pins
- Fabric stiffener
- Ornament hangers
The printed product note states that AUNT LYDIA’S® Classic Crochet Thread, Size 10, Art. 154 is available in white and ecru 400-yard balls, solid colors in 250-yard balls, and shaded colors in 300-yard balls.
The thread needle is used to weave in ends. Rustproof pins hold the snowflake points in place during shaping, while fabric stiffener helps the openwork retain its finished form.
Complete Crochet Instructions
Work one or more of the following snowflake styles. US crochet terminology is used throughout.
Snowflake Style #1 Intermediate
Setup / Gauge
Ch 8, join with slip st in first ch to form ring.
Round 1
Ch 5 (counts as first tr and ch-1),
[tr into ring, ch 1] 19 times;
slip st in 4th ch of ch-5 to join
20 tr and 20 ch-1 spaces.
Round 2
Ch 1, sc into next ch-1 space,
*ch 18, sc into next ch-1 space, ch 25, sc into next ch-1 space; repeat from * around;
slip st in beginning sc to join
10 ch-18 loops and 10 ch-25 loops.
Fasten off and weave in ends. Referring to photograph for finished shape, stiffen Snowflake, following stiffener directions.
Designed by: Elizabeth P. Williams
Snowflake Style #2 Easy
Setup / Gauge
Ch 6, join with slip st in first ch to form ring.
Round 1
Ch 3 (counts as first dc), 2 dc into ring, ch 2,
*3 dc into ring, ch 2; repeat from * 4 times;
slip st in top of ch-3 to join
5 3-dc clusters and 5 ch-2 spaces.
Round 2
Ch 1, sc in top of ch-3,
*ch 7, skip 1 dc, sc in next dc,
**ch 7, skip next ch-2 space, sc in next dc; repeat from * 3 times, then from * to ** once,
ch 7, skip last ch-2 space;
slip st in beginning sc to join
10 ch-7 loops.
Round 3
Slip st into first ch-7 loop, ch 4 (counts as first tr),
7 tr into same loop, ch 3,
sc into next ch-7 loop, ch 3,
*8 tr into next ch-7 loop, ch 3, sc into next ch-7 loop, ch 3;
repeat from * 3 times;
slip st in top of ch-4 to join
5 8-tr clusters and 10 ch-3 spaces.
Round 4
Ch 1, sc in top of ch-4,
*ch 6, skip 2 tr, sc in next tr, ch 5, sc in next tr, ch 6, skip 2 tr, sc in last tr in cluster,
[ch 8, sc in 4th ch from hook (picot made)] 3 times, ch 4,
skip ch-3 space and sc and ch-3 space,
**sc in next tr; repeat from * 3 times, then from * to ** once;
slip st in beginning sc to join
5 3-picot loops, 10 ch-6 loops, and 5 ch-5 loops.
Fasten off and weave in ends. Referring to photograph for finished shape, stiffen Snowflake, following stiffener directions.
Snowflake Style #3 Intermediate
Special Stitch
dtr (double treble crochet): Yarn over 3 times, insert hook in indicated stitch or space and draw up a loop, [yarn over and draw through 2 loops] 4 times.
Setup / Gauge
Ch 6, join with slip st in first ch to form ring.
Round 1
Ch 3 (counts as first dc), dc into ring, ch 3,
*2 dc into ring, ch 3; repeat from * 4 times;
slip st in top of ch-3 to join
6 2-dc clusters and 6 ch-3 spaces.
Round 2
Ch 3 (counts as first dc), dc in top of same st, 2 dc in next dc, ch 4,
skip next ch-3 space,
*2 dc in each of next 2 dc, ch 4; repeat from * 4 times;
slip st in top of ch-3 to join
6 4-dc clusters and 6 ch-4 spaces.
Round 3
Ch 3 (counts as first dc), 2 dc in top of same st,
*ch 3, skip 2 dc, 3 dc in next dc, ch 6, sc in 4th chain from hook (picot made), ch 2, skip next ch-4,
**3 dc in next dc;
repeat from * 4 times, then from * to ** once;
slip st in top of ch-3 to join
12 3-dc clusters, 6 ch-3 spaces, and 6 picot loops.
Round 4
Ch 4 (counts as first tr), tr in each of next 2 dc,
*ch 5, skip next ch-3 space, tr in each of next 3 dc, ch 8, skip next picot loop,
**tr in each of next 3 dc; repeat from * 4 times, then from * to ** once;
slip st in top of ch-4 to join
12 3-tr clusters, 6 ch-5 spaces, and 6 ch-8 spaces.
Round 5
Slip st in next 2 tr and into ch-5 space,
(ch 5 (counts as first dtr), ch 1, [dtr, ch 1] 6 times, dtr) in same ch-5 space,
*ch 3, skip next 3 ch of ch-8 space of previous Round, sc in 4th ch, ch 5, sc in 5th ch (open picot made), ch 3, skip last 3 ch of ch-8 space,
**([dtr, ch 1] 7 times, dtr) in next ch-5 space; repeat from * 4 times, then from * to ** once;
slip st in top of ch-5 to join
6 8-dtr clusters and 6 open picot loops.
Round 6
Slip st into first ch-1 space, ch 1, sc into same space,
[ch 5, skip next dtr, sc in next space] 6 times,
*ch 10, sc in 4th chain from hook (picot made), ch 6, skip next dtr and open picot loop and dtr,
**sc in next ch-1 space, [ch 5, skip next dtr, sc in next space] 6 times;
repeat from * 4 times, then from * to ** once;
slip st in beginning sc to join
6 picot loops and 36 ch-5 spaces.
Fasten off and weave in ends. Referring to photograph for finished shape, stiffen Snowflake, following stiffener directions.
Snowflake Style #4 Easy
Setup / Gauge
Ch 6, join with slip st in first ch to form ring.
Round 1
Ch 3 (counts as first dc), ch 1,
*dc into ring, ch 1; repeat from * around;
slip st in top of ch-3 to join
16 dc and 16 ch-1 spaces.
Round 2
Slip st in first ch-1 space, sc in same space,
*ch 6, skip next dc, sc in next ch-1 space; repeat from * 14 times,
ch 3, skip ch-3;
dc in beginning sc to join (counts as last ch-6 loop)
16 sc and 16 ch-6 loops.
Rounds 3–4
Work both rounds the same.
Ch 1, sc into top of loop just made,
*ch 6, skip next sc, sc in next ch-6 loop; repeat from * 14 times,
ch 3, skip last sc;
dc in beginning sc to join (counts as last ch-6 loop)
16 sc and 16 ch-6 loops.
Round 5
Ch 1, sc into top of loop just made,
*ch 7, skip next sc, sc in next ch-6 loop; repeat from * 14 times,
ch 7, skip last sc;
slip st in beginning sc to join
16 sc and 16 ch-7 loops.
Fasten off and weave in ends. Referring to photograph for finished shape, stiffen Snowflake, following stiffener directions.
Assembly and Finishing
Fasten off and weave in ends (each style).
Stiffen Snowflake by following stiffener directions, referring to photograph for finished shape.
Ornament hangers are listed as required materials.
Ways to Display Your Finished Crochet
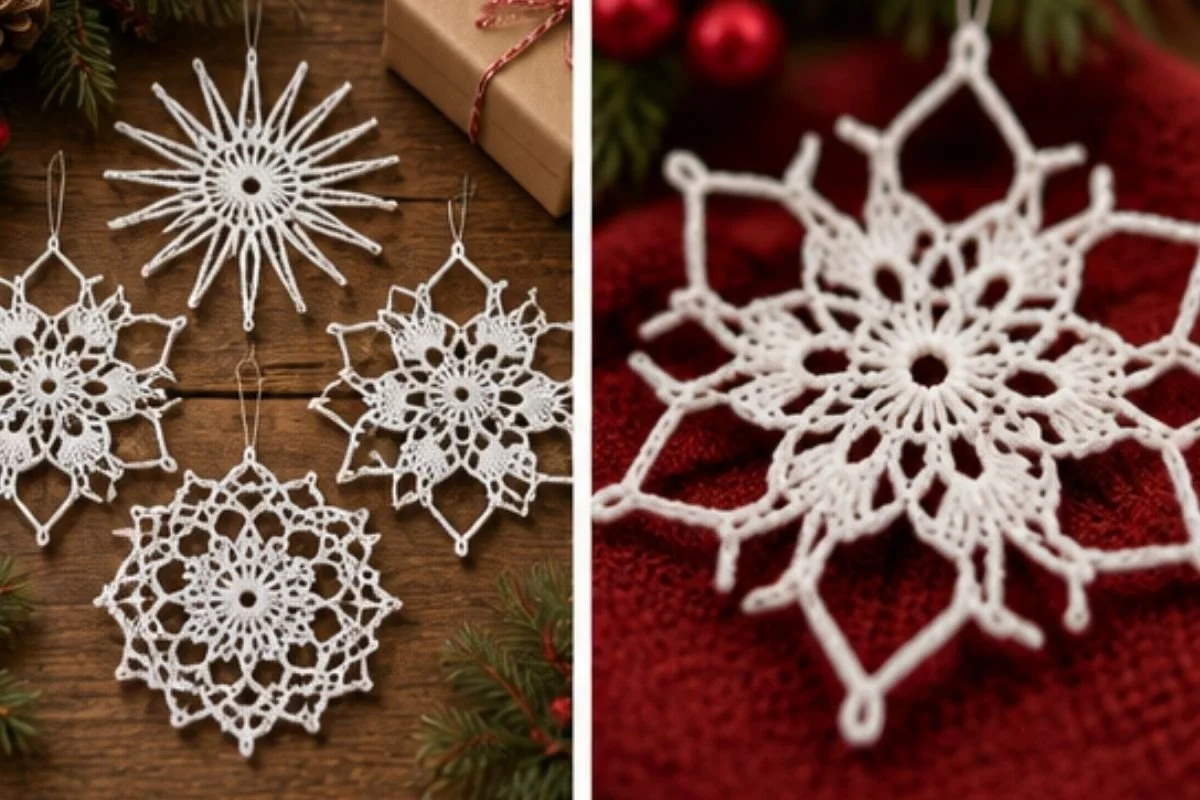
- Hang individual snowflakes from a Christmas tree, mantel, window, or decorative branch.
- Use several styles together as a lightweight winter garland.
- Attach a snowflake to a wrapped gift as a reusable handmade embellishment.
- Arrange white snowflakes in a shallow bowl or on a seasonal table setting.
- Combine the motifs with winter greenery for a wreath or door display; a similar seasonal project is this crochet flowers wreath pattern.
- Give a set of different styles as a thoughtful handmade holiday gift.
Caring for Your Crochet Project
Dust the finished snowflakes gently with a soft brush, microfiber cloth, or cool air from a distance. Because the thread has been shaped with fabric stiffener, avoid soaking, machine washing, or aggressively rubbing the motifs.
Store the snowflakes flat or suspended in a dry container where the points will not be crushed. Keep them away from excessive heat and moisture, which may soften or distort the stiffened shape. If a point becomes misaligned, carefully reshape it and allow the piece to dry fully before hanging it again.
Tips for Better Results
- Keep the starting ring secure. Join the opening with a neat slip stitch so the first round does not twist.
- Count each round’s spaces. The listed counts, such as 20 tr and 20 ch-1 spaces in Style 1, help confirm that the motif is developing evenly.
- Do not tighten chain loops excessively. Open chains need enough flexibility to form the snowflake’s airy points.
- Mark the beginning when helpful. A removable marker can make it easier to identify the beginning sc or joining location in extended rounds.
- Watch tall-stitch height. In Style 3, keep dtr stitches consistent so the six outer sections remain balanced.
- Shape before stiffening dries. Pin the points symmetrically and check the outline from several angles.
- Weave in ends carefully. Fine thread can show through open spaces, so secure the tails discreetly along nearby stitches.
- Use rustproof pins only. Other pins may leave marks or create rust stains when the stiffener is wet.
Creative Ways to Customize Your Project
The approved pattern uses 001 White, but the designs can be adapted as optional variations.
- Try ecru for a softer vintage appearance while keeping the same thread type and hook size.
- Crochet each style in a different winter shade, such as icy blue, silver-gray, or deep navy.
- Make a monochromatic grouping with white snowflakes displayed against a contrasting background.
- Combine several motifs with crochet flowers or small botanical accents for a mixed seasonal arrangement.
- Use a different thread size only as an experiment; changing thread or hook size will affect the snowflake’s dimensions, drape, stitch definition, and possibly the amount of stiffener needed.
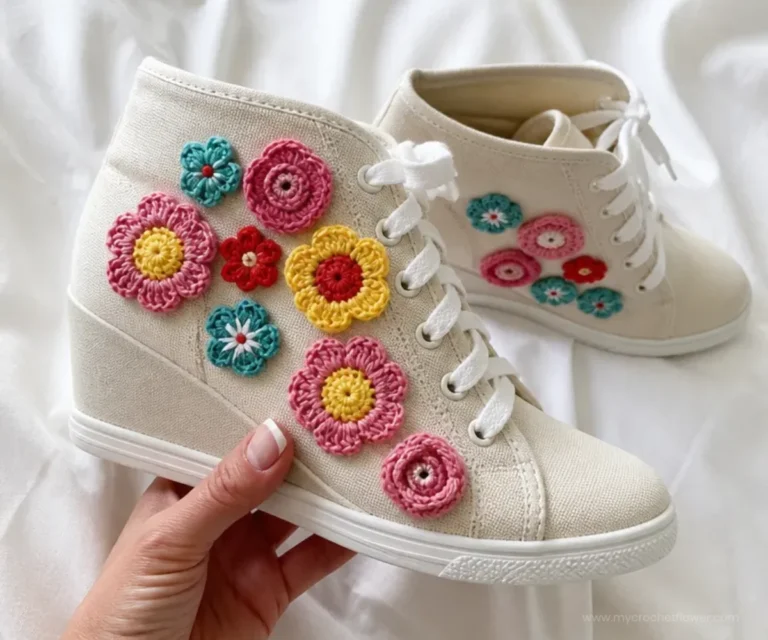
- Pair the snowflakes with handmade accessories or embellishments, such as these crochet shoe appliques, for a coordinated gift theme.
Frequently Asked Questions
Which snowflake style is easiest?
Styles 2 and 4 are labeled easy. Style 2 includes clusters and picots, while Style 4 is built mainly from repeated chain loops and single crochets.
Which styles are intermediate?
Styles 1 and 3 are labeled intermediate. Style 3 also uses the special double treble crochet stitch and has six rounds.
What yarn and hook does the pattern use?
The pattern uses one ball of AUNT LYDIA’S® Classic Crochet Thread, Size 10, in 001 White, with a Susan Bates® Steel Crochet Hook measuring 1.5mm [US 7].
Can I crochet only one style?
Yes. Each style is a complete snowflake design with its own setup, rounds, finishing instructions, and stitch counts.
How do I create the snowflake shape?
After fastening off and weaving in the ends, arrange the finished motif according to the photograph, secure it with rustproof pins, and stiffen it by following the fabric stiffener directions.
Are ornament hangers included in the pattern?
Ornament hangers are listed as required materials, so they can be added after the snowflake has been shaped and stiffened.
Can I use a different thread color?
Yes, color changes are an optional styling choice. Keep in mind that changing thread type or size can alter the finished dimensions and texture.
How should I store the finished snowflakes?
Store them dry and protected from crushing, moisture, and excessive heat. Flat storage or careful hanging helps preserve the stiffened points.
Conclusion
This Crochet Flurry of Snowflakes Pattern offers four elegant ways to create lightweight winter decorations in fine white thread. Choose an easy style for a quick introduction to snowflake crochet or explore the intermediate designs for more detailed stitchwork. Once shaped and stiffened, the motifs make beautiful ornaments, gift accents, and seasonal displays. For more snowflake inspiration, explore these indoor crochet snowflake patterns and stiffening methods.