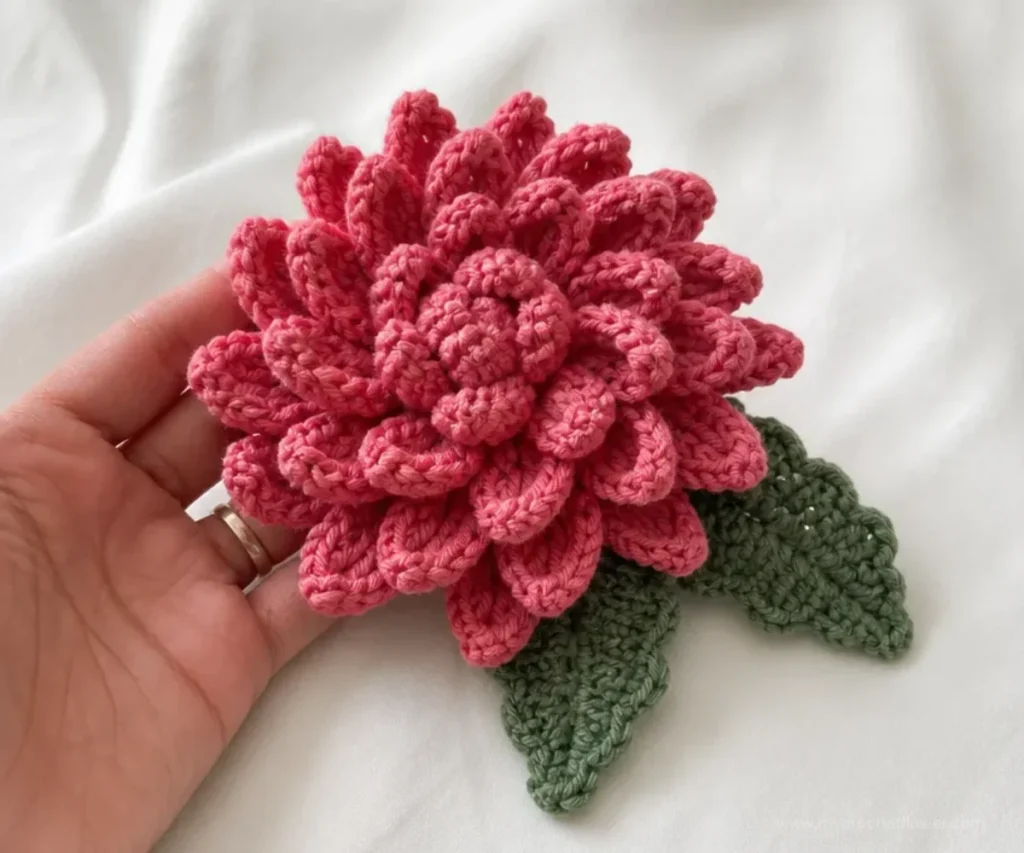
A crocheted chrysanthemum pin combines layered petals, felted wool texture, and leafy details in one charming accessory. This Crochet Felted Chrysanthemum Pin Pattern creates a dimensional flower in Cupcake yarn, with Thyme leaves and a stitched backing that supports a 1 ½-inch bar pin. It is a useful project for crocheters who enjoy floral motifs, experimenting with felting, or making small handmade gifts. Wear it on a jacket, hat, scarf, or bag, or use several flowers in a decorative botanical arrangement.
Why You’ll Love This Crochet Project
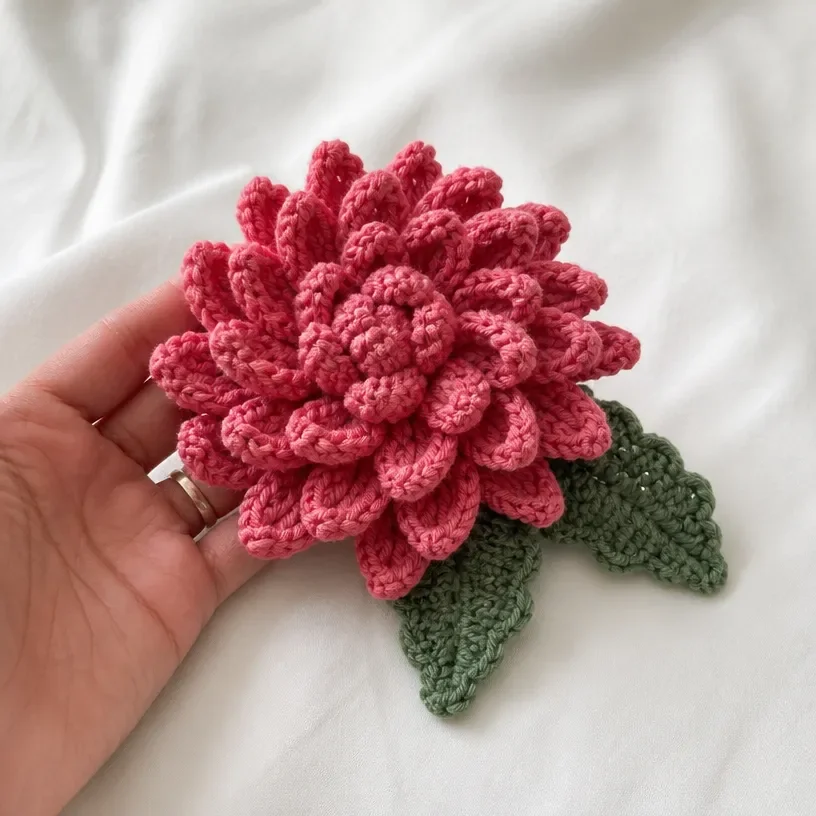
- The layered petals create dimension. Four rounds of petals build a full chrysanthemum shape rather than a flat flower.
- It practices useful techniques. You will work into front loops, back loops, and chain back humps while managing increasing stitch counts.
- The felted finish adds structure. Washing the wool pieces in hot water changes their texture and helps the petals hold a shaped form.
- It makes a thoughtful handmade accessory. After assembly, the flower becomes a wearable pin for a coat, sweater, bag, or hat.
- The components are manageable. The project includes one flower, two leaves, and one circular backing, making it suitable for a focused floral craft session.
My Crochet Flower Tip: Keep the flower’s petals slightly loose while crocheting. Felting will firm and compact the fabric, and the open structure gives you room to shape the layers inward afterward.
How This Crochet Project Comes Together
The project is worked in separate pieces:
- Crochet the chrysanthemum flower in Color A through eight rounds.
- Make two leaves to coordinate with Color B.
- Crochet the circular backing in Color C.
- Felt the pieces in pillowcases in a washing machine with hot water and a small amount of detergent.
- Shape and dry the flower, then block the remaining pieces.
- Stitch the leaves, backing, and bar pin into place.
The flower is worked in joined rounds, with petal rounds made into the front loops and expansion rounds worked behind the petals in back loops. The final petal round uses both loops of Round 7. The leaves are worked in two rows, while the backing is a four-round circle.
Abbreviations
- A, B, C: Color A, Color B, Color C, and so on
- ch: chain
- dc: double crochet
- hdc: half double crochet
- sc: single crochet
- st(s): stitch(es)
- yo: yarn over
- [ ]: Work the directions in brackets the number of times specified
Special Abbreviation
3-ch-picot: Ch 3, insert the hook in the front loop the horizontal bar of the dc just made and in the left strand the vertical bar of the same stitch, yo, and pull through all three loops.
Materials You’ll Need
- Stitch Nation by Debbie Stoller™ Full o’ Sheep™ yarn, Color A: 1 ball, 2701 Cupcake
- Stitch Nation by Debbie Stoller™ Full o’ Sheep™ yarn, Color B: 1 ball, 2640 Thyme
- Crochet hook: 8 mm (US L-11)
- Sharp yarn needle
- 1 ½-inch bar pin
- Straight pins
Color A is used for the chrysanthemum flower. The leaves are made to match Color B because they are stitched to the flower with B during assembly. The backing is specified as Color C in the pattern instructions; use the designated backing color if available.

Complete Crochet Instructions
Flower
Chrysanthemum worked in rounds
Color A
Round 1
With A, ch 2, 6 sc in second ch from the hook; join to first sc 6 sc.
Round 2: First Row of Petals
Working in the front loops only of the previous round:
Slip st into first sc,
[ch 4, working in the back humps of the chain, sc in second ch from the hook and the next 2 ch, slip st in front loop of next sc] 5 times;
ch 4, working in the back humps of the chain, sc in second ch from the hook and the next 2 ch, slip st into back loop of first sc 6 petals.
Work carefully into the front loops so the unused back loops remain available for the next expansion round.
Round 3
Working behind the petals and in the back loops only of Round 1:
Ch 1,
2 sc in each sc in the round;
join to first sc 12 sc.
Round 4: Second Row of Petals
Working in the front loops only of the previous round:
Slip st into first sc,
[ch 5, working in the back humps of the chain, sc in second ch from the hook and the next 3 ch, slip st in front loop of next sc] 11 times;
ch 5, working in the back humps of the chain, sc in second ch from the hook and the next 3 ch, slip st into back loop of first sc 12 petals.
Round 5
Working behind the petals and in the back loops only of Round 3:
Ch 1,
[2 sc in next sc, sc in next sc] 6 times;
join to first sc 18 sc.
Round 6: Third Row of Petals
Working in the front loops only of the previous round:
Slip st into first sc,
[ch 5, working in the back hump of the chain sts, sc in second ch from the hook and the next 3 ch, slip st in next sc] 17 times;
ch 5, working in the back hump of the chain, sc in second ch from the hook and the next 3 ch, slip st into back loop of first sc 18 petals.
Round 7
Working behind the petals and in the back loops only of Round 5:
Ch 1,
[2 sc in next sc, sc in next 2 sc] 6 times;
join to first sc 24 sc.
Round 8: Fourth Row of Petals
Working into both loops of Round 7:
[ch 6, sc in the back hump of the second ch from the hook and the next 4 ch, slip st in next sc] 23 times;
ch 6, sc in the back hump of the second ch from the hook and the next 4 ch, join to first petal 24 petals.
Fasten off.
Weave in ends.
Leaves
Make 2
The color for the leaves is not specified separately. Follow the pattern’s color usage: the leaves are used later in assembly and stitched with B, so make them to match B.
Round 1
Ch 2, 7 sc in second ch from the hook; do not join; turn.
Round 2
Ch 1,
(hdc, dc) in first sc;
ch 2, (sc, hdc, dc) in next sc;
ch 2, (sc, hdc) in next sc;
(2 dc, 3-ch-picot, dc) in next sc;
(hdc, sc) in next sc;
ch 2, (dc, hdc, sc) in next sc;
ch 2, (dc, hdc) in next sc;
ch 1, slip st into same sc.
Fasten off.
Weave in ends.
Backing
Color C
Round 1
With C, ch 2, 6 sc in second ch from the hook; join to first sc 6 sc.
Round 2
Ch 1, 2 sc in each sc; join to first sc 12 sc.
Round 3
Ch 1, [2 sc in next sc, sc in next sc] 6 times; join to first sc 18 sc.
Round 4
Ch 1, [2 sc in next sc, sc in next 2 sc] 6 times; join to first sc 24 sc.
Fasten off.
Weave in ends.
Felting
Before assembling the flower, put the pieces into pillowcases and tie closed. Place them in a washing machine with hot water and a small amount of detergent. Check regularly during the wash cycle until the desired amount of felting is achieved.
Rinse out the soap and squeeze out excess water. To shape the flower, curve the petals inward, shaping them toward the center; pin or tie the petals in place. Let dry. Block the remaining pieces into desired shapes and let dry.
Assembly
- Arrange the leaves on the back of the flower, pin them into place, and stitch them to the chrysanthemum with B.
- Place the backing on the chrysanthemum over the leaves; pin and stitch it into place with A.
- Sew the bar pin onto the back.
Finishing
Weave in ends for all pieces the flower, leaves, and backing as specified.
After felting and shaping, let the flower dry. Block the remaining pieces into their desired shapes and let them dry. Sew the bar pin onto the back during assembly.
Handmade Gift and Decoration Ideas
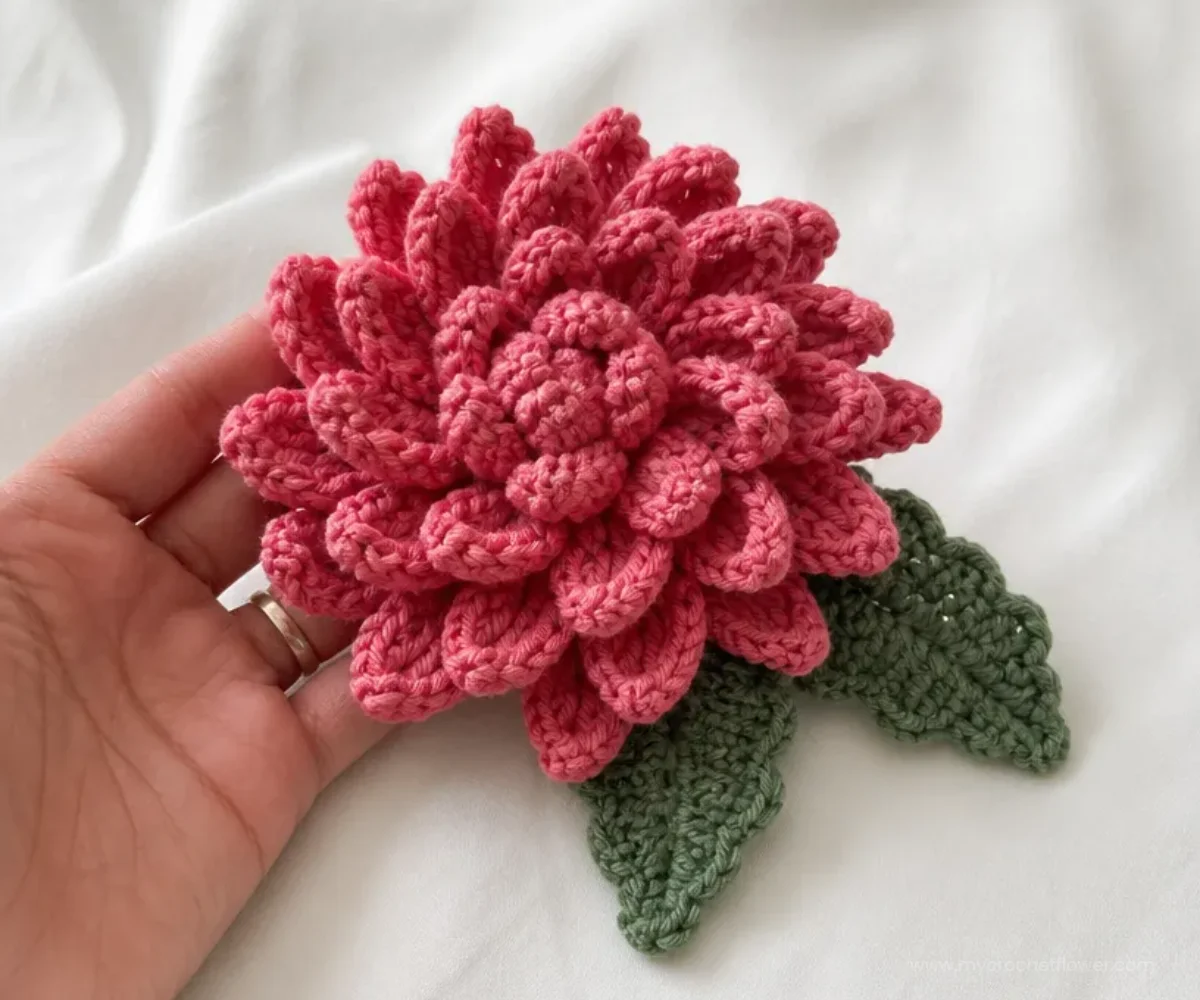
- Wear it as a jacket pin: Attach the chrysanthemum to a coat, cardigan, denim jacket, or scarf for a small botanical accent.
- Decorate a handbag or tote: The bar pin makes it possible to move the flower between bags without permanently sewing it on.
- Create a seasonal accessory: The warm Cupcake flower and Thyme leaves can complement autumn clothing and nature-inspired outfits.
- Use it as a gift topper: Pin the flower to a wrapped present or gift bag, then give it to the recipient as part of the package.
- Make a floral display: Crochet several flowers and arrange them with the leaves in a shallow dish or decorative container. Remove or leave the bar pins attached according to how you plan to display them.
- Coordinate a handmade set: Use the same flower as a matching accent on a hat, scarf, bag, or other fabric accessory.
Caring for Your Crochet Project
The flower is felted during construction, but the finished piece still benefits from gentle handling.
- Dust the petals with a soft, dry brush or carefully shake away surface dust.
- Avoid soaking the completed pin, especially around the bar pin and stitched assembly.
- If the petals become misshapen, gently adjust them by hand and allow the flower to rest in its intended shape.
- Store the pin flat or in a small box so the petals are not crushed under heavier items.
- Keep it away from excessive heat, which can alter the felted shape or affect the bar pin’s attachment.
- Check the stitching periodically, particularly where the leaves, backing, and bar pin are joined.
- When transporting the flower, protect it from snagging against jewelry, zippers, or rough fabric.
Tips for Better Results
- Track the working loops carefully. The petal rounds use front loops, while the expansion rounds work behind the petals in back loops. Round 8 is worked into both loops of Round 7.
- Count each petal row. The flower progresses from 6 petals to 12, then 18, and finally 24 petals. Counting helps identify missed slips or skipped stitches before felting.
- Work into the back humps of chains. This creates the intended edge and keeps the chain loops consistent throughout the petal rounds.
- Keep the joins accurate. Each joined flower round establishes the starting point for the next round, so join to the stated stitch rather than moving to a nearby loop.
- Shape after felting. Curve the petals inward toward the center while the flower is damp, then pin or tie them in place until dry.
- Pin the layers before stitching. Secure the leaves first, then position the backing over them. This keeps the layers aligned while you sew.
- Use the correct sewing colors. Stitch the leaves to the flower with B and attach the backing with A, as specified in the assembly instructions.
- Protect the washer during felting. Place the pieces in tied pillowcases and check regularly so you can stop once the desired amount of felting is achieved.
Color and Styling Variations
These ideas are optional and do not change the approved pattern instructions.
- Change the flower color: Use another wool yarn color for the flower while keeping the same four-layer petal construction. A different color will change the visual character of the chrysanthemum.
- Use a different leaf shade: A deeper green can create a traditional botanical look, while a muted or gray-green shade can give the pin a softer appearance.
- Create seasonal palettes: Try rich reds and golds for autumn, pale shades for spring, or deep jewel tones for winter accessories.
- Make coordinated pins: Crochet several flowers in different flower colors while repeating the same leaf color for a unified collection.
- Style it as a bouquet accent: Make multiple felted flowers and combine them in a shallow container or tabletop arrangement.
- Substitute yarn cautiously: The approved pattern uses Stitch Nation by Debbie Stoller™ Full o’ Sheep™ and includes a felting step. A different fiber may felt differently or may not felt at all. Changing yarn weight or hook size can also affect the flower’s dimensions, stitch definition, texture, and yarn requirements.
Frequently Asked Questions
Is this project beginner-friendly?
It is suitable for a crocheter who is comfortable with single crochet, half double crochet, double crochet, chains, slip stitches, joined rounds, and working into specific loops. The front-loop and back-loop placement requires careful attention.
What yarn is recommended?
The pattern specifies Stitch Nation by Debbie Stoller™ Full o’ Sheep™ yarn, with one ball of Color A, 2701 Cupcake, and one ball of Color B, 2640 Thyme. The felting instructions are part of the project, so choose any substitution with felting compatibility only after considering how it may change the result.
What hook size should I use?
Use an 8 mm (US L-11) crochet hook.
How many pieces does the project include?
You will make one chrysanthemum flower, two leaves, and one circular backing. A 1 ½-inch bar pin is attached during assembly.
Can I change the colors?
Yes. Color changes are an optional styling choice. Keep track of the roles of A, B, and C so the flower, leaves, backing, and assembly stitching remain clear.
How is the flower felted?
Place the pieces into pillowcases and tie them closed. Wash them in a machine with hot water and a small amount of detergent, checking regularly until the desired amount of felting is achieved. Rinse out the soap and squeeze out excess water.
How do I shape the petals?
After felting, curve the petals inward toward the center. Pin or tie them in place and let the flower dry. Block the remaining pieces into their desired shapes and let them dry.
How is the bar pin attached?
After the leaves and backing are stitched into place, sew the 1 ½-inch bar pin onto the back of the flower.
Can I use the finished flower in a bouquet?
Yes. You can make multiple flowers and arrange them with the leaves as a decorative display. The finished piece is also designed to function as a wearable pin.
Conclusion
This Crochet Felted Chrysanthemum Pin Pattern is a satisfying way to practice layered petals, careful loop placement, felting, and fabric shaping. The finished flower can become a wearable accessory, a handmade gift, or part of a seasonal floral display. For another interpretation of this felted flower project, see the free felted chrysanthemum pin crochet pattern.