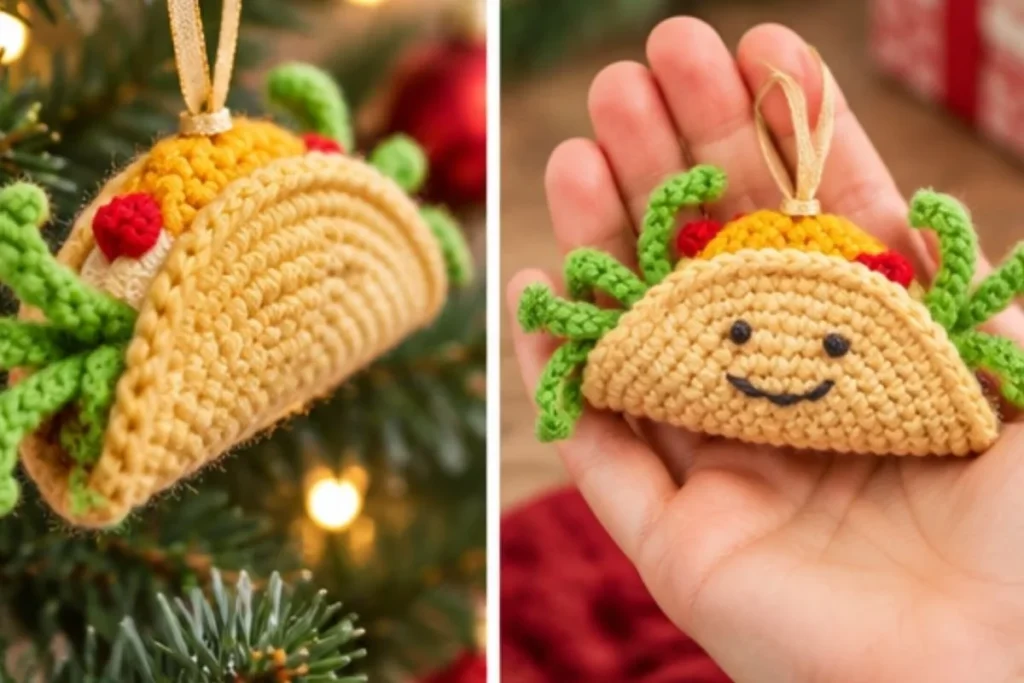
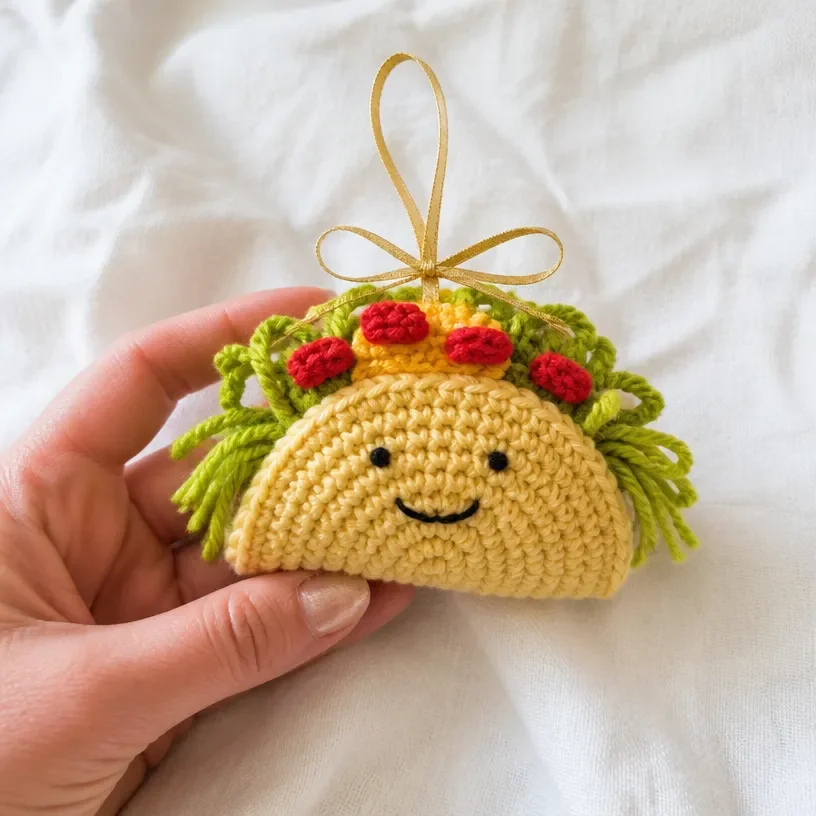
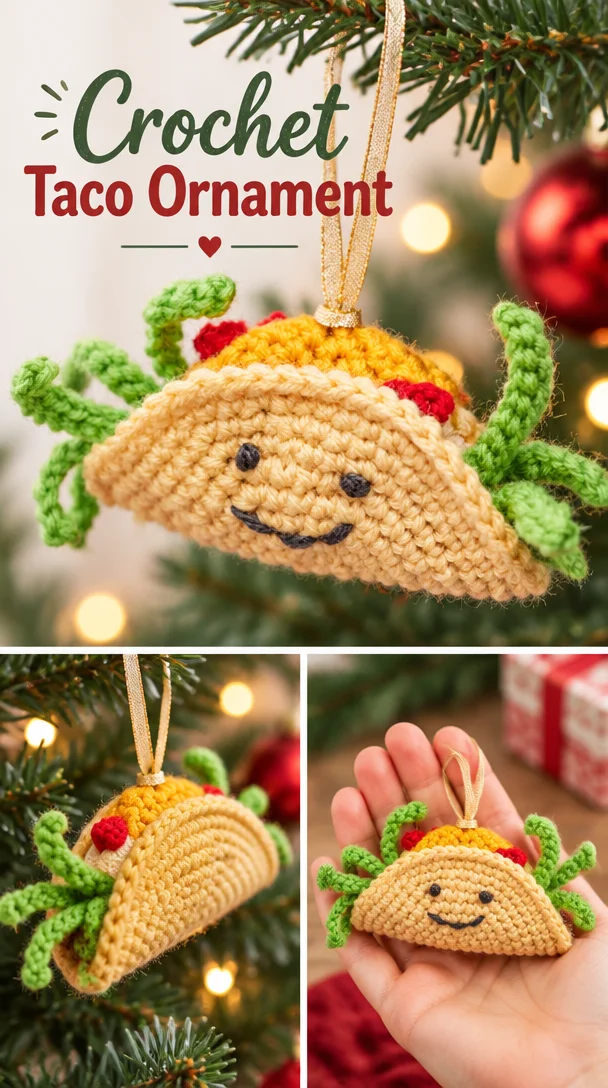
A cheerful Crochet Tasty Taco Ornament Pattern turns simple crochet pieces into a playful, dimensional decoration. The folded shell, ruffled lettuce, scattered tomato pieces, diamond-shaped cheese, and embroidered face create a fun ornament for a holiday tree, kitchen display, gift package, or themed garland. Crocheters who enjoy small projects and whimsical food designs will appreciate the clear construction. For another dimensional ornament idea, explore this crochet flower ball ornament pattern.
Why You’ll Love This Crochet Project
- It uses simple stitches. The pattern relies primarily on single crochet, slip stitches, chains, and basic increases.
- The shaping is satisfying. The shell begins as a flat spiral and becomes a recognizable taco when folded and sewn.
- The details add personality. Tomato pieces, loose lettuce ends, cheese, embroidered eyes, and a smile give the finished ornament plenty of character.
- It makes a creative handmade gift. A taco ornament is a fun choice for a food lover, coworker, friend, or family member.
- It is easy to customize. You can experiment with color placement while keeping the approved construction order intact.
My Crochet Flower Tip: Keep the long yarn tails until each component has been positioned and sewn securely. Those tails make assembly easier and reduce the need to reattach yarn.
Before You Start Crocheting
This project is made from four main components: one shell, one lettuce tube, seven tomato pieces, and one cheese piece. The shell is crocheted in continuous spiral rounds, while the lettuce, tomatoes, and cheese are worked in rows.
After the pieces are crocheted, the lettuce is lightly stuffed and closed into a tube. Four tomato pieces are attached to the lettuce, followed by the cheese and the remaining three tomato pieces. The layered filling is then sewn to the wrong side of the shell before the shell is folded into a taco shape.
The final details are embroidered with charcoal yarn, and a thin gold ribbon creates the hanging loop. The pattern uses US crochet terminology.
Useful Abbreviations
- ch: chain
- sc: single crochet
- sl st: slip stitch
- rnd/round: a complete circular pass
- st/sts: stitch/stitches
Materials You’ll Need
- RED HEART® Super Saver® yarn, Color A, Cornmeal: 1 skein (320)
- RED HEART® Super Saver® yarn, Color B, 319 Gold: 1 skein
- RED HEART® Super Saver® yarn, Color C, 321 Cherry Red: 1 skein
- RED HEART® Super Saver® yarn, Color D, 321 Gold D: 1 skein (as listed: “Gold D”)
- RED HEART® Super Saver® yarn, Color E, 3950 Charcoal: 1 skein
- Susan Bates® Crochet Hook: 3.75 mm [US F-5]
- Polyester fiberfill: 18″ [45.5 cm]
- Thin gold ribbon: 18″ [45.5 cm] for the hanger
- Stitch marker
- Yarn needle
Only a small amount of each yarn color is needed. Color A forms the shell, Color B creates the lettuce, Color C is used for the tomato pieces and part of the face details, Color D makes the cheese, and Color E is used for the embroidered face.
Complete Crochet Tutorial
Shell
With A, ch 2.
Round 1 (right side): Work 6 sc in 2nd ch from hook 6 sc.
Do not join; work in continuous rounds (spirals). Place a marker for the beginning of the round. Move the marker up as each round is completed.
Round 2: Work 2 sc in each sc around 12 sc.
Round 3: [Sc in next sc, 2 sc in next sc] 6 times 18 sc.
Round 4: [Sc in next 2 sc, 2 sc in next sc] 6 times 24 sc.
Round 5: [Sc in next 3 sc, 2 sc in next sc] 6 times 30 sc.
Round 6: [Sc in next 4 sc, 2 sc in next sc] 6 times 36 sc.
Round 7: [Sc in next 5 sc, 2 sc in next sc] 6 times 42 sc.
Round 8: [Sc in next 6 sc, 2 sc in next sc] 6 times 48 sc.
Round 9: [Sc in next 7 sc, 2 sc in next sc] 6 times 54 sc.
Round 10: Sc in each sc around.
Fasten off, leaving a long tail.
Lettuce
With B, ch 33.
Row 1: Slip st in 2nd ch from hook and in next 11 ch, sc in next 8 ch; leave remaining chains unworked.
Rows 2–8: Ch 13, turn, slip st in 2nd ch from hook and in next 11 ch, sc in next 8 sc.
Fasten off, leaving a long tail.
Sew the first row and last row together, keeping the shredded lettuce ends free on each side, to form a tube. Stuff the tube lightly, then gather and sew both ends of the tube closed, leaving the lettuce ends loose.
Tomato Pieces
Make 7.
With C, ch 3.
Row 1: Sc in 2nd ch from hook and in last ch 2 sc.
Row 2: Ch 1, turn, sc in each sc across.
Fasten off, leaving a long tail.
Repeat these instructions until you have seven tomato pieces.
Cheese
With D, ch 10.
Row 1: Sc in 2nd ch from hook and in each remaining ch across 9 sc.
Rows 2–8: Ch 1, turn, sc in each sc across.
Fasten off, leaving a long tail.
Assembly and Finishing
- With A, sew Lettuce to the center of the wrong side of Shell, allowing lettuce ends to hang out over the edges.
- With C, sew four Tomato Pieces to the sc section of Lettuce, scattering them and leaving the middle open for Cheese.
- With D, sew Cheese, diamond-like, to the top of Lettuce.
- With C, sew the three remaining Tomato Pieces to the top of Cheese.
- Fold up Shell. With A, sew several stitches through all layers to hold the Taco shape.
Face Embroidery
With yarn needle and E, using the photograph as a guide, embroider a back stitch smile and French knot eyes on the front of Taco.
Hanging Loop
Fold the gold ribbon in half.
Insert the crochet hook around a few stitches at the top of the ornament, place the ribbon fold on the hook, and draw it through to form a loop.
Thread the ends of the ribbon through the loop and pull to tighten.
Tie the ends together with a bow or overhand knot to form a hanging loop.
Weave in any remaining ends.
Ways to Display Your Finished Crochet
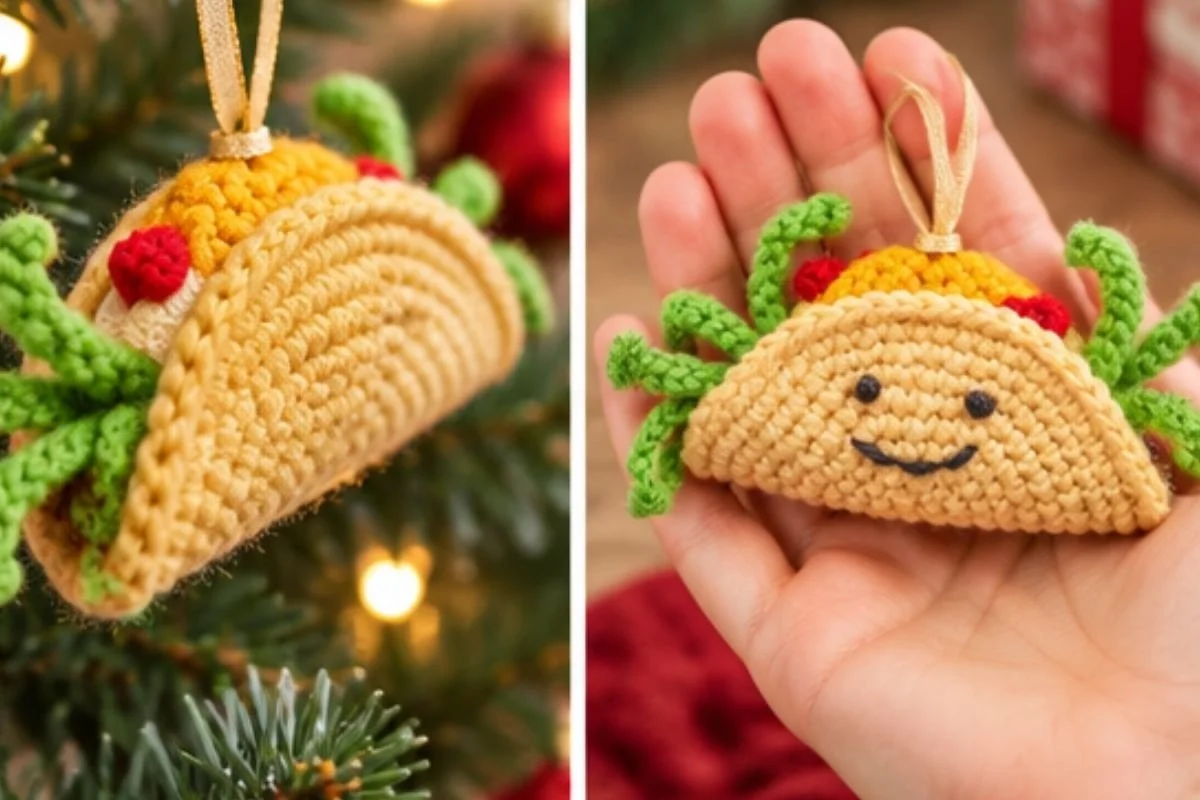
- Hang the taco from a holiday tree alongside colorful baubles for a playful food-themed section.
- Tie it to a wrapped gift as a reusable decoration instead of a paper bow.
- Display several finished tacos on a kitchen-themed garland or decorative branch.
- Add it to a handmade ornament collection with other miniature food or floral designs; a 3D flower granny square design can inspire a contrasting botanical project nearby.
- Give it as a small housewarming, birthday, or holiday gift to someone who enjoys tacos and cheerful décor.
- Use it as part of a playful table display, keeping it away from food surfaces where loose fibers could collect.
Caring for Your Crochet Project
Dust the ornament gently with a soft, dry cloth or a clean, soft brush. Pay special attention to the lettuce ends, embroidered face, and ribbon loop, since these details can catch on rough surfaces.
For a small mark, use careful spot cleaning rather than soaking the ornament. Apply minimal moisture to the affected area and allow it to air-dry completely. Avoid excessive heat, which can affect the yarn, stuffing, ribbon, and stitched shape.
Store the taco in a clean, dry container when it is not on display. Place it where the loose lettuce ends and ribbon will not be crushed. Avoid storing it under heavy decorations, as pressure may flatten the stuffing or distort the folded shell.
Tips for Better Results
- Use the stitch marker consistently. The shell is worked in continuous rounds, so the marker identifies the beginning of each round and helps prevent losing your place.
- Count every increase round. The shell should progress from 6 stitches to 12, 18, 24, 30, 36, 42, 48, and 54 stitches. Checking the count at the end of each round helps maintain the taco’s shape.
- Keep the lettuce tube lightly stuffed. Too much fiberfill can make the filling bulky and difficult to sew to the shell.
- Leave the lettuce ends loose. The loose ends create the shredded appearance, so avoid stitching them down when closing the tube.
- Scatter the first four tomato pieces. Attach them to the single-crochet section of the lettuce while leaving the center open for the cheese.
- Shape the cheese like a diamond. Position it neatly on top of the lettuce before attaching the three remaining tomato pieces.
- Sew through all layers when closing the taco. Several stitches through the shell and filling help the folded form hold securely.
- Use small, even embroidery stitches. A controlled back stitch creates a neat smile, while consistent French knots make the eyes similar in size.
Creative Ways to Customize Your Project
The approved pattern uses Cornmeal for the shell, Gold for the lettuce, Cherry Red for the tomato, Gold D for the cheese, and Charcoal for the face. Those colors create a classic taco palette, but the project can be personalized with other yarn colors.
For an optional variation, try a darker shell shade for a toasted appearance or a brighter green for more contrast in the lettuce. You can also use a different ribbon color to coordinate with a holiday tree, gift wrapping, or kitchen display.
Changing yarn or hook size is also optional, but it may affect the finished dimensions, texture, stuffing needs, and amount of yarn required. If you substitute yarn, keep the materials consistent across the components so the shell and filling remain proportionate.
For a larger themed display, pair the taco with other handmade decorations, such as a floral wreath inspired by this crochet April flowers wreath pattern. Keep any alternate project separate from this taco’s approved assembly instructions.
Frequently Asked Questions
Is this taco ornament suitable for beginners?
The project uses basic stitches and straightforward shaping, making it approachable for crocheters familiar with single crochet, chains, slip stitches, sewing, and simple embroidery. The continuous spiral shell and layered assembly require careful counting and placement.
What yarn is recommended?
The pattern specifies RED HEART® Super Saver® yarn in five color assignments: Cornmeal, 319 Gold, 321 Cherry Red, 321 Gold D, and 3950 Charcoal. Only a small amount of each color is needed.
What crochet hook size should I use?
Use a Susan Bates® Crochet Hook measuring 3.75 mm [US F-5].
How many tomato pieces are needed?
Make seven tomato pieces total. Four are sewn to the single-crochet section of the lettuce, and the remaining three are sewn on top of the cheese.
How is the taco shape created?
The shell is first crocheted as a flat circle in continuous rounds. After the filling is attached, fold up the shell and sew several stitches through all layers with Color A to hold the taco shape.
How do I create the lettuce texture?
The lettuce is made as a tube with extended slip-stitch sections and single-crochet sections. When the tube is closed, keep the shredded lettuce ends free on each side.
Can I change the colors?
Yes. Color changes are an optional styling choice, but they may alter the visual appearance of the taco. Keep the component assignments clear so you know which color is being used for the shell, lettuce, tomatoes, cheese, and face.
How is the ornament hung?
Fold the 18″ [45.5 cm] thin gold ribbon in half. Draw the fold through a few stitches at the top of the ornament with a crochet hook, pull the ribbon ends through the loop, and tie the ends together with a bow or overhand knot.
How should the ornament be stored?
Store it in a clean, dry place where the folded shell, loose lettuce ends, embroidery, and ribbon will not be crushed. Gentle dusting and careful spot cleaning are preferable to soaking.
Conclusion
This Crochet Tasty Taco Ornament Pattern combines simple crochet techniques with colorful layers and expressive embroidery. The finished taco makes a playful decoration, gift accent, or themed display piece, and optional color changes let you give it your own style. For the original complementary reference, see the Free Easy Red Heart Tasty Taco Ornament Crochet Pattern.