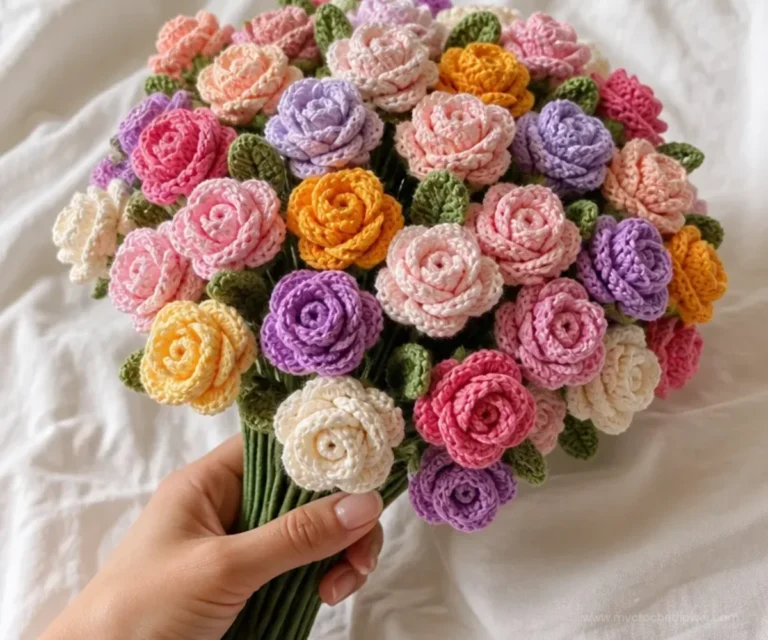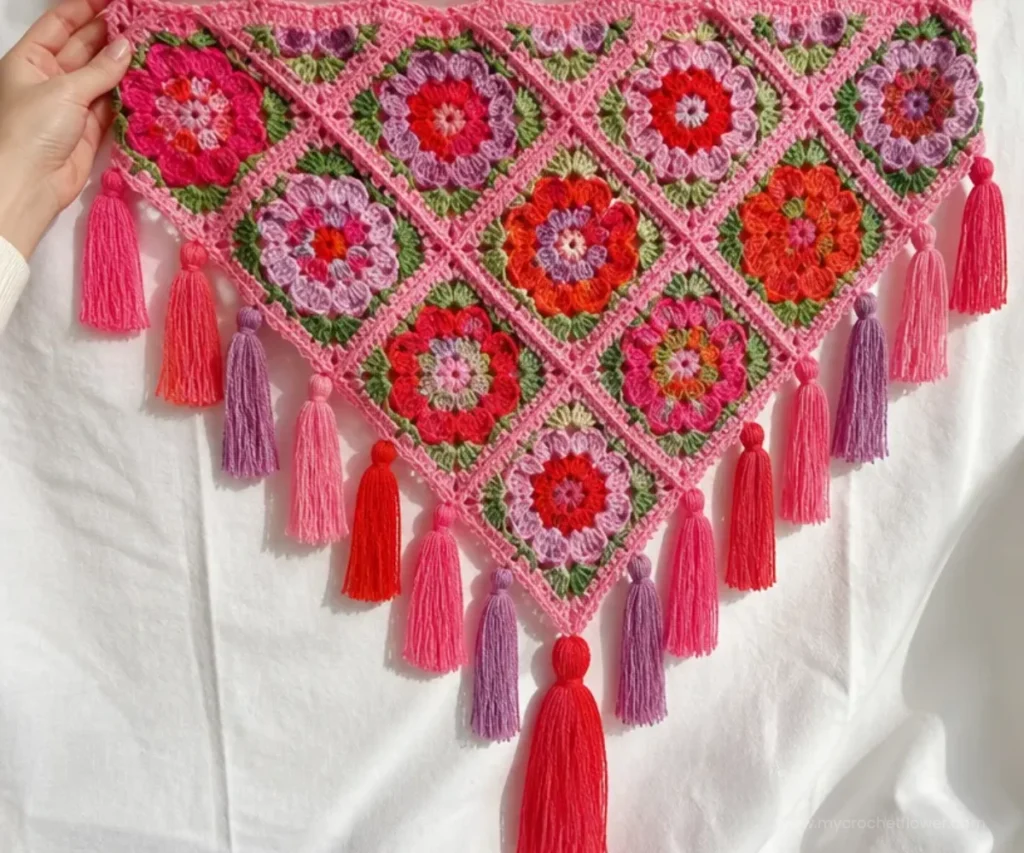
The Flower Power Crochet Wall Hanging Pattern turns colorful crochet squares into a cheerful botanical-inspired decoration. Each six-inch motif features layered flower-like shaping, while the coordinated shades create a lively patchwork arrangement. With 21 squares, a wooden dowel, a tassel, and matching fringe, the finished wall hanging makes a bright accent for a craft room, nursery, bedroom, or living space. It is also a thoughtful handmade gift for anyone who enjoys colorful fiber art and floral home décor.
Why You’ll Love This Crochet Project

- It creates a substantial home decoration. Twenty-one crocheted squares are joined into a wall hanging with a finished top edge and dowel for display.
- The motifs build useful skills. You’ll practice working in rounds, shaping flower-like centers, changing colors, and forming square corners.
- The color changes are built into the yarn plan. The pattern assigns colors to specific rounds, helping the flower motifs develop their distinct layered appearance.
- It makes a memorable handmade gift. The finished piece works well for birthdays, housewarmings, nurseries, craft rooms, and seasonal decorating.
- The fringe and tassel complete the botanical textile look. Matching the fringe shade to each square helps the whole arrangement feel intentional.
My Crochet Flower Tip: Make and measure one motif before crocheting all 21 squares. If it does not measure 6″ [15 cm] square, adjust your tension during the later rounds before continuing.
Before You Start Crocheting
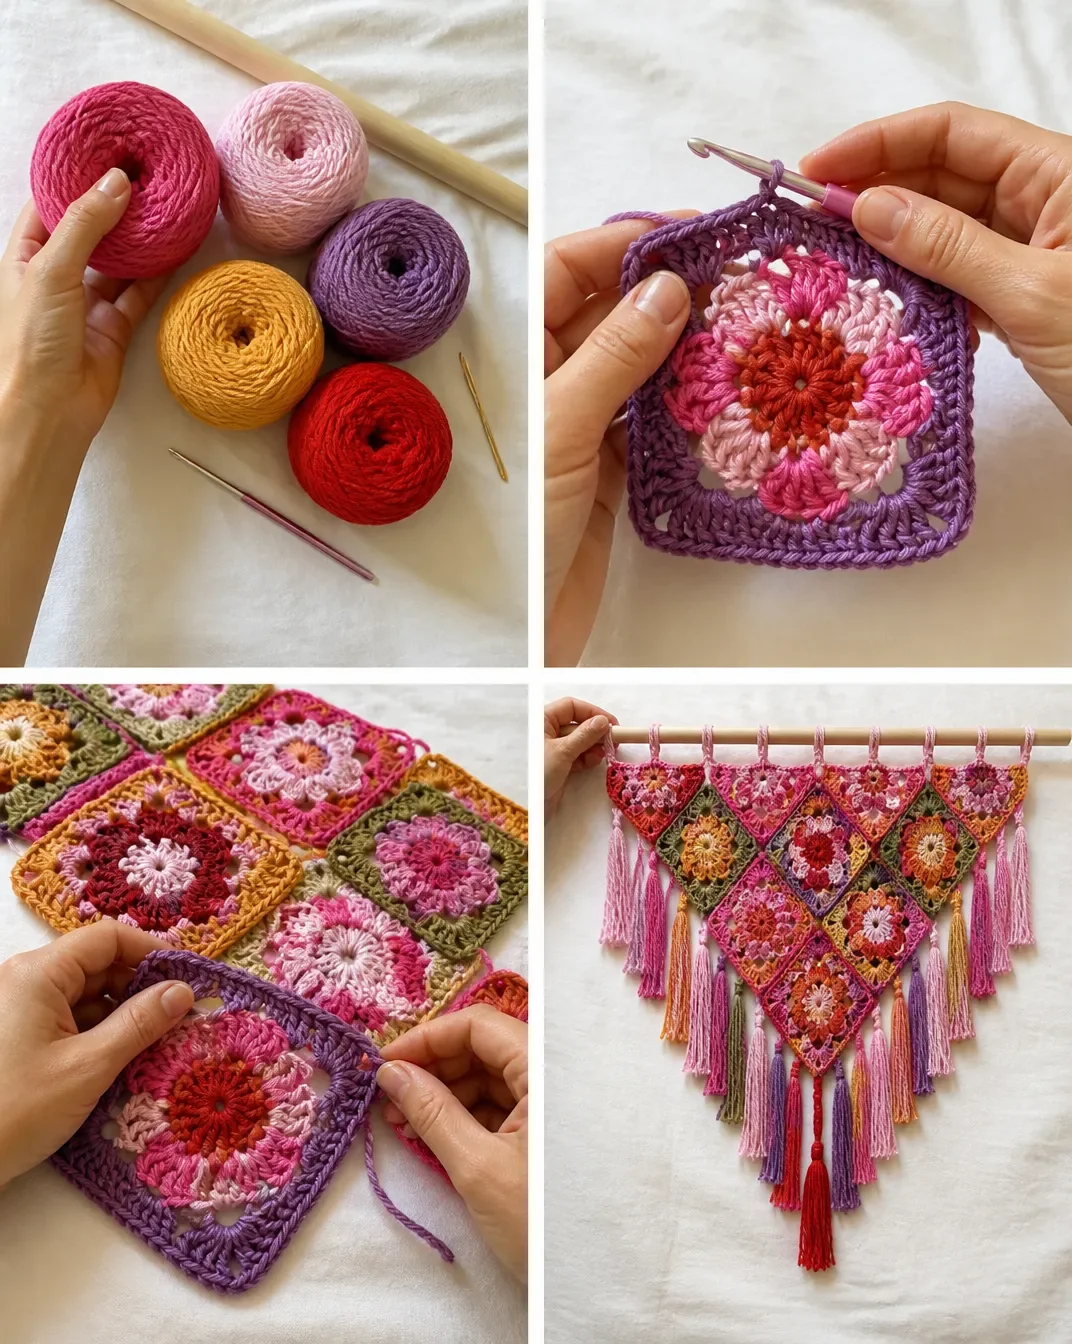
This project is made from 21 Flower Power motifs: 6 Squares with Contrast A and 5 Squares each with Contrasts B, C, and D. Each square is worked in six rounds and should measure 6″ [15 cm] square. The squares are joined into 5 strips, then the strips and remaining square are seamed together.
The top edging creates a series of hanging loops, and a 60″ [152.5 cm] wooden dowel is threaded through the edging. The bottom is finished with matching fringe and one tassel made from Contrast C.
The motif uses three color sections:
- Color 1 begins the center and is the shortest color repeat from the pull-skein.
- Color 2 is used for rounds 2 and 3.
- Color 3 is used for rounds 4, 5, and 6.
The pattern uses a U.S. I/9 (5.5 mm) hook, or the size needed to obtain gauge. The finished motif measurement is especially important because the squares must align during assembly.
Abbreviations and stitch symbols
- ch: chain
- sl st: slip stitch
- sc: single crochet
- hdc: half double crochet
- dc: double crochet
- tr: treble crochet
- RS: right side
- WS: wrong side
- tog: together
The stitch key symbols are: ○ = chain, • = slip stitch, ⊥ = single crochet, | = half double crochet, + = double crochet, and ≡ = treble crochet.
Materials You’ll Need
- Red Heart® All in One™ Flower Power™: 8.8 oz/250 g; 417 yds/381 m main yarn
- Contrast A Peony Pop (2021): 1 ball or 6 Squares, plus 112 yds/102 m for fringe
- Contrast B Cherry Blossom (2000): 1 ball or 5 Squares, plus 137 yds/125 m for fringe and top edging
- Contrast C Poppy Star (2018): 1 ball or 5 Squares, plus 91 yds/83 m for fringe and tassel
- Contrast D Hyacinth Bucket (2017): 1 ball or 5 Squares, plus 112 yds/102 m for fringe
- Crochet hook: U.S. I/9 (5.5 mm) Susan Bates® Silvalume® crochet hook, or size needed to obtain gauge
- Yarn needle
- Wooden dowel: 60″ [152.5 cm] long, ½” [1.5 cm] diameter
Step-by-Step Crochet Instructions
Technical notes for the Flower Power motif
Each color aligns with specific rounds in the motif, using 3 Colors in total.
Begin the motif with Color 1, the shortest color repeat from the center of the pull-skein, leaving a 4″ [10 cm] tail to weave in. Work the 2nd and 3rd rounds in Color 2. Work the 4th, 5th, and 6th rounds in Color 3.
If too much color is left at the end of a round, pull back some stitches and slightly loosen your gauge to re-work the stitches and finish at the color change. If too little color is left, pull back some stitches and slightly tighten your gauge to re-work the stitches and finish at the color change.
At the end of the final round, the motif should measure 6″ [15 cm] square, with a long tail of at least 24″ [61 cm] remaining for seaming. Adjust gauge as needed while working the 4th, 5th, and 6th rounds to maintain the 6″ [15 cm] square finished size.
Ch 3 at the beginning of a round counts as a dc. Ch 2 at the beginning of a round does not count as a stitch. Join all rounds with a sl st to the first stitch unless otherwise stated.
Make the 21 squares
Make 6 Squares with A, and 5 Squares each with B, C, and D 21 Squares total.
Flower Power motif
With Color 1, ch 4. Join with sl st to first ch to form ring.
1st rnd
Ch 3.
Work 9 dc in ring.
Join.
10 dc. (Color 1 complete.)
2nd rnd
Color 2 begins.
Ch 3.
1 dc in first dc.
2 dc in each dc around.
Join.
20 dc.
3rd rnd
Sl st in next dc.
(Ch 3. 1 tr) in same st as last sl st.
3 tr in next dc.
(1 tr. 1 dc) in next dc.
Sl st in next dc.
(1 dc. 1 tr) in next dc.
3 tr in next dc.
(1 tr. 1 dc) in next dc.
Sl st in next dc.
Rep from * around, ending by joining with sl st to top of ch-3 of previous (2nd) rnd.
Color 2 complete.
4th rnd
Color 3 begins.
Sl st in first dc.
Ch 3.
1 dc in next tr. 1 hdc in next tr. 1 sc in next tr. 1 hdc in next tr. 1 dc in each of next 2 sts.
1 tr in dc of 2nd rnd below sl st.**
1 dc in next dc.
Rep from * 3 times more, then from * to ** once.
Join.
5th rnd
Ch 6 (counts as tr and ch-2).
1 tr in same sp as sl st.
(2 dc in next st. Ch 1. 1 dc in next st. 1 hdc in next st. 1 sc in next st. Ch 1. Skip next st. 1 sc in next st. 1 hdc in next st. 1 dc in next st. Ch 1. 2 dc in next st.)
(1 tr. Ch 2. 1 tr) all in next st. Rep from * twice more, then from * to ** once.**
Join to 4th ch of ch-6.
6th rnd
Sl st in next ch-2 sp.
Ch 2 (does not count as st).
1 hdc in same ch-2 sp.
Ch 3.
3 hdc in same ch-2 sp.
Ch 1.
(3 hdc. Ch 1) in each ch-1 sp to next corner ch-2 sp.
(3 hdc. Ch 3. 3 hdc) all in next ch-2 sp.
Ch 1.
Rep from * twice more, then from * to ** once.
2 hdc in first ch-2 sp.
Join.
Fasten off at the end of Color 3, leaving a long tail for seaming.
The motif should measure 6″ [15 cm] square, as noted above.
Assembly
Seaming with a flat slip-stitch join
With RS facing, use Color 3 from A to sl st motifs together into 5 Strips as shown in Assembly Diagram I, working through back loops only. Keep the working yarn to the WS of the work so the flat slip-stitch chain detail appears on the RS.
Slip-stitch the Strips and remaining Square together as shown in Assembly Diagram II.
Keep the working yarn to the WS so only the flat slip-stitch chain is visible on the RS.
Top edging
With RS facing, join B with a sl st to the top corner ch-3 sp of the right-most square of the Wall Hanging, marked A on Assembly Diagram III.
1st row:
Ch 1.
3 sc in same ch-3 sp.
(Ch 23. 3 sc in ch-3 sp of next Square) 5 times.
Turn.
2nd row:
Ch 1.
1 sc in first sc.
Ch 7 (hanging loop).
Skip next sc.
1 sc in next sc.
(1 sc in each of next 23 ch. 1 sc in next sc. Ch 7. Skip next sc. 1 sc in next sc) 5 times.
Fasten off.
Thread the wooden dowel through the Top Edging.
Finishing
Tassel
Cut a piece of cardboard 12″ [30.5 cm] wide.
Wind C around the cardboard 100 times. Break yarn, leaving a long end. Thread the end through a needle. Slip the needle through all loops and tie tightly.
Remove the cardboard and wind yarn tightly around the loops ¾” [2 cm] below the fold.
Attach one Tassel to the center ch-3 sp at the bottom of the Wall Hanging.
Fringe
Cut lengths of yarn 25″ [63.5 cm].
Taking 6 strands together, knot the fringe into each ch-1 and ch-3 sp along the bottom edges of the Wall Hanging, matching the shade of the fringe to the shade of the Square.
Trim the fringe evenly.
Ways to Display Your Finished Crochet

- Hang it above a craft table, reading nook, or small console where the flower-like motifs can serve as a colorful focal point.
- Use it as cheerful nursery or playroom décor, especially when the surrounding furnishings are kept neutral.
- Give it as a handmade housewarming, birthday, or holiday gift.
- Display it seasonally by pairing it with spring colors, botanical décor, or other handmade textiles.
- Coordinate it with crocheted flowers, baskets, or a bouquet-inspired arrangement for a layered floral theme.
- Change the display location throughout the year while keeping the wooden dowel and fringe protected from snagging.
Caring for Your Crochet Project
Dust the wall hanging gently with a soft brush, microfiber cloth, or the low-suction setting of a vacuum held slightly away from the surface. Pay particular attention to the fringe and tassel, where loose fibers can collect dust.
For small marks, use careful spot cleaning rather than soaking the complete wall hanging. Avoid pulling on the flat slip-stitch seams, hanging loops, fringe, or tassel. Keep the piece away from excessive heat and direct conditions that could cause the yarn colors or fibers to deteriorate.
Store it flat or loosely rolled when it is not displayed. Do not compress the fringe, and place clean tissue or a breathable fabric around the piece if storing it for an extended period. Follow the yarn manufacturer’s care instructions when laundering is appropriate, but protect the wooden dowel and decorative components from moisture.
Tips for Better Results
- Measure the first square. The motif should measure 6″ [15 cm] square. Consistent square size makes the strips easier to seam.
- Plan the color changes before starting. The center uses Color 1, rounds 2 and 3 use Color 2, and rounds 4 through 6 use Color 3.
- Leave the correct tails. Begin with a 4″ [10 cm] tail for weaving in, and leave at least 24″ [61 cm] at the end for seaming.
- Watch the round beginnings. Ch 3 counts as a dc, while ch 2 does not count as a stitch. Confusing these points can alter the stitch placement.
- Count the second round carefully. It should finish with 20 dc. This round establishes the foundation for the shaped center.
- Keep the working yarn on the WS during seaming. This allows the flat slip-stitch chain to remain visible on the RS.
- Check the square arrangement before joining all pieces. Lay out the 21 squares and confirm the color placement before seaming.
- Trim the fringe only after knotting it. This gives you a better view of the finished edge and helps avoid cutting strands too short.
Creative Ways to Customize Your Project
These ideas are optional and should be kept separate from the approved instructions:
- Arrange the 21 squares in a different color order while preserving the same total number of motifs.
- Use a restrained palette of two or three coordinating shades for a softer wall hanging.
- Choose a seasonal arrangement, such as warm shades for autumn or pastel shades for spring, if you use yarn that maintains the required gauge.
- Make the fringe and tassel visually match the strongest color in your square arrangement rather than following the original shade placement.
- Display the finished wall hanging against a contrasting wall color so the flower-like centers stand out.
- If substituting yarn, choose a comparable yarn carefully and make a test motif first. A different yarn weight, fiber, or hook size can change the 6″ [15 cm] motif measurement, texture, drape, color transitions, and total yarn requirements.
Frequently Asked Questions
How many squares does this wall hanging use?
It uses 21 Squares total: 6 Squares with A, and 5 Squares each with B, C, and D.
What size should each motif be?
Each completed Flower Power motif should measure 6″ [15 cm] square. Adjust your gauge during the 4th, 5th, and 6th rounds as needed to maintain this measurement.
Which hook size is recommended?
Use a U.S. I/9 (5.5 mm) Susan Bates® Silvalume® crochet hook, or use the size needed to obtain gauge.
How are the colors assigned within each motif?
Color 1 begins the center. Color 2 is used for the 2nd and 3rd rounds. Color 3 is used for the 4th, 5th, and 6th rounds.
Why should I leave a long tail after the final round?
The pattern requires a long tail of at least 24″ [61 cm] for seaming the motifs together.
How are the squares joined?
The motifs are joined with a flat slip-stitch join through the back loops only. Keep the working yarn on the WS so the flat slip-stitch chain detail shows on the RS.
How does the wall hanging attach to the dowel?
The top edging creates hanging loops. After completing the edging, thread the 60″ [152.5 cm] wooden dowel through it.
Can I change the colors?
Yes, color changes are an optional styling choice. However, changing yarn or color placement may affect the flower-like appearance, and changing the yarn or hook can affect gauge and finished dimensions.
How should I care for the finished wall hanging?
Dust it gently, spot-clean carefully when necessary, avoid excessive heat and moisture, and store it flat or loosely rolled with the fringe protected from compression.
Conclusion
This Flower Power Crochet Wall Hanging Pattern combines dimensional flower-like motifs, bright color changes, matching fringe, and a handmade tassel in one cheerful décor piece. Take time to check motif size and square placement before assembly, then enjoy displaying or gifting your finished work. For another floral-inspired crochet idea, explore this Flower Power Crochet Wallflower.