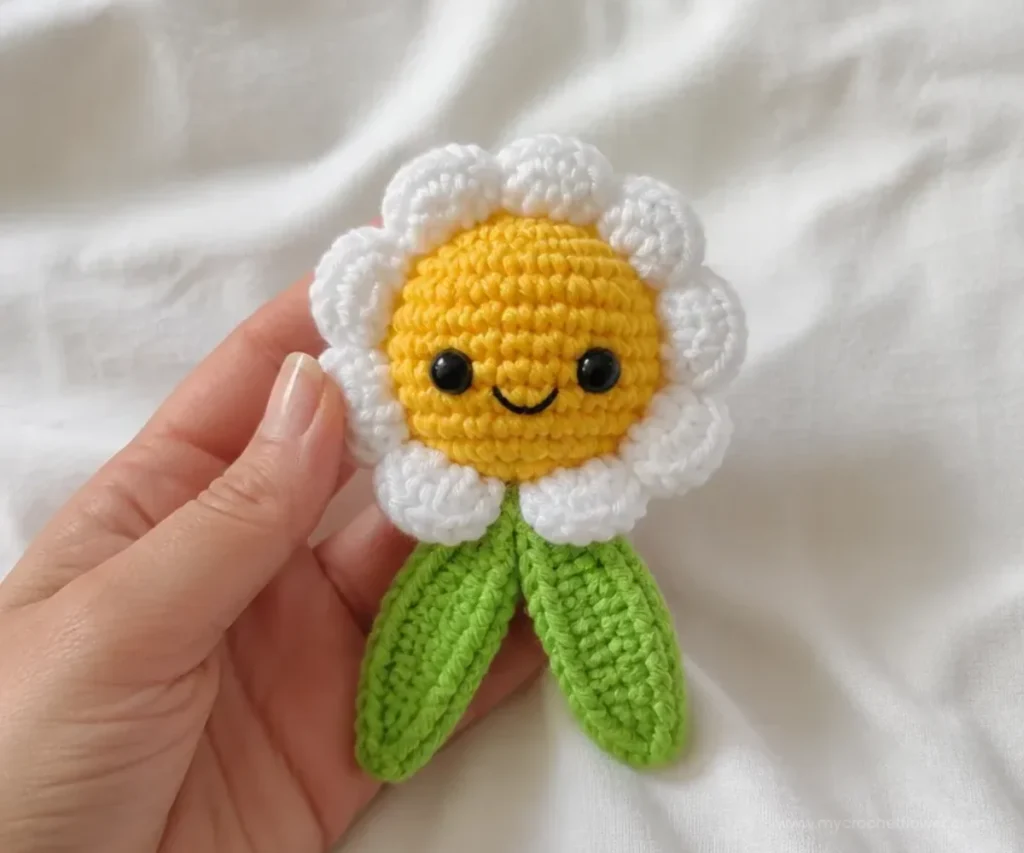
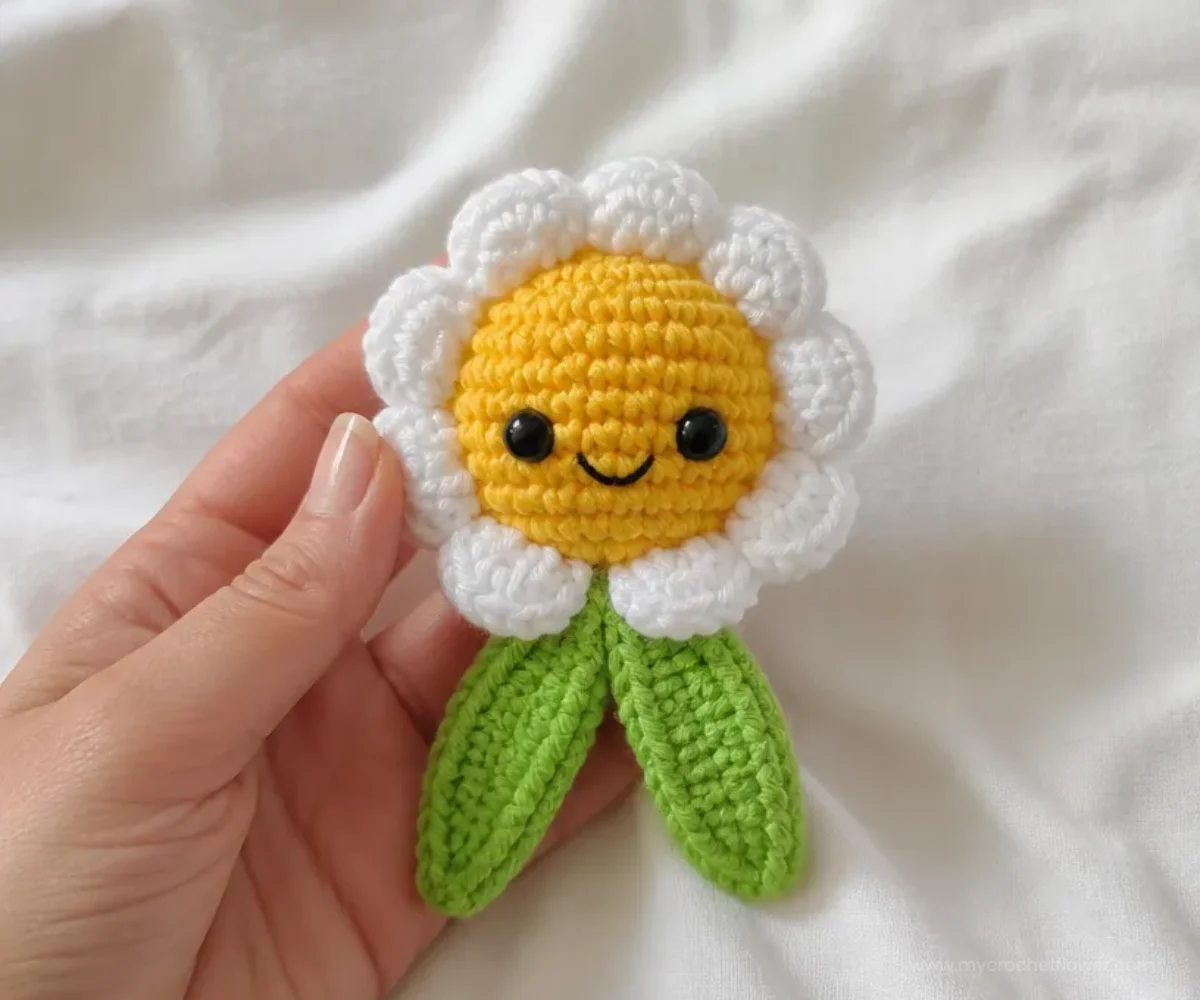
The Maker Mini Daisy the Crochet Flower Pattern creates a cheerful, soft-sculpted daisy with a yellow center, green details, colorful petals, embroidered features, and two leaves. It is a charming project for beginners who want to practice crocheting in the round, shaping with increases and decreases, and working into front and back loops. Display one in a small arrangement, use several as a handmade gift, or combine the color versions for a bright botanical decoration.
Why You’ll Love This Crochet Project
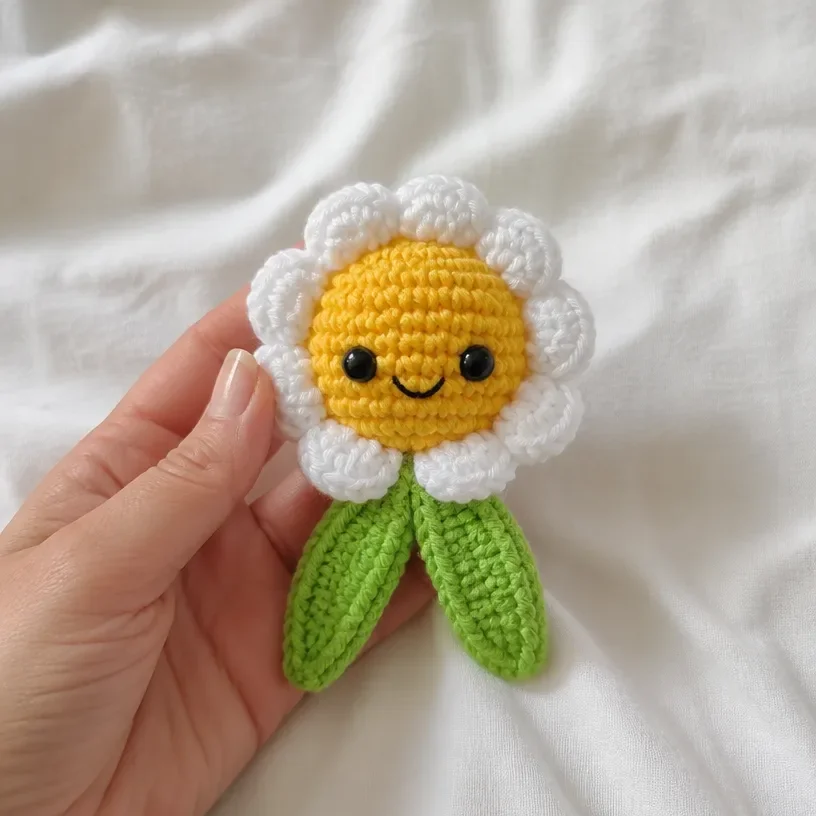
- A cheerful floral design: Yellow, green, and colorful petal shades give the daisy a lively, playful appearance.
- Useful practice for crocheters: The project includes single crochet, half double crochet, double crochet, slip stitches, increases, decreases, and loop-specific techniques.
- Three color possibilities: Use white, pink, or purple for Contrast C while keeping the yellow center and green leaves consistent.
- A versatile handmade decoration: Finished flowers can be displayed individually or grouped into a small bouquet.
- A thoughtful handmade gift: The soft, stuffed flower can brighten a desk, shelf, nursery, craft room, or seasonal display.
My Crochet Flower Tip: Place the stitch marker in the first stitch of the center and move it as you work. This makes the rounds easier to track, especially while shaping the center with increases and decreases.
Before You Start Crocheting
This project includes one stuffed flower center, two rounds of petals, two leaves, safety eyes, and an embroidered mouth. The flower center is crocheted first in Contrast A, then continued in Contrast B to form the green section. After the center is stuffed and the safety eyes are attached, Contrast C is used to create the petals. The leaves are crocheted separately and sewn to the completed flower.
The pattern uses U.S. crochet terminology. Important abbreviations include:
- ch: chain
- sc: single crochet
- hdc: half double crochet
- dc: double crochet
- sl st: slip stitch
- sc2tog: single crochet two stitches together
- PM: place marker
- rnd: round
- rep: repeat
Keep the shaping counts at the end of each round in view. They provide a useful check that the increases and decreases have been worked correctly.
Crochet Supplies and Tools
Yarn
- Bernat® Maker Minis™ Kit, including 10 balls, each 1.75 oz/50 g and 61 yds/56 m; total pack weight 17.65 oz/500 g and total yardage 610 yds/560 m; product code 53001. One kit will make all 3 versions.
- Version 1: Contrast A Yellow, 1 ball or 11 yds/10 m; Contrast B Green, 1 ball or 27.5 yds/25 m; Contrast C White, 1 ball or 11 yds/10 m.
- Version 2: Contrast A Yellow, 1 ball or 11 yds/10 m; Contrast B Green, 1 ball or 27.5 yds/25 m; Contrast C Pink, 1 ball or 11 yds/10 m.
- Version 3: Contrast A Yellow, 1 ball or 11 yds/10 m; Contrast B Green, 1 ball or 27.5 yds/25 m; Contrast C Purple, 1 ball or 11 yds/10 m.
Tools and Notions
- Size U.S. I/9 (5.5 mm) Susan Bates® Silvalume® crochet hook, or size needed to obtain gauge
- Susan Bates® steel yarn needle
- Susan Bates® stitch markers
- Polyfil stuffing
- Two 5/16 in [1 cm] safety eyes for each flower
- Length of black embroidery floss
The stuffing gives the center its rounded shape, while the safety eyes and embroidered mouth create the flower’s face. Use the yarn needle to sew in the leaves and secure yarn ends.

Complete Crochet Instructions
Flower Center
With A, ch 2. See diagram on page 2.
- 1st rnd: 6 sc in 2nd ch from hook. PM on first st. 6 sc.
- 2nd rnd: 2 sc in each sc around. 12 sc.
- 3rd rnd: *1 sc in next sc. 2 sc in next sc. Rep from * around. 18 sc.
- 4th rnd: *1 sc in each of nex 2 sc. 2 sc in next sc. Rep from * around. 24 sc.
- 5th rnd: *1 sc in each of next 3 sc. 2 sc in next sc. Rep from * around. 30 sc.
- 6th rnd: *1 sc in each of next 4 sc. 2 sc in next sc. Rep from * around. Break A. Join B. 36 sc.
- 7th rnd: With B, working in back loops only, 1 sc in each sc around.
- 8th and 9th rnds: 1 sc in each sc around.
- 10th rnd: *1 sc in each of next 4 sc. Sc2tog. Rep from * around. 30 sts.
- 11th rnd: *1 sc in each of next 3 sc. Sc2tog. Rep from * around. 24 sts.
- 12th rnd: *1 sc in each of next 2 sc. Sc2tog. Rep from * around. 18 sts.
Stuff Center firmly and attach safety eyes.
- 13th rnd: *1 sc in next sc. Sc2tog. Rep from * around. 12 sts.
- 14th rnd: (Sc2tog) 6 times. 6 sts.
Petals
Join C with sl st to first sc front loop of 6th rnd.
1st rnd: Working in front loops only,
- (1 sc. 1 hdc) all in next sc after sl st.
1 dc in each of next 2 sc. (1 hdc. 1 sc) all in next sc.
Sl st in each of next 2 sc. Rep from * to last 5 sc.
(1 sc. 1 hdc) in next sc. 1 dc in each of next 2 sc. 1 hdc. 1 sc in next sc.
Sl st in last sc. Do not join.
2nd rnd: Working in both loops, skip first sl st.
- Sl st in next sc. (1 sc. 1 hdc) in next hdc.
2 dc in each of next 2 dc. (1 hdc. 1 sc) in next hdc.
Sl st in next sc. Skip each of next 2 sl sts.
Rep from * to last 7 sts.
Sl st in next sc. (1 sc. 1 hdc) in next hdc.
2 dc in each of next 2 dc. (1 hdc. 1 sc) in next hdc.
Sl st in next sc. Sl st in last sl st. Fasten off.
With a length of black embroidery floss or yarn, embroider the mouth as shown in the photo.
Leaves
Make 2.
With B, ch 8.
1st rnd:
- Sl st in 2nd ch from hook.
- 1 sc in next ch.
- 1 hdc in next ch.
- 1 dc in next ch.
- 1 hdc in next ch.
- 1 sc in next ch.
- Sl st in last ch.
- Ch 2.
- Working in opposite side of foundation ch, sl st in next ch.
- 1 sc in next ch.
- 1 hdc in next ch.
- 1 dc in next ch.
- 1 hdc in next ch.
- 1 sc in next ch.
- Sl st in last ch.
- Fasten off.
Assembly and Finishing
Sew Leaves to Flower as shown in the photo. Weave in and secure the yarn ends neatly with the steel yarn needle.
Finished Project Inspiration
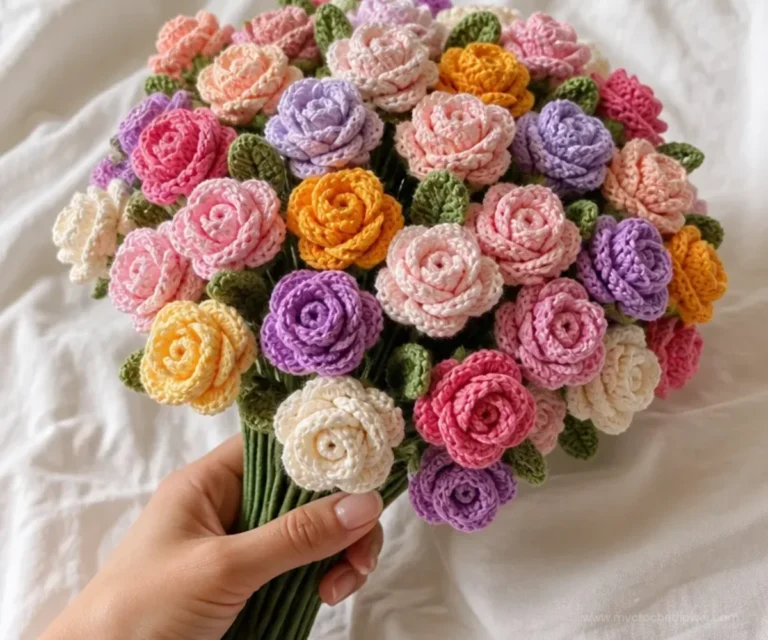
- Small vase arrangement: Place one or several completed daisies in a narrow vase or decorative container for a cheerful tabletop accent.
- Color-coordinated bouquet: Combine the white, pink, and purple petal versions with their matching yellow centers and green leaves.
- Handmade gift: Give a finished flower as a small, lasting gift for a birthday, spring celebration, or craft-loving friend.
- Seasonal display: Use the daisies in a spring arrangement or brighten a shelf with several flowers grouped together.
- Desk or bedside decoration: A single flower can add color to a small personal space without requiring water or sunlight.
- Floral centerpiece: Arrange multiple daisies in a low container for a playful handmade centerpiece.
Caring for Your Crochet Project
Dust the finished flower gently with a soft cloth, makeup brush, or low-powered fabric-safe duster. Take care around the safety eyes, embroidered mouth, petals, and leaves so they do not catch or pull.
For small marks, use careful spot cleaning with a slightly damp cloth rather than soaking the stuffed flower. Avoid excessive water, heat, and direct high-heat drying, which may affect the yarn, stuffing, shape, or attached components.
Store the flower in a clean, dry place away from moisture, pets, and sharp objects. If the petals become compressed, gently reshape them by hand and allow the flower to rest flat until it regains its form.
Tips for Better Results
- Count every increase: The center grows from 6 sc to 36 sc through the sixth round. Check the stitch count after each increase round before moving on.
- Use the correct loops: The seventh round is worked in back loops only, while the petals begin in the front loops of the sixth round. These loop placements help create the separation between the center and petals.
- Stuff before closing: Add the Polyfil stuffing after the 12th round, before working the 13th and 14th rounds. Firm stuffing supports the rounded flower center.
- Attach the eyes securely: Position and attach the safety eyes while the opening is still accessible, then continue the final decrease rounds.
- Watch the petal repeats: The first petal round uses sc, hdc, and dc combinations, while the second round increases the dc stitches. Read each repeat fully before beginning it.
- Shape each leaf as you work: The leaf is crocheted along both sides of the foundation chain. Keep the stitches relaxed enough to form a smooth leaf outline.
- Secure finishing ends: Fasten off carefully and weave in the ends with the yarn needle so the leaves and petals remain neat during handling.
- Sew the leaves evenly: Place the two leaves as shown in the photo and use small, secure stitches to attach them without flattening the flower.
Color and Styling Variations
The approved pattern includes three color versions:
- Yellow center, green leaf section, and white petals
- Yellow center, green leaf section, and pink petals
- Yellow center, green leaf section, and purple petals
For an optional custom palette, keep Contrast A yellow and Contrast B green for the recognizable daisy structure, then replace Contrast C with another color that coordinates with your décor. Soft pastels can create a gentle spring arrangement, while deeper shades can make the flowers feel more suitable for autumn or a dramatic room display.
You can also arrange the completed flowers by color: use a single shade for a coordinated bouquet or alternate white, pink, and purple petals for a mixed arrangement. These are styling choices only and do not change the approved instructions.
If you substitute a different yarn or hook, the flower’s texture, size, stuffing requirements, and stitch definition may change. A different yarn may also require more or less yardage, so make a sample before producing multiple flowers.
Frequently Asked Questions
Is this crochet flower suitable for beginners?
It can be a useful beginner project for crocheters familiar with basic stitches. The pattern also introduces working in the round, stitch increases and decreases, front-loop and back-loop techniques, and crocheting along both sides of a foundation chain.
What yarn does the pattern recommend?
The pattern recommends the Bernat® Maker Minis™ Kit. One kit includes 10 balls and will make all 3 versions. Each version uses yellow Contrast A, green Contrast B, and a different Contrast C color.
Which hook size should I use?
Use a size U.S. I/9 (5.5 mm) Susan Bates® Silvalume® crochet hook, or use the size needed to obtain gauge.
How many leaves are made?
Make two leaves in Contrast B. Each leaf begins with ch 8 and is worked around both sides of the foundation chain.
When should I add the stuffing?
Stuff the center firmly after completing the 12th round and before working the 13th and 14th rounds. Attach the safety eyes at the same stage while the center remains open.
Can I change the petal color?
Yes. The supplied versions use white, pink, or purple for Contrast C. You may also choose another color as an optional variation, keeping in mind that a yarn substitution can affect texture, size, and yardage.
How are the petals attached?
Join Contrast C with a slip stitch to the first single crochet front loop of the sixth round. The first petal round is worked in front loops only, and the second petal round is worked in both loops.
How do I finish the flower’s face?
After fastening off the petals, use a length of black embroidery floss or yarn to embroider the mouth as shown in the photo. The safety eyes are attached during the center construction.
How should I care for the completed flower?
Dust it gently and spot clean carefully when needed. Avoid soaking, high heat, and rough handling around the safety eyes, embroidered mouth, petals, and leaves.
Conclusion
The Maker Mini Daisy the Crochet Flower Pattern is a bright, characterful project that combines simple rounds with satisfying shaping details. Make one flower as a small handmade accent or create a colorful arrangement with all three versions. For the original approved instructions and pattern reference, see the Free Easy Bernat Maker Mini Daisy the Crochet Flower Pattern.