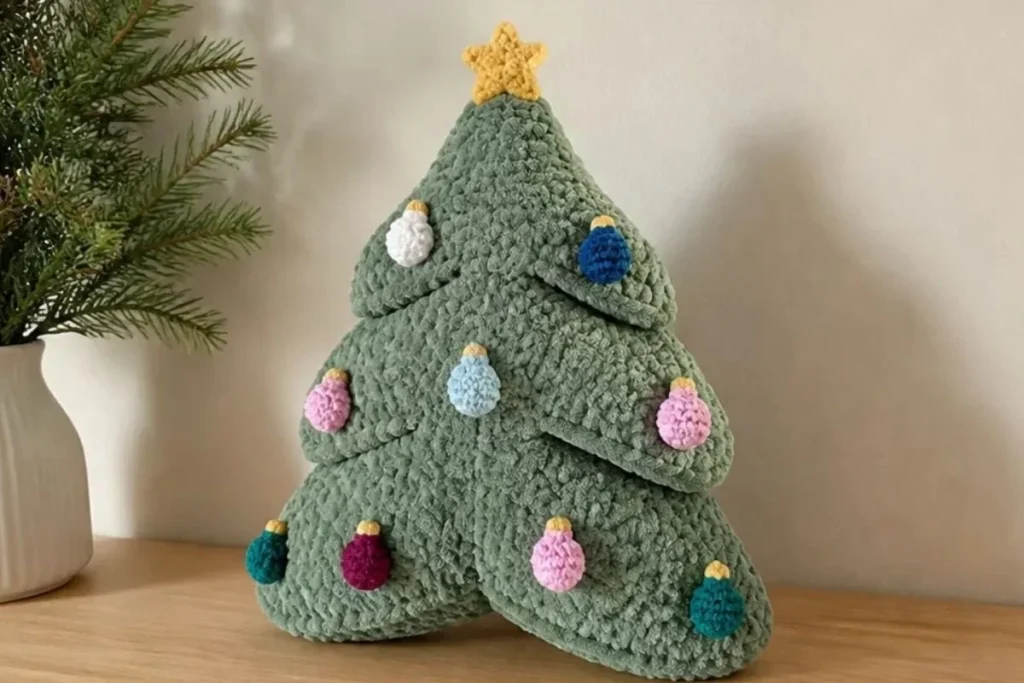
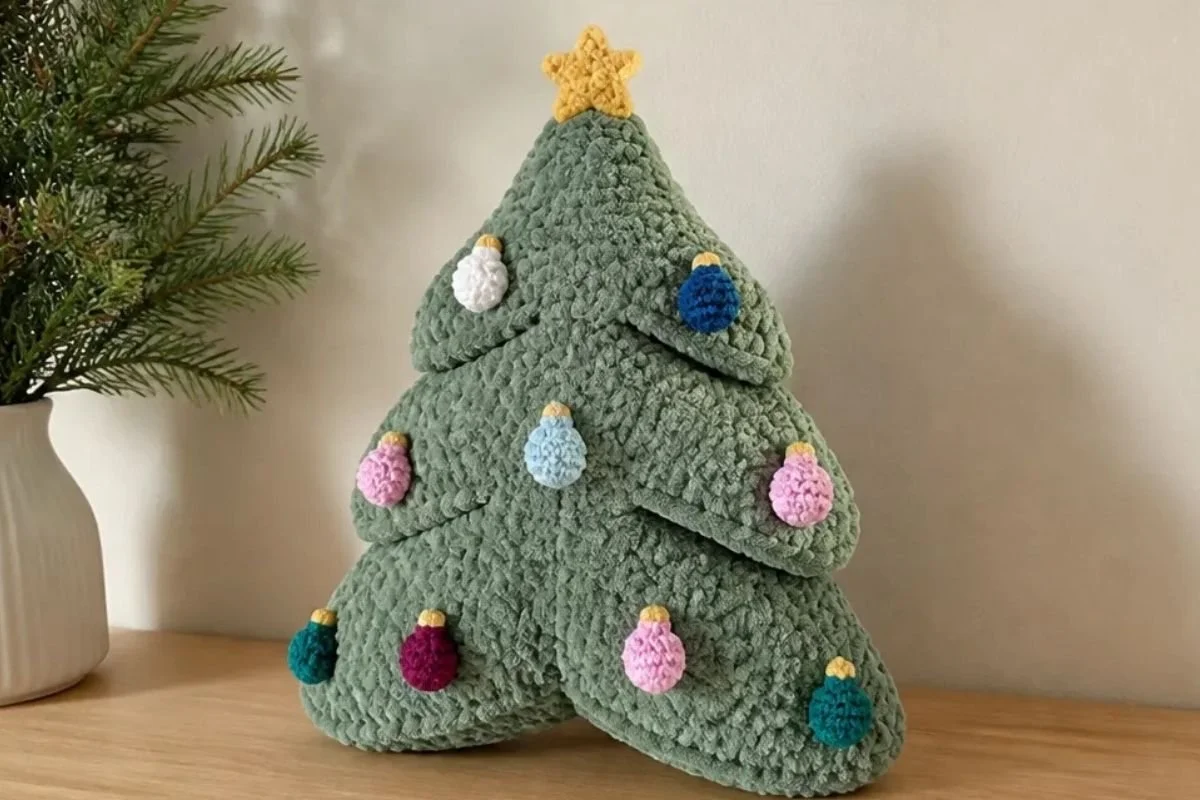
A modern crochet Christmas tree pillow brings seasonal color, texture, and handmade charm to a sofa, reading chair, or holiday bed. This design uses six tree motifs in plush Smoky Green yarn, joined into a dimensional pillow with six stuffed tree pockets. Bright velvet ornaments and a soft sunshine star complete the festive look. The project is especially enjoyable for crocheters who like shaping, seaming, and decorative finishing. For another small seasonal handmade accent, you may also enjoy this crochet blooms for hair pattern.
Why You’ll Love This Crochet Project
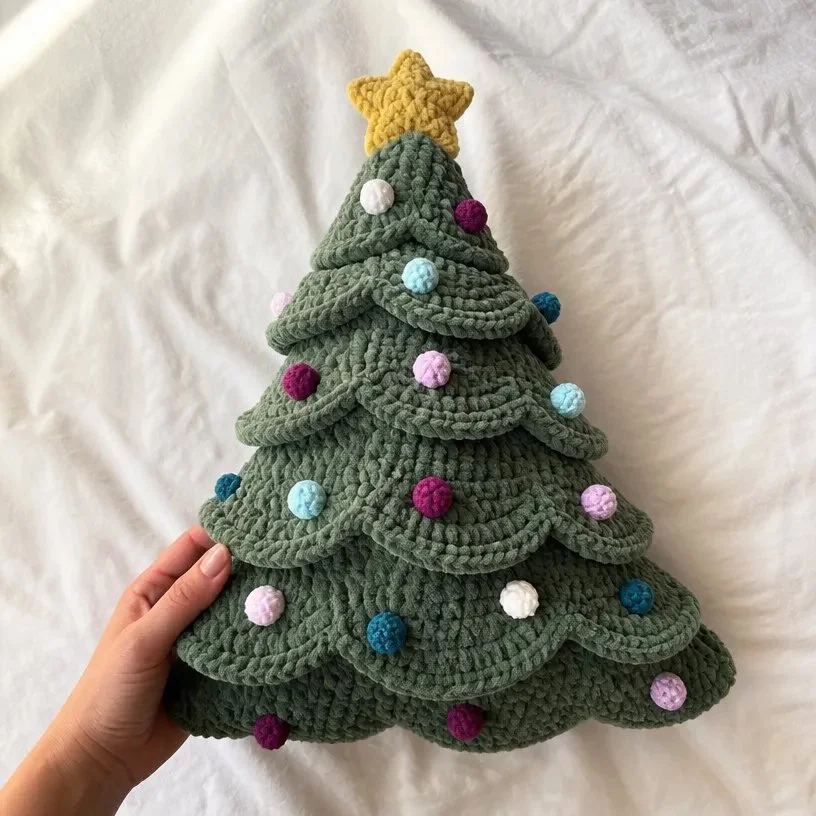
- It creates dimensional holiday décor. The tree is formed from layered motifs and stuffed pockets rather than a flat panel, giving the pillow sculptural texture.
- It combines plush and velvet yarns. Bernat® Blanket™ provides a soft, substantial base, while Bernat® Velvet Minis™ adds colorful ornament details.
- It offers useful shaping practice. The tree motif includes increases, decreases, skipped stitches, chain spaces, and foundation single crochet.
- It makes a thoughtful handmade gift. A finished Christmas tree pillow can be displayed year after year or given as a seasonal housewarming present.
- The palette is easy to personalize. The supplied ornament colors create a cheerful multicolor effect, while the green-and-gold foundation remains classic.
My Crochet Flower Tip: Keep each finished motif oriented in the same direction before joining so the tree tiers and center chain spaces align neatly.
Pattern Overview
How the Pillow Comes Together
The tree base begins with six identical tree motifs worked in Bernat® Blanket™ using the larger hook. Two motifs are crocheted together along their side edges to make three double-layer motifs. These are then stacked and stitched through the center, forming six tree pockets with openings along the bottom edge.
Each pocket is lightly stuffed before the bottom seams are closed. The decorative portion includes two identical stuffed stars in Contrast A and 18 lights total three in each of six Contrast B colors. The lights are sewn to the branch tips, and the star is attached to the top of the tree.
The supplied gauges are:
- 8 sc and 9 rows = 4″ [10 cm] with the larger hook and Bernat® Blanket™.
- 13 sc and 14 rows = 4″ [10 cm] with the smaller hook and Bernat® Velvet Minis™.
Useful abbreviations include sc for single crochet, sl st for slip stitch, ch for chain, sc2tog for single crochet two together, fsc for foundation single crochet, RS for right side, rem for remaining, beg for beginning, and rep for repeat.
Materials You’ll Need
- Bernat® Blanket™, 10.5 oz/300 g; 220 yds/201 m: Main Color (MC), Smoky Green (10855), 3 balls or 660 yds/603 m
- Bernat® Velvet Minis™ Kit, Classic (68001), 1 kit; includes 20 balls, 1.2 oz/35 g each, 25 oz/700 g total, 41 yds/38 m each, 820 yds/750 m total
- Contrast A: Soft Sunshine, 1 ball or 41 yds/38 m
- Contrast B: Snowy White, Bleached Aqua, Every After Pink, Velveteal, Burgundy Plum, and Smokey Blue, 1 ball or 21 yds/19 m each
- Susan Bates® Silvalume® crochet hooks, U.S. H/8 (5 mm) and U.S. K/10½ (6.5 mm), or sizes needed to obtain gauge
- Susan Bates® jumbo yarn needle
- Stuffing
Use the larger hook with Bernat® Blanket™ for the tree motifs and the smaller hook with Bernat® Velvet Minis™ for the lights.
Step-by-Step Crochet Instructions
Gauge and Technical Notes
Before beginning, make a gauge swatch if you need to adjust your hook size. For the ornaments, join all rounds with a slip stitch to the first single crochet or stitch.
For the star, the approved finishing instruction is: With RS facing and A, working into back loops only, sew Stars together using Whipstitch, stuffing lightly as you work.
For the tree base, the center seams are made with backstitching, using the chain-1 spaces as a guide. Keep the openings along the bottom edge while forming the pockets, then close those openings with single crochet.
Tree Base
Tree Motif Make 6
With MC and larger hook, ch 36.
1st row: 1 sc in 2nd ch from hook. 1 sc in each of next 16 ch. Ch 1. Skip next ch. 1 sc in each of last 17 ch. Turn. 34 sc and 1 ch-1 sp.
2nd row: Ch 1. 2 sc in first sc. 1 sc in each sc to next ch-1 sp. Ch 1. Skip next ch-1 sp. 1 sc in next sc. 1 sc in each sc to last sc. 2 sc in last sc. Turn. 36 sc and 1 ch-1 sp.
3rd row: Ch 1. 1 sc in each sc to next ch-1 sp. Ch 1. Skip next ch-1 sp. 1 sc in each sc to end of row. Turn.
4th and 5th rows: Rep 2nd and 3rd rows once more. 38 sc and 1 ch-1 sp after 4th row.
6th row: As 2nd row. 40 sc and 1 ch-1 sp.
7th to 16th rows: Ch 1. Skip first st. 1 sc in each sc to next ch-1 sp. Ch 1. Skip next ch-1 sp. 1 sc in each sc to last 2 sc. Sc2tog. Turn. 20 sts and 1 ch-1 sp at end of 15th row.
17th row: Ch 7. 1 sc in 2nd ch from hook. 1 sc in each of next 5 ch. 1 sc in each of next 10 sts to next ch-1 sp. Ch 1. Skip next ch-1 sp. 1 sc in each of next 10 sts. Pull up a loop in top of last st one row below, 16th row. Yoh and pull through 1 loop on hook, ch made. Yoh and pull through 2 loops on hook first fsc made. 5 fsc. Turn. 32 sc, 6 added at both beg and end of row, and 1 ch-1 sp.
18th to 22nd rows: As 7th row. 22 sts and 1 ch-1 sp at end of last row.
23rd row: As 3rd row.
24th to 28th rows: As 7th row. 12 sts and 1 ch-1 sp at end of last row.
29th row: Ch 6. 1 sc in 2nd ch from hook. 1 sc in each of next 4 ch. 1 sc in each of next 6 sts to next ch-1 sp. Ch 1. Skip next ch-1 sp. 1 sc in each of next 6 sts. Pull up a loop in top of last st one row below, 28th row. Yoh and pull through 1 loop on hook, ch made. Yoh and pull through 2 loops on hook first fsc made. 4 fsc. Turn. 22 sts, 5 added at both beg and end of row, and 1 ch-1 sp.
30th to 34th rows: As 7th row. 12 sts and 1 ch-1 sp at end of last row.
35th row: As 3rd row.
36th to 38th rows: As 7th row. 6 sts and 1 ch-1 sp at end of last row.
39th row: Ch 1. Skip first sc. 1 sc in next sc. Ch 1. Skip next ch-1 sp. 1 sc in next sc. Sc2tog. Turn. 4 sc and 1 ch-1 sp.
40th row: Ch 1. Skip first sc. 1 sc in next sc. Ch 1. Skip next ch-1 sp. Sc2tog. Fasten off.
Finishing the Tree Base
Joining Motifs
Align 2 motifs, one on top of the other.
With larger hook, join MC with sl st to lower right corner of motif. Working through both thickness, work sc evenly around 2 side edges of tree motif, leaving bottom of tree motif open. Fasten off.
Rep for rem motifs to create a total of 3 double-layer tree motifs.
Assembly
Align 3 double-layer tree motifs, one on top of the other.
With a 76″ [193 cm] strand of MC and yarn needle, working through all layers, backstitch 3 pieces together using ch-1 sps as guide to stitch up the middle 6 tree pockets formed with openings along bottom edge of pillow.
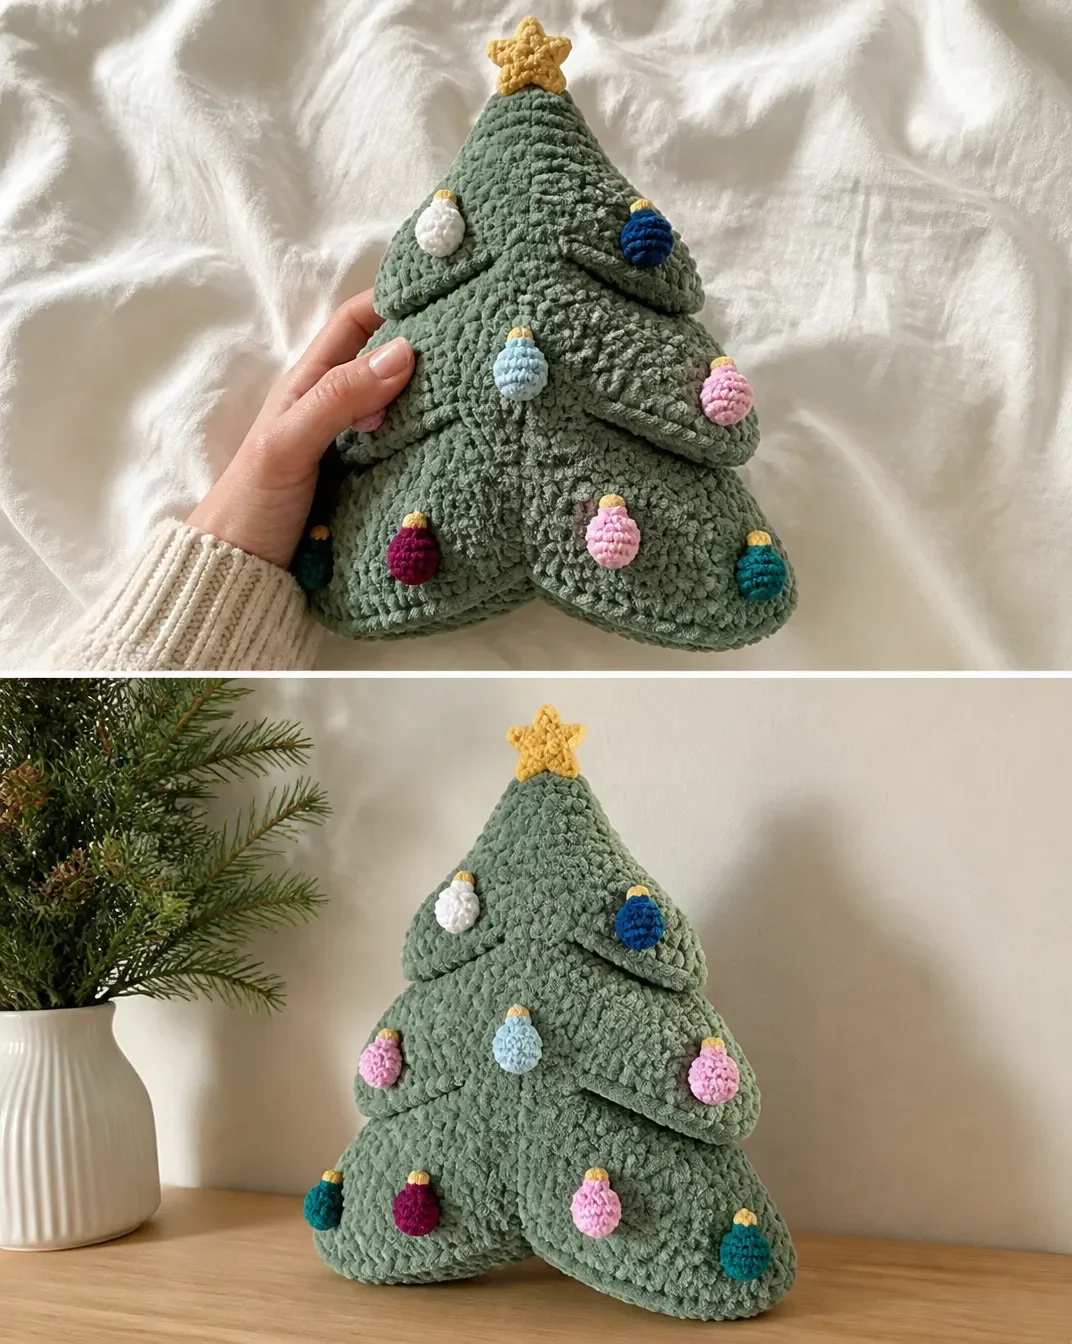
Stuff each pocket with stuffing until the desired look is achieved, as shown in the photo.
With larger hook, join MC with sl st to bottom corner of double-layer motif. Working through both thickness, work sc evenly across bottom of double-layer motif, to seam opening. Fasten off.
Rep for rem double-layer motifs until all bottom seams are closed.
Ornaments
Star Make 2 Alike
With A, ch 2.
1st rnd: 10 sc in 2nd ch from hook. Join. 10 sc.
2nd rnd: Ch 1. (1 sc. Ch 2. 1 sc) in same sp as sl st. 1 sc in next sc. [(1 sc. Ch 2. 1 sc) in next sc. 1 sc in next sc] 4 times. Join.
3rd rnd: Ch 1. 1 sc in same sp as sl st. (2 sc. Ch 2. 2 sc) in next ch-2 sp. [1 sc in each of next 3 sc. (2 sc. Ch 2. 2 sc) in next ch-2 sp] 4 times. 1 sc in each of last 2 sc. Fasten off.
With RS facing and A, working into back loops only, sew Stars together using Whipstitch, stuffing lightly as you work.
Lights Make 3 in Each Contrast B Color
Make 3 lights in each of Snowy White, Bleached Aqua, Every After Pink, Velveteal, Burgundy Plum, and Smokey Blue.
With A and smaller hook, ch 2, leaving a long tail.
1st rnd: 6 sc in 2nd ch from hook. Join. 6 sc.
2nd rnd: Ch 1. 2 sc in each sc around. Join. 12 sc.
3rd and 4th rnds: Ch 1. 1 sc in each sc around. Join.
5th rnd: Ch 1. (1 sc in next sc. Sc2tog) 4 times. Join. 8 sts.
6th rnd: Ch 1. 1 sc in each st around. Join.
Stuff lightly with a strand of the same yarn used.
7th rnd: Ch 1. (Sc2tog) 4 times. Join. 4 sts.
8th rnd: Ch 1. 1 sc in each st around. Join.
Fasten off, leaving a tail. Weave tail through top of rem 4 sts, pull tight, and fasten off to form the tip of the light.
Attaching the Lights and Star
With tail, sew lights to tips of tree branches.
With A, sew star to top of tree, as shown in the photo.
Ways to Display Your Finished Crochet
- Place the pillow on a living-room sofa with coordinating green, cream, or gold cushions.
- Use it as an accent on a holiday reading chair or entryway bench.
- Arrange it with wrapped gifts, a tabletop tree, and other soft seasonal decorations.
- Give it as a handmade Christmas gift for someone who enjoys cozy home décor.
- Display it on a guest-room bed during the holiday season.
- Pair it with other handmade seasonal pieces; a dimensional floral square such as this 3D flower granny square crochet pattern can inspire additional textured décor for a broader handmade display.
Caring for Your Crochet Project
- Dust the pillow gently with a soft brush or use a vacuum’s lowest suction with a clean upholstery attachment.
- Spot-clean small marks carefully rather than soaking the stuffed pillow.
- Avoid excessive heat, which can affect the plush and velvet textures.
- Keep the pillow away from sharp hooks, rough surfaces, and open flames that could catch the decorative lights or yarn.
- Store it in a clean, dry container or breathable fabric bag when not in use.
- Avoid compressing the stuffed pockets for long periods; reshape the tree layers gently after storage.
Helpful Crochet Tips
- Check gauge before making all six motifs. The larger hook is used with Bernat® Blanket™, while the smaller hook is used with Bernat® Velvet Minis™ for the lights.
- Count the chain-1 spaces carefully. They guide the shaping and later serve as alignment points during the backstitched center assembly.
- Mark the right side if needed. Consistent orientation helps all six tree motifs stack in the same direction.
- Keep the bottom openings clear. The pockets must remain open while the three double-layer motifs are stitched together and stuffed.
- Stuff lightly and evenly. Too much stuffing can distort the tree silhouette, while too little may leave the pockets flat.
- Work the star in back loops only during sewing. This preserves the stated construction method and helps the two star layers join neatly.
- Join every ornament round as instructed. The slip-stitch joins keep each small component organized and help maintain its shape.
- Leave the specified long tails. The tails are used for sewing the lights and closing the tops, so avoid trimming them too soon.
Creative Ways to Customize Your Project
These are optional styling ideas and do not change the approved pattern instructions:
- Use the supplied six-color light palette for a bright retro look, or arrange the colors in a repeated sequence when sewing them to the branches.
- Create a quieter holiday palette by selecting only the neutral and cool shades from the available Contrast B colors.
- Pair the Smoky Green tree with gold, ivory, or red accents elsewhere in the room.
- Display the pillow with a textured throw in a contrasting stitch pattern to emphasize the tree’s raised pockets.
- If substituting yarn, choose a comparable plush yarn only after considering how its thickness, stretch, and texture may affect gauge, stitch definition, stuffing, and final dimensions.
- If changing hook size, recheck gauge and expect the tree motifs, pockets, and ornament sizes to change.
For additional handmade décor inspiration, a soft seasonal wrap can also complement a winter display; this crochet bouquet wrap pattern offers ideas for combining texture and coordinated color in giftable projects.
Frequently Asked Questions
Is this crochet Christmas tree pillow suitable for beginners?
It is best for a crocheter who is comfortable with single crochet, increases, decreases, chain spaces, slip-stitch joins, seaming, and stuffing. The shaping is clearly divided into rows, but the complete project involves several assembly stages.
How many tree motifs are required?
The tree base requires 6 tree motifs. These are paired into 3 double-layer tree motifs, which are then assembled to form 6 stuffed tree pockets.
Which hook is used for each part?
Use the larger U.S. H/8 (5 mm) or U.S. K/10½ (6.5 mm) hook as needed with Bernat® Blanket™ for the tree motifs and finishing. Use the smaller hook with Bernat® Velvet Minis™ for the lights, following the supplied gauge.
How many decorative lights does the pattern make?
Make 3 lights in each of six Contrast B colors: Snowy White, Bleached Aqua, Every After Pink, Velveteal, Burgundy Plum, and Smokey Blue. This creates 18 lights total.
Can the ornament colors be changed?
Yes. The colors can be rearranged or replaced with other shades, provided the yarn has suitable characteristics. Changing yarn weight or texture may affect gauge, appearance, and the amount of yarn required.
How should the tree pockets be stuffed?
Stuff each pocket until the desired look is achieved, as shown in the photo. Use a light, even amount so the tree remains dimensional without becoming distorted.
How are the tree layers joined?
First, join two motifs through both thicknesses along their two side edges, leaving the bottom open. Then backstitch three double-layer motifs together through all layers, using the chain-1 spaces as a guide. Close the bottom seams after stuffing.
How should the finished pillow be cleaned?
Use gentle dusting and careful spot cleaning. Avoid soaking, excessive heat, and rough handling so the stuffed structure and plush yarn surfaces retain their shape.
Conclusion
This modern crochet Christmas tree pillow combines plush texture, dimensional construction, and colorful handmade ornaments in one inviting holiday accent. Follow the stitch counts and assembly sequence carefully, then enjoy displaying or gifting the finished design. For more seasonal pillow inspiration, browse these free crochet Christmas pillow patterns.