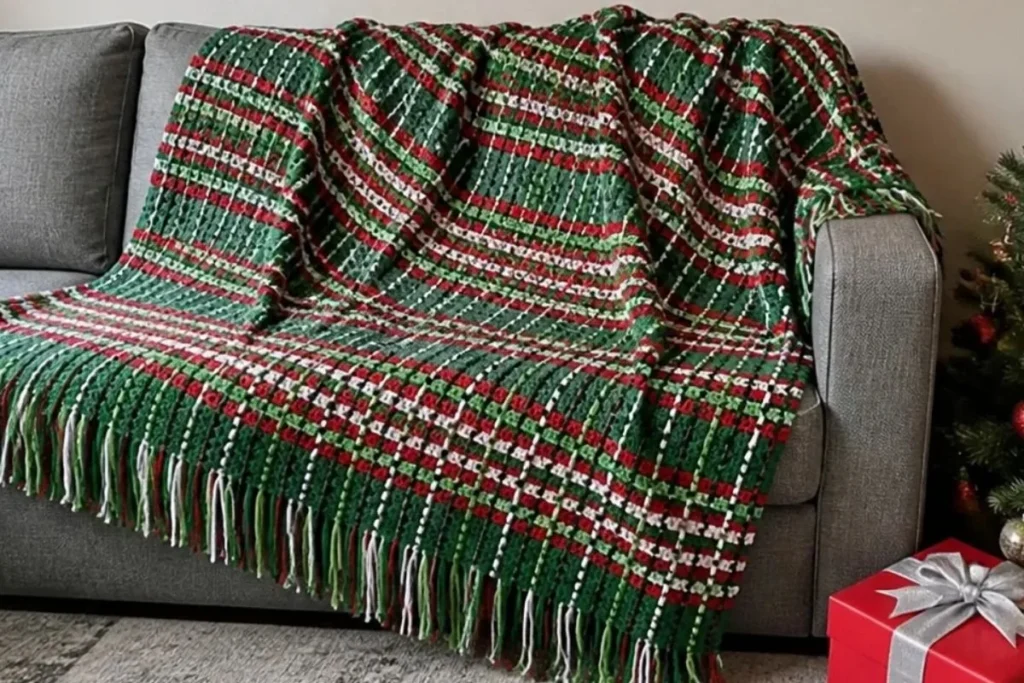
This Easy Christmas Plaid Crochet Blanket Pattern creates a festive woven-look throw with horizontal mesh stripes and contrasting vertical chains. Paddy Green, Cherry Red, Soft White, Black, and Spring Green form a classic holiday plaid that suits cozy winter decorating, thoughtful handmade gifts, and seasonal family traditions. Crocheters who enjoy repetitive rows and color planning will appreciate the construction, while the woven chains add an eye-catching finish without complicated shaping. For another colorful crochet project to explore alongside this blanket, see this 3D flower granny square pattern.
Why You’ll Love This Crochet Project
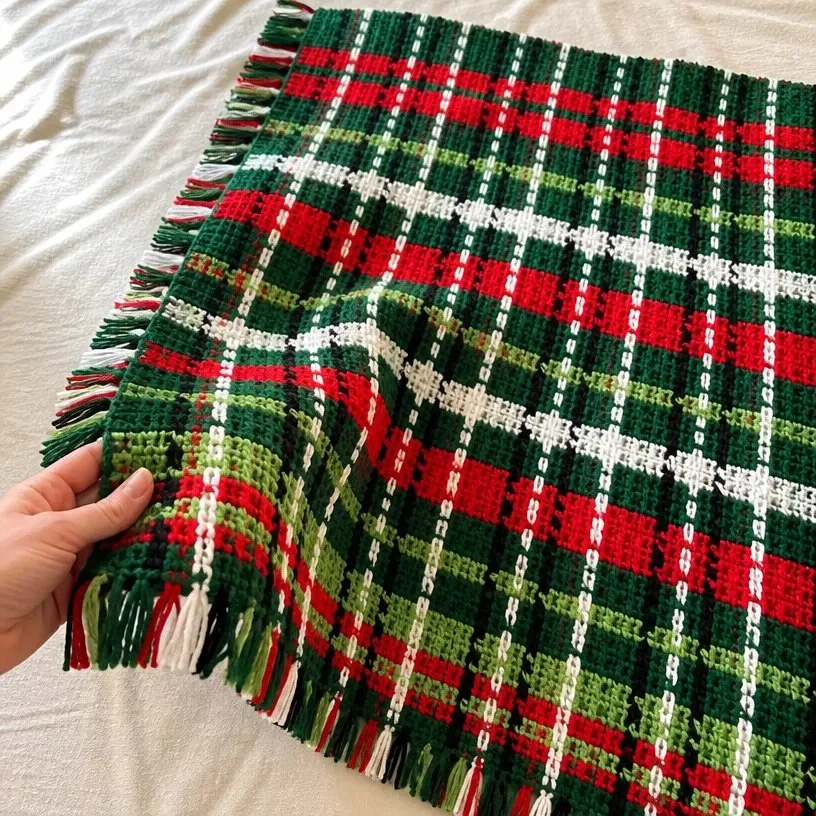
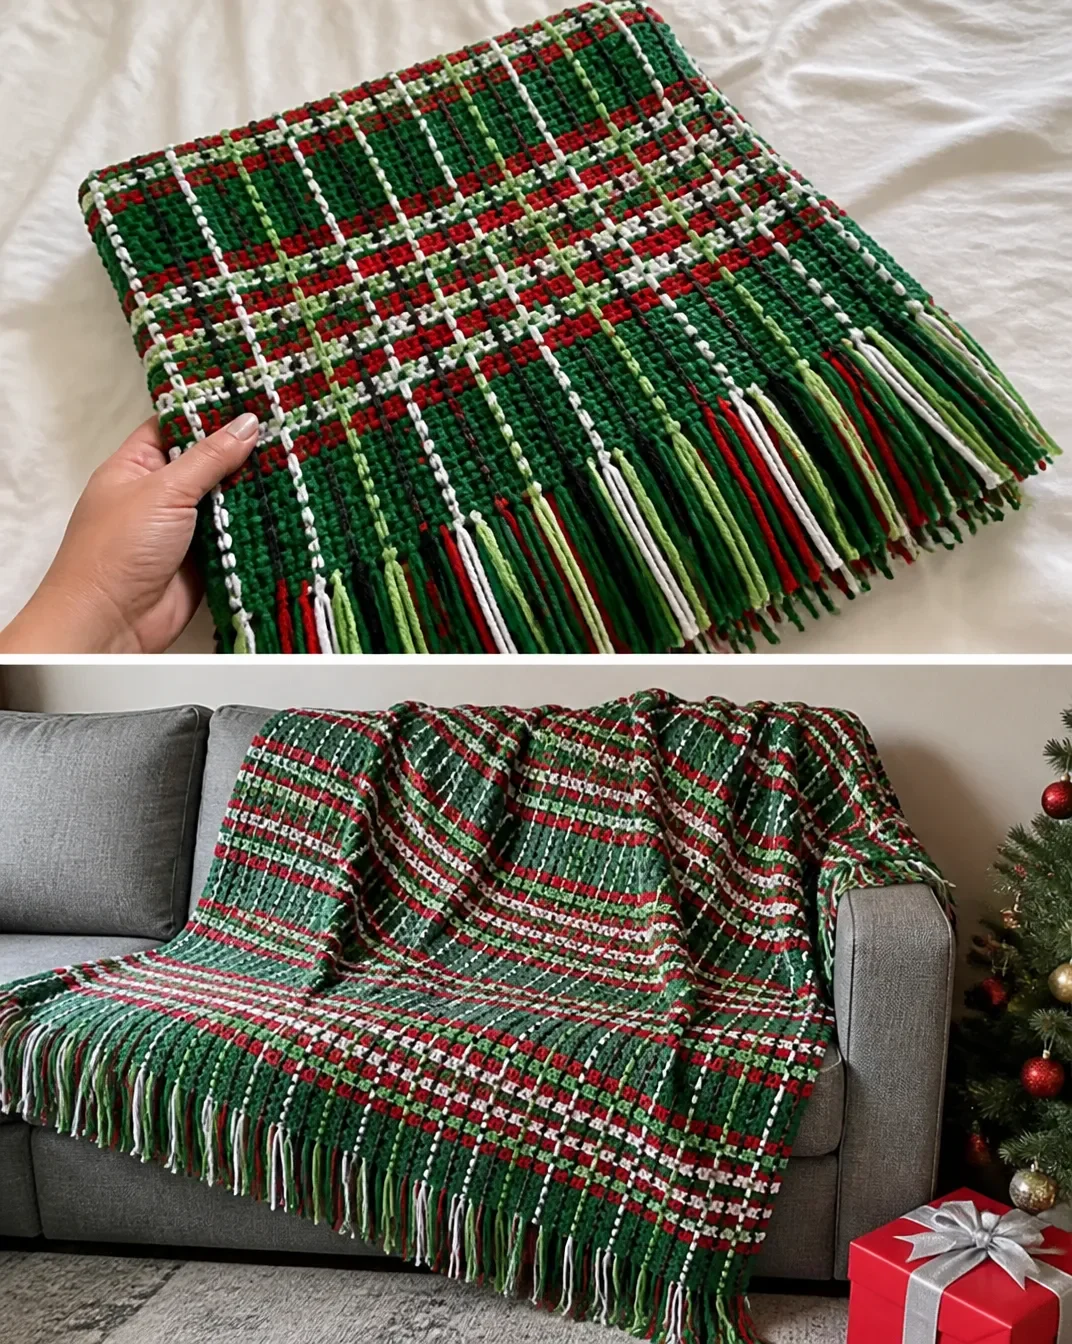
- The plaid effect is built from simple techniques. The base uses double crochet and chain-1 spaces, while the vertical chains create the woven appearance.
- The color sequence does the decorative work. Multiple green shades, red, white, and black create a recognizable Christmas palette without requiring intricate motifs.
- It offers useful stitch practice. You’ll work foundation chains, mesh rows, color changes, long chains, weaving, fringe, and simple single-crochet edging.
- It makes a meaningful handmade gift. A finished blanket can be given for Christmas, a winter birthday, a housewarming, or a cozy seasonal care package.
- The fringe completes the rustic look. Matching the fringe to the vertical chain colors helps unify the plaid design.
My Crochet Flower Tip: Keep each color skein organized before beginning the stripe sequence. Since the blanket uses several closely related color sections, a written row checklist can prevent missed color changes. You may also find Crochet Bloomin Shoe Appliques Pattern useful.
Before You Start Crocheting
The blanket is made in three main stages. First, you crochet a wide mesh base in horizontal stripes. Next, you make long chains and weave them vertically through the mesh spaces, alternating over and under the chain stitches. Finally, you add fringe to the top and bottom edges, work single-crochet edging along the two side edges, and weave in the loose ends.
The base begins with 173 chains and measures 171 stitches, including chain stitches, across Row 1. It contains 85 chain-1 spaces. The pattern then repeats Row 2 for 111 more rows while following the specified color sequence.
The vertical section begins with one chain in Black and one in Soft White. You then create 83 additional chains and weave them from right to left according to the provided color list. Work these chains without stretching them so they match the blanket’s length.
Abbreviations
- ch: chain
- dc: double crochet
- sc: single crochet
- sl st: slip stitch
- st/sts: stitch/stitches
Materials and Tools
Yarn
- RED HEART® Super Saver®: 6 skeins, 368 Paddy Green, color A
- RED HEART® Super Saver®: 4 skeins, 319 Cherry Red, color B
- RED HEART® Super Saver®: 3 skeins, 316 Soft White, color C
- RED HEART® Super Saver®: 3 skeins, 312 Black, color D
- RED HEART® Super Saver®: 3 skeins, 672 Spring Green, color E
Tools
- Susan Bates® crochet hook: 6 mm [US J-10]
- Yarn needle
The yarn color labels A through E are used throughout the instructions, so keep the color key nearby while crocheting. The yarn needle is needed for securing the vertical chains, attaching fringe, and weaving in loose ends.
Step-by-Step Crochet Instructions
Base: Mesh and Horizontal Stripes
With A, ch 173.
Row 1 (right side): Dc in 5th ch from hook; skipped stitches count as 1 dc and 1 ch.
Ch 1, skip next ch, dc in next ch; repeat from * to end, turn.
There are 171 sts including ch sts and 85 ch-1 spaces.
Row 2: Ch 4; this counts as 1 dc and 1 ch.
Dc in next dc, ch 1; repeat from * to end, turn.
Repeat Row 2 111 more times in the following color sequence:
- 3 more rows with A
- 1 row with C
- 2 rows with B
- 1 row with D
- 2 rows with B
- 1 row with C
- 5 rows with A
- 1 row with D
- 2 rows with E
- 1 row with C
- 2 rows with E
- 1 row with D
- 5 rows with A
- 1 row with C
- 2 rows with B
- 1 row with D
- 2 rows with B
- 1 row with C
- 5 rows with A
Repeat from * twice more.
Fasten off.
The chain-4 at the beginning of each Row 2 counts as one double crochet and one chain. Maintain that same structure throughout the mesh so the columns remain aligned for the later weaving step.
Vertical Chains
With D, create a chain that measures the length of the blanket without being stretched.
Weave this chain through the rightmost column of spaces, working over and under the ch sts of the Blanket.
Secure chain to Blanket at top and bottom using yarn tails.
With C, create another chain the same way, and weave it through the next column of spaces, alternating the overs and unders for a woven effect.
Create 83 more chains and weave them through in the same manner, working your way from right to left on the Blanket, using the following colors:
- 1 chain with A
- 1 chain with E
- 2 chains with C
- 1 chain with A
- 2 chains with C
- 1 chain with E
- 1 chain with A
- 1 chain with C
- 1 chain with D
- [1 chain with C
- 1 chain with A
- 1 chain with E
- 2 chains with B
- 1 chain with C
- 2 chains with B
- 1 chain with E]**
- Repeat from * to ** twice
- 1 chain with C
- 1 chain with A
- 1 chain with E
- 2 chains with C
- 1 chain with A
- 2 chains with C
- 1 chain with E
- 1 chain with A
- 1 chain with C
- 1 chain with D
When weaving, alternate the direction of the chain over and under the horizontal chain stitches. Avoid pulling the chains tightly; they should lie across the mesh naturally and preserve the blanket’s shape.
Fringe
Attach a fringe at each ch-1 space at the top and bottom of the Blanket as follows:
- With the color of the corresponding vertical chain, cut 3 strands of yarn, 8″ (20.5 cm) each.
- Fold the strands at the center.
- Use the hook to pull the center of the strands through the edge space.
- Pull the ends of the strands through the resulting loop and pull tight.
Repeat at each ch-1 space along both edges. Matching each fringe bundle to its corresponding vertical chain reinforces the plaid color arrangement.
Edging
With right side facing:
- Join A with slip st at bottom right corner.
- Ch 1, and work 1 row evenly in sc up right side edge.
- Fasten off.
With right side facing:
- Join A with slip st at top left corner.
- Ch 1, and work 1 row evenly in sc down left side edge.
- Fasten off.
Weave in all loose ends, working ends of vertical chains into fringe.
Ways to Display Your Finished Crochet
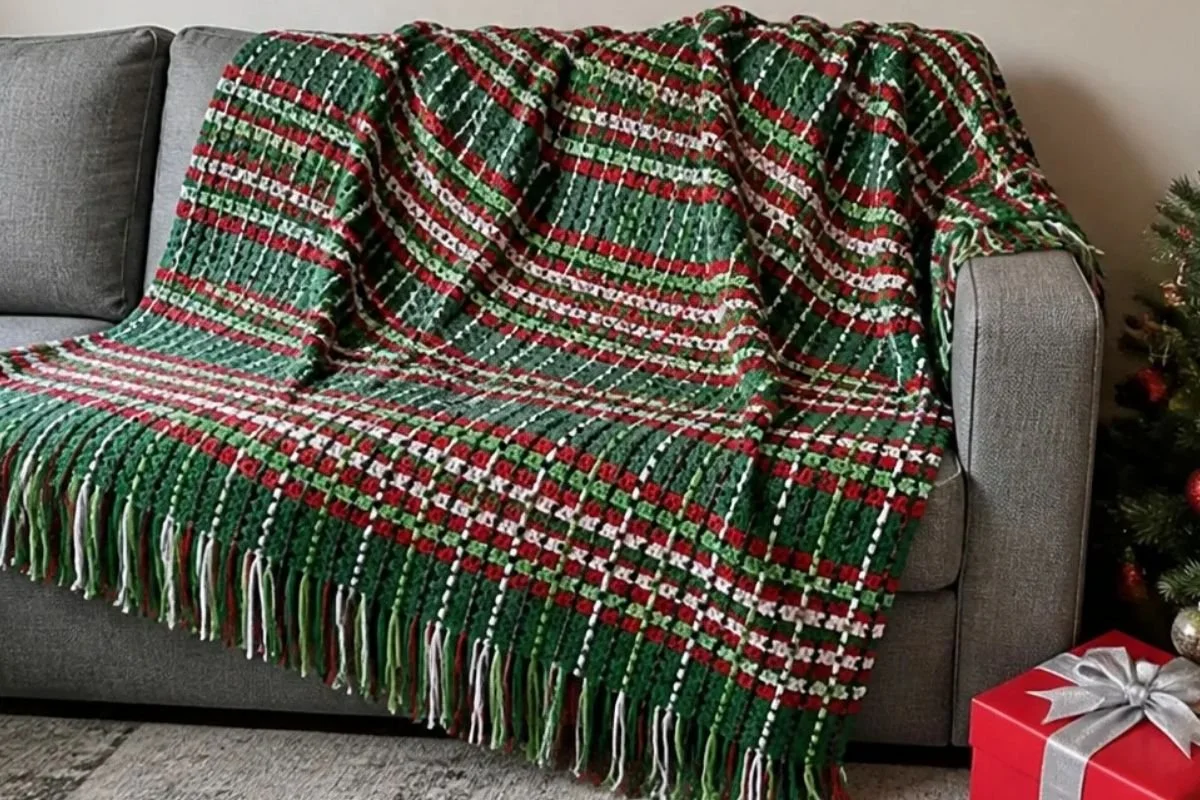
- Layer it over a sofa or reading chair. The plaid design works especially well as a visible winter accent rather than being folded away.
- Use it as a Christmas morning throw. Place it near a tree, fireplace, or gift-opening area for both decoration and warmth.
- Give it as a handmade holiday gift. Fold the blanket with a simple ribbon or pair it with a book, mug, or other cozy seasonal item.
- Style it at the foot of a bed. The horizontal stripes can add a strong seasonal color band without covering the entire bed.
- Create a coordinated holiday display. Pair it with green, red, white, or natural wood accessories for a traditional Christmas arrangement.
- Use it as a photography prop. The bold plaid texture and fringe can create a warm backdrop for seasonal family or product photographs.
For a smaller seasonal crochet decoration that complements the blanket’s holiday colors, consider this crochet flower wreath pattern as a separate project.
Caring for Your Crochet Project
Handle the finished blanket gently, especially around the woven vertical chains and fringe. Shake it lightly to remove loose dust, then smooth the chains and fringe back into place if they shift.
For small marks, use careful spot cleaning rather than aggressively rubbing the mesh. Follow the yarn manufacturer’s care instructions for the RED HEART® Super Saver® yarn used in the project. Avoid excessive heat, which can affect the drape and finished appearance.
Store the blanket clean and completely dry. Fold it loosely or roll it rather than compressing the fringe for long periods. Keep it away from rough surfaces that could catch the vertical chains or pull individual fringe strands.
Tips for Better Results
- Count the foundation chain carefully. The starting chain is ch 173, and the first row should finish with 171 sts including ch sts and 85 ch-1 spaces.
- Mark the right side. A removable stitch marker or small scrap of yarn can help you identify the right side during the long stripe sequence.
- Write down each completed color row. The repeated sequence contains several one- and two-row color changes, so checking off each row is safer than relying on memory.
- Keep the mesh relaxed. Consistent tension helps the vertical chains pass smoothly through the spaces without stretching the blanket.
- Measure each vertical chain without stretching it. The chain should match the blanket’s length naturally, not pull the top and bottom edges inward.
- Alternate over and under carefully. The woven effect depends on alternating the chain’s path through the horizontal mesh.
- Secure chain ends before trimming. Use the yarn tails to secure each vertical chain at the top and bottom before moving to the next column.
- Make the fringe strands evenly. Cut all three strands for each bundle to 8″ (20.5 cm) so the finished edge looks consistent.
- Work the side edging evenly. The instructions call for one row of single crochet up the right side and down the left side, so avoid adding extra shaping.
- Weave chain ends into the fringe. This keeps the finishing cleaner and helps prevent loose ends from showing along the top and bottom edges.
Creative Ways to Customize Your Project
The approved pattern uses a traditional Christmas palette, but the construction can be adapted as an optional color experiment.
- Try a neutral winter palette. Substitute coordinated white, gray, charcoal, and evergreen shades while keeping the same color positions.
- Use a bright modern palette. Red, turquoise, white, and lime can create a playful holiday variation.
- Create a farmhouse look. Natural cream, deep green, muted red, and black can soften the contrast while preserving the plaid character.
- Make a nonseasonal version. Choose colors that coordinate with your room for a year-round throw.
- Change the fringe arrangement. Keep the same fringe length but use one consistent color for a simpler border effect.
- Test yarn substitutions carefully. A different yarn or hook size may change the blanket’s dimensions, texture, drape, and yarn requirements. Make any substitution consistently throughout the project and expect the final result to differ from the approved version.
These are optional styling ideas only; follow the supplied color sequence for the stated pattern.
Frequently Asked Questions
Is this Christmas plaid crochet blanket beginner-friendly?
The pattern uses basic stitches, but its large size, extended color sequence, vertical weaving, and fringe require careful organization. A crocheter familiar with double crochet, chain spaces, and fastening off should be able to work through it with patience.
What hook size does the pattern use?
Use a Susan Bates® crochet hook in 6 mm [US J-10].
How many foundation chains are needed?
Begin with ch 173. After working Row 1, the pattern specifies 171 sts including chain stitches and 85 ch-1 spaces.
How many base rows are crocheted?
After Row 1, repeat Row 2 111 more times while following the listed color sequence. Fasten off after completing the sequence.
How are the vertical chains attached?
Create each chain to the length of the blanket without stretching it. Weave it through a column of spaces over and under the chain stitches, then secure it at the top and bottom using the yarn tails.
Which colors are used for the vertical chains?
The first vertical chain uses D, the next uses C, and the 83 additional chains follow the supplied color list. Work from right to left across the blanket.
Can the colors be changed?
Yes, color changes are an optional variation. Changing colors may alter the visual balance of the plaid, so keep a written color plan and use colors with similar yarn characteristics.
How is the fringe made?
At each ch-1 space along the top and bottom, cut 3 strands of the corresponding vertical-chain color, each 8″ (20.5 cm) long. Fold them at the center, pull the center through the edge space, then pull the ends through the loop and tighten.
Does the blanket have edging on every side?
The supplied finishing instructions add one row of single crochet up the right side and one row down the left side. The top and bottom edges receive fringe.
How should the finished blanket be stored?
Store it clean and dry, folded loosely or rolled. Protect the vertical chains and fringe from snagging, rough surfaces, and excessive compression.
Conclusion
This Easy Christmas Plaid Crochet Blanket Pattern combines straightforward mesh rows with colorful woven chains for a classic seasonal finish. Careful color tracking, relaxed tension, and neat fringe work will help the plaid design stand out. Make the pattern in its original festive palette or adapt the colors for your home, then enjoy displaying or gifting the finished blanket alongside a free Red Heart plaid Christmas crochet blanket pattern for more seasonal inspiration.