The Holly and Lace Doily Crochet Pattern creates an elegant, round centerpiece with open lacework, pointed edging, green paired leaves, and red holly berries. Made with fine crochet thread, this project is ideal for holiday tables, handmade gifts, and heirloom-inspired home décor. The detailed rounds offer practice with shells, clusters, chain spaces, and delicate shaping. If you enjoy floral-inspired accessories too, you may also like this crochet flower necklace pattern.
Why You’ll Love This Crochet Project
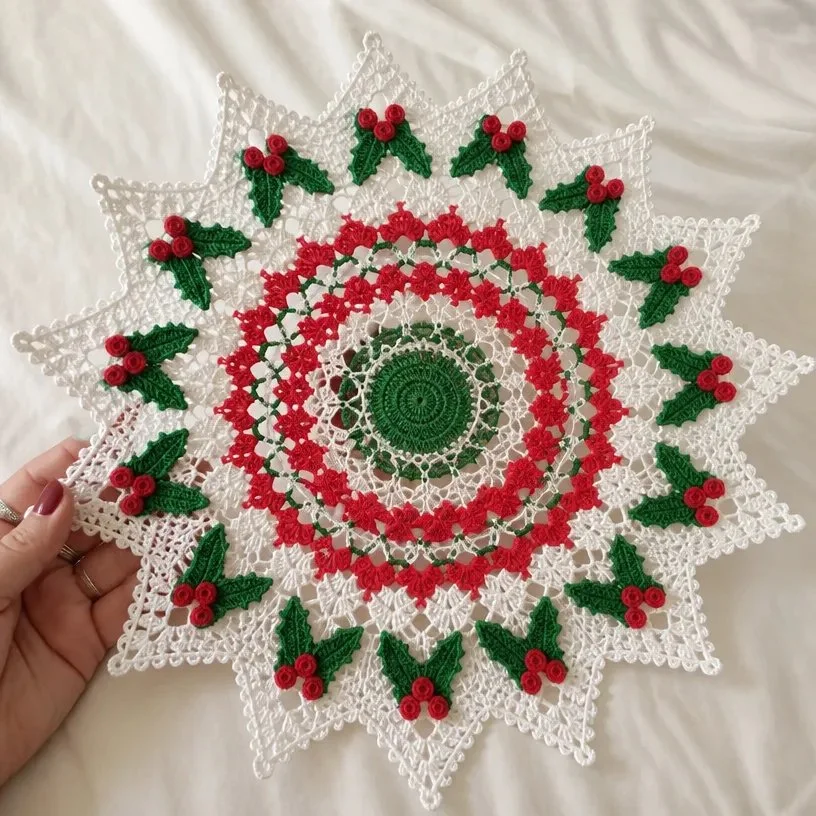
- Festive botanical design: Myrtle green leaves and victory red berries give the lace doily a classic holly-inspired appearance.
- Detailed stitch practice: The pattern introduces shells, clusters, tall stitches, chain spaces, and worked-back-loop leaf shaping.
- Decorative versatility: Use the finished piece as a holiday table accent, under a centerpiece, or as part of a seasonal display.
- Handmade gift potential: A carefully blocked thread doily makes a thoughtful gift for someone who appreciates traditional crochet.
- Structured construction: The doily is worked in rounds, followed by twelve points, twelve leaf sets, and twelve berries.
My Crochet Flower Tip: Block the doily before attaching the leaves so the points and lace sections are evenly arranged when the embellishments are sewn in place.
Before You Start Crocheting
This design is made in several stages. First, crochet the circular doily through Round 24 in Myrtle Green and White or shaded Christmas thread. Next, work twelve pointed sections, then make twelve paired leaf sets and twelve red berries. Finally, block the doily and sew the botanical elements between its points.
The pattern uses US crochet terminology. Useful abbreviations include:
- ch: chain
- sc: single crochet
- hdc: half double crochet
- dc: double crochet
- tr: treble crochet
- dtr: double treble crochet
- trtr: triple treble crochet
- sl st: slip stitch
A cluster groups partially completed stitches together and finishes them as one stitch. Work carefully into the stated spaces, because the open lace structure depends on accurate chain-space placement.
Materials You’ll Need
- AUNT LYDIA’S® Classic Crochet Thread, Size 10
- Color A: 1 ball White 001 or 453 Shaded Christmas A
- Color B: 1 ball 484 Myrtle Green B
- Color C: 1 ball 494 Victory Red C
- Steel crochet hook: 1.5 mm [US 7]
Complete Crochet Instructions
Doily
Work in rounds. With B, ch 6; join with a slip st to form a ring.
Round 1
Ch 1, 12 sc in ring; join with a slip st to first sc – 12 sc.
Round 2
Ch 1, 2 sc in each sc around; join with slip st to first sc – 24 sc.
Round 3
Ch 1, 2 sc in joining slip st, sc in next 2 sc, [2 sc in next sc, sc in next 2 sc] 7 times; join with slip st to first sc – 32 sc.
Round 4
Ch 1, 2 sc in joining slip st, sc in next 3 sc, [2 sc in next sc, sc in next 3 sc] 7 times; join with slip st to first sc – 40 sc.
Round 5
Ch 3, tr in joining slip st, ch 3, (tr, dc) all in next sc, * skip next sc, sc in next sc, skip next sc **, (dc, tr) all in next sc, ch 3, (tr, dc) all in next sc; repeat from * around, ending at **; join with slip st to top of ch-3 – 8 shells.
Round 6
Slip st in next tr, ch 1, * sc in next ch-3 space, ch 8; repeat from * around; join with slip st to first sc.
Round 7
Slip st in next 3 chs, ch 7, [dtr in next ch, ch 2] twice, * dtr in next ch, ch 5, skip next 2 ch, skip next sc, skip next 2 ch **, [dtr in next ch, ch 2] 3 times; repeat from * around, ending at **; join with slip st to 5th ch of ch-7.
Round 8
Ch 1, sc in joining slip st, * [2 sc in ch-2 space, sc in dtr] 3 times; 5 sc in ch-5 space **; sc in next dtr; repeat from * around, ending at **; join with slip st to first sc – 120 sc.
Rounds 9 and 10
Ch 1, sc in each sc around; join with slip st to first sc.
Round 11
Repeat Round 5 – 24 shells. Fasten off.
Round 12
With right side facing, join A to first ch-3 space, ch 3; work 2-dc cluster in joining ch-3 space; * ch 8, sc in next ch-3 space, ch 8 **; 3-dc cluster in next ch-3 space; repeat from * around, ending at **; join with a slip st to top of 2-dc cluster – 12 clusters.
Round 13
Ch 2, 2-dc cluster in slip st; * ch 3, (sc, ch 5, sc) all in next ch-8 space; ch 5, (sc, ch 5, sc) all in next ch-8 space; ch 3 **, 3-dc cluster in top of next 3-dc cluster; repeat from * around, ending at **; join with a slip st to top of 2-dc cluster.
Round 14
Ch 2, 2-dc cluster in slip st; * ch 5, skip ch-3 space, [sc in next ch-5 space, ch 5] 3 times **; 3-dc cluster in top on next 3-dc cluster; repeat from * around, ending at **; join with a slip st to top of 2-dc cluster.
Round 15
Ch 2, 2-dc cluster in slip st; * ch 3, sc in next ch-5 space, [ch 5, sc in next ch-5 space] 3 times; ch 3 **, 3-dc cluster in top of next 3-dc cluster; repeat from * around, ending at **; join with a slip st to top of 2-dc cluster.
Round 16
Repeat Round 14.
Round 17
Repeat Round 15, working ch 6 instead of ch 5.
Round 18
Repeat Round 14, working ch 6 instead of ch 5.
Round 19
Ch 2, 2-dc cluster in slip st; ch 4, sc in next ch-6 space, [ch 7, sc in next ch-6 space] 3 times; ch 4 **, 3-dc cluster in top of next 3-dc cluster; repeat from * around, ending at **; join with a slip st to top of 2-dc cluster.
Round 20
Ch 2, 2-dc cluster in slip st; * ch 7, skip ch-4 space, [sc in ch-7 space, ch 7] 3 times **; 3-dc cluster in top of next 3-dc cluster; repeat from * around, ending at **; join with a slip st to top of 2-dc cluster.
Round 21
Ch 2, 2-dc cluster in slip st; * ch 4, sc in next ch-7 space, [ch 8, sc in next ch-7 space] 3 times; ch 4 **, 3-dc cluster in top of next 3-dc cluster; repeat from * around, ending at **; join with a slip st to top of 2-dc cluster.
Round 22
Ch 2, 2-dc cluster in slip st; * ch 7, skip ch-4 space, sc in ch-8 space; [(dtr, trtr, ch 3, trtr, dtr) all in next sc, sc in next ch-8 space] twice; ch 7 **, 3-dc cluster in top of next 3-dc cluster; repeat from * around, ending at **; join with a slip st to top of 2-dc cluster.
Round 23
Ch 2, 2-dc cluster in slip st; * ch 4, sc in ch-7 space, [ch 7, sc in next ch-3 space] twice; ch 7, sc in next ch-7 space, ch 4 **; 3-dc cluster in top of next 3-dc cluster; repeat from * around, ending at **; join with a slip st to top of 2-dc cluster.
Round 24
Ch 2, 2-dc cluster in slip st; * ch 6, skip ch-4 space, sc in ch-7 space, [ch 6, sc in next ch-7 space] twice; ch 6 **, (2-dc cluster, ch 3, sl st, ch 3, 2-dc cluster) all in top of next 3-dc cluster; repeat from * around, ending at **; 3-dc cluster in same st first 2-dc cluster made; do not join; mark right side of work; turn – 24 clusters.
Points
Work after Round 24.
With right side facing, skip next cluster on Round 24, join A to next cluster; turn. Work Rows 1–6 for point. Repeat until all 12 points are completed. Weave in ends. Block doily before sewing on leaves.
Row 1 Wrong Side
Ch 3, 2-dc cluster in top of next cluster; ch 3, sc in next ch-6 space, ch 4, sc in next ch-6 space, ch 6, sc in next ch-6 space, ch 4, sc in next ch-6 space, ch 3; 3-dc cluster in top of next cluster; turn.
Row 2
Ch 3, 2-dc cluster in top of next cluster; ch 4, skip next ch-3 space, [sc in next ch-4 space, ch 4] 3 times; skip next ch-3 space; 3-dc cluster in top of next cluster; turn.
Row 3
Ch 3, 2-dc cluster in top of next cluster; ch 3, sc in next ch-4 space, [ch 4, sc in next ch-4 space] 3 times; ch 3, 3-dc cluster in top of next cluster; turn.
Row 4
Ch 3, 2-dc cluster in top of next cluster; ch 3, skip next ch-3 space, [sc in next ch-4 space, ch 3] 3 times; skip next ch-3 space, 3-dc cluster in top of next cluster; turn.
Row 5
Ch 3, 2-dc cluster in top of next cluster; ch 3, skip next ch-3 space, [sc in next ch-3 space, ch 3] twice; skip next ch-3 space, 3-dc cluster in top of next cluster; turn.
Row 6
Ch 3, 2-dc cluster in top of next cluster; 3-dc cluster in top of next cluster. Fasten off.
Leaves
Make 12 sets.
First Leaf
With B, ch 12.
Row 1 Right Side: Sc in 2nd ch from hook – tip made; sc in next 9 ch, (sc, ch 3, sc) all in last ch; working along opposite side of chain, sc in next 8 ch; turn.
Row 2: Ch 3, sc in next 9 sc, (sc, ch 3, sc) all in ch-3 space, sc in next 8 sc; turn.
Rows 3–12: Working in back loops only, repeat Row 2. At end of Row 12, slip st in last sc. Fasten off.
Second Leaf
Rows 1–11: Work same as for First Leaf.
Row 12 Joining Row: With right sides of each leaf facing and working through both thicknesses, ch 3; slip st in next 9 sts and next ch-3 space; working on 2nd Leaf only, sc in back loop of next 8 sc; slip st in last sc worked. Fasten off.
Berries
Make 12.
With C, ch 12; join with a slip st to form a ring.
Round 1
[Slip st into next ch, ch 3; work 5-tr cluster into same ch; ch 3, slip st in same ch, skip next ch] 6 times; turn; keeping right side facing, work 5-tr cluster in same ch as last cluster. Fasten off.
Finishing
Sew tip of last cluster to 6th ch of ring.
Sew berries to leaves.
Sew leaves between points of doily with the joining of the 2 leaves just touching the 2 clusters of Round 24.
Weave in ends.
Ways to Display Your Finished Crochet
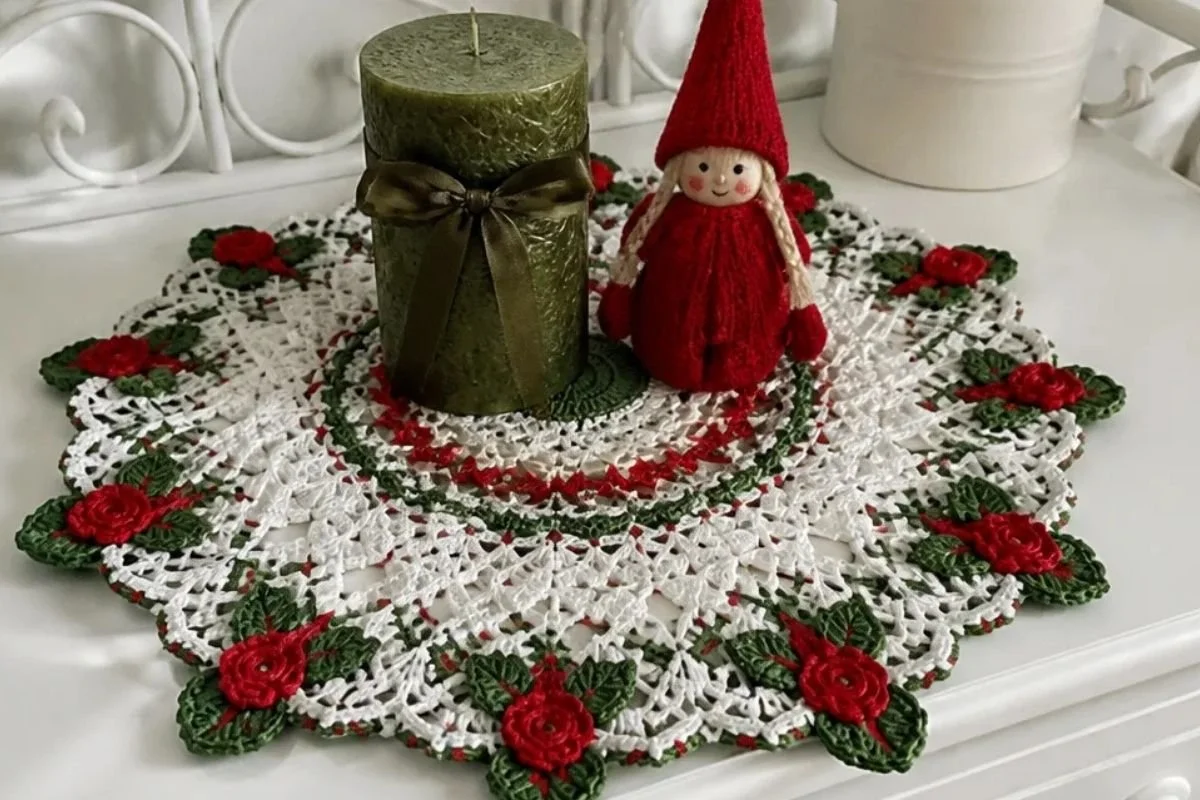
- Place the blocked doily beneath a holiday centerpiece, candle arrangement, or small serving display.
- Use it as a decorative accent on an entryway table or sideboard during the winter season.
- Give it as a handmade gift with a simple care card explaining that the threadwork should be handled gently.
- Layer it over a solid-colored table runner so the lace spaces and pointed edge stand out.
- Pair it with other botanical crochet pieces; a crochet rose garland can add a softer floral contrast to the holly-inspired design.
Caring for Your Crochet Project
Fine crochet thread and open lacework benefit from gentle handling. Dust the doily with a soft, clean brush or use low, indirect air rather than pulling at the stitches.
For a small mark, spot-clean cautiously with a barely damp cloth and allow the piece to dry completely while lying flat. Avoid soaking unless the yarn manufacturer’s care instructions specifically support it. Do not wring, twist, or stretch the doily while wet.
Store the finished piece flat or loosely rolled in a clean, dry place. Keep it away from direct sunlight, excessive heat, moisture, and anything that could snag the berries, leaf edges, or lace points.
Tips for Better Results
- Keep tension even. Fine thread shows tension changes clearly, especially in the chain spaces and pointed edging.
- Mark the right side. Round 24 specifically instructs you to mark the right side before turning, which helps orient the point sections correctly.
- Count the major landmarks. Check for 8 shells in Round 5, 120 sc in Round 8, 24 shells in Round 11, and 24 clusters in Round 24.
- Work into spaces carefully. Many later rounds are built into ch-5, ch-6, ch-7, and ch-8 spaces, so avoid accidentally working into a nearby stitch.
- Respect the back loops. Rows 3–12 of the first leaf are worked in back loops only, and the second leaf’s joining row also specifies the back loop.
- Block before sewing. Blocking first makes it easier to position the twelve leaves evenly between the doily points.
- Secure the components neatly. When sewing the berries to leaves and leaves to the doily, use matching thread and hide the ends within the back of the work.
- Take care with tall stitches. The dtr and trtr stitches in Round 22 are much taller than sc and dc, so maintain a relaxed but consistent loop height.
Creative Ways to Customize Your Project
The approved pattern uses white or shaded Christmas thread, Myrtle Green, and Victory Red for a traditional holly palette. Optional color changes can create different seasonal effects without changing the stitch instructions.
- Use White 001 with green and red for a bright winter centerpiece.
- Use Shaded Christmas A as the main thread for a more variegated appearance.
- Try a green-and-white arrangement for a snowy botanical look while keeping the red berries for contrast.
- Display the finished doily on a deep red, forest green, or cream cloth to emphasize the lace openings.
- Pair it with a small glass, ceramic, or wooden centerpiece that does not cover the points.
- For coordinated crochet accessories, a puffy flower crochet hairband and hair clips set can complement a handmade floral gift theme.
Changing thread weight or hook size is optional, but it may alter the finished proportions, lace definition, yarn requirements, and size of every component. Keep the approved yarn and 1.5 mm hook when you want the pattern’s intended structure.
Frequently Asked Questions
Is this pattern suitable for a beginner?
It is best approached by a crocheter who is comfortable with joined rounds, chain spaces, clusters, and taller stitches. Beginners can work through it slowly, but the later rounds require careful stitch placement.
What yarn does the pattern recommend?
The pattern calls for AUNT LYDIA’S® Classic Crochet Thread, Size 10: one ball of Color A, one ball of Color B, and one ball of Color C in the specified shades and codes.
Which hook size should I use?
Use a 1.5 mm steel crochet hook, listed as US 7.
How many leaf sets and berries are made?
Make 12 leaf sets and 12 berries. Each leaf set consists of a first leaf and a second leaf joined together.
Can I change the colors?
Yes. Color changes are optional, but keep the same thread type when possible. Changing yarn weight or hook size may affect the shape, dimensions, texture, and yarn requirements.
When should I block the doily?
Block the doily after weaving in the ends and completing the points, but before sewing on the leaves. This helps establish the final lace shape.
How are the leaves attached?
Sew the leaves between the points of the doily, with the joining of the two leaves just touching the two clusters of Round 24.
How should I care for the finished piece?
Handle it gently, dust it carefully, spot-clean only when appropriate for the thread, and store it flat or loosely rolled in a dry place. Protect the open lace and attached berries from snags.
Conclusion
This Holly and Lace Doily Crochet Pattern combines delicate thread lace with pointed edging, paired green leaves, and red berries for a classic handmade decoration. Follow the rounds carefully, block the doily before assembly, and use gentle finishing techniques to preserve its shape. For a printable version of the pattern, see the Aunt Lydia’s Holly & Lace Doily pattern.